Certificate Setup Guide
Create an Application ID
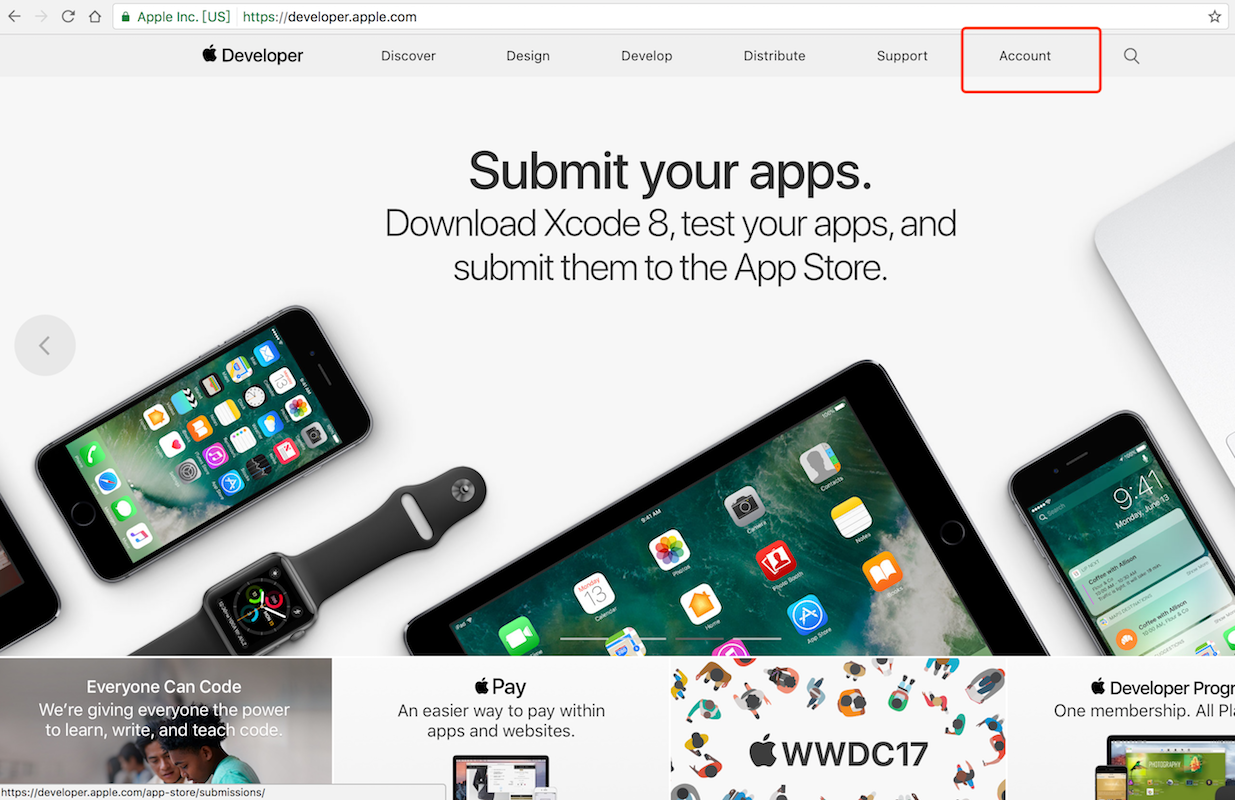
Log in to the Apple Developer website and enter your developer account.
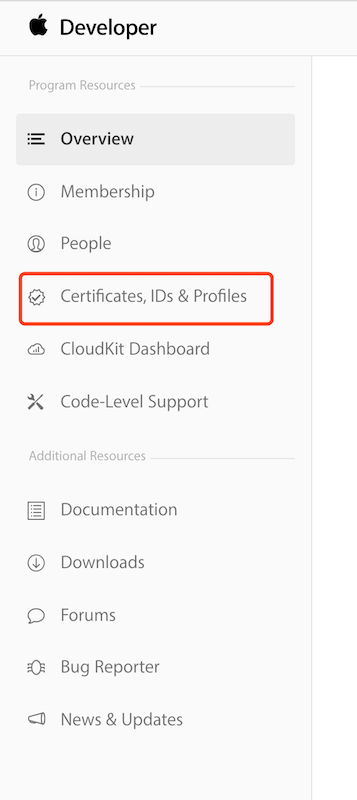
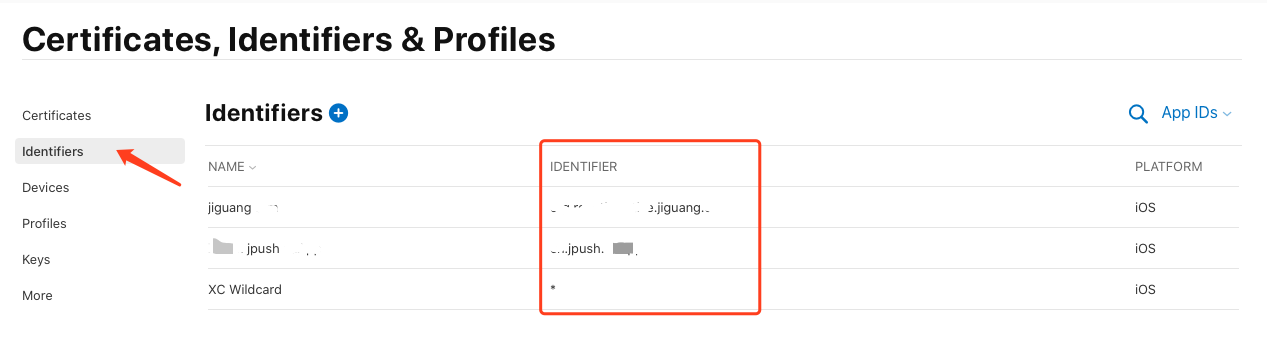
From the left-side entry on the developer account page, go to the "Certificates, IDs & Profiles" page.
Create an App ID and fill in the NAME and Bundle ID of the App ID. If the ID already exists, you can skip this step.
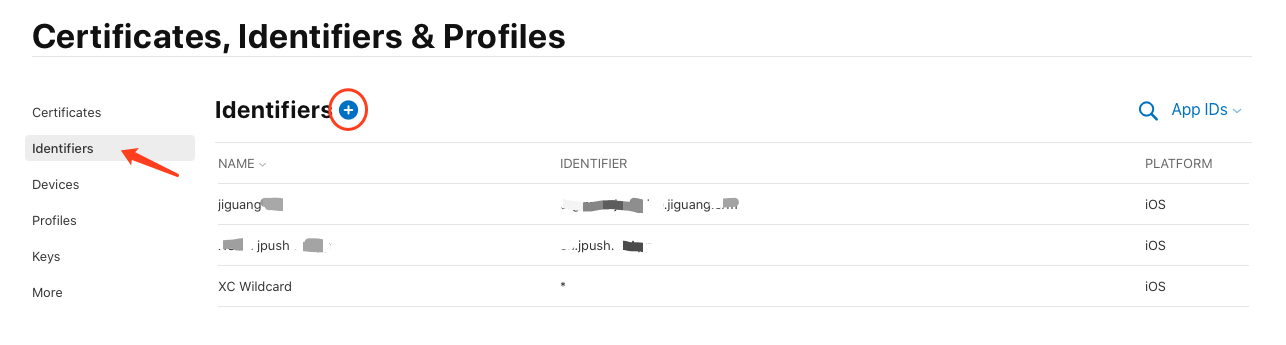 Note: Specify an explicit Bundle ID here. Do not use a wildcard. ~~~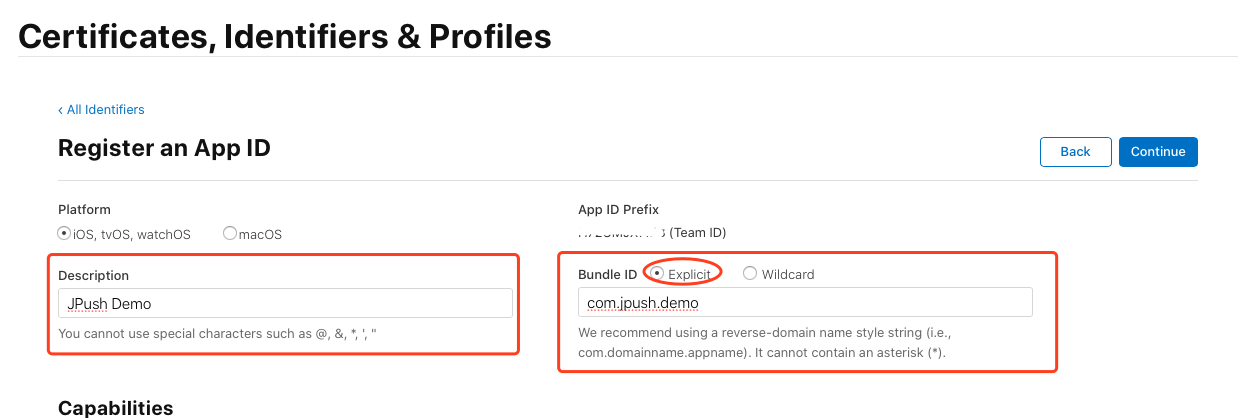
Note: Specify an explicit Bundle ID here. Do not use a wildcard. ~~~This code block is shown in the floating windowEnable Push Notification for the App. If the App ID has already been created, you can also enable Push Notification through settings.
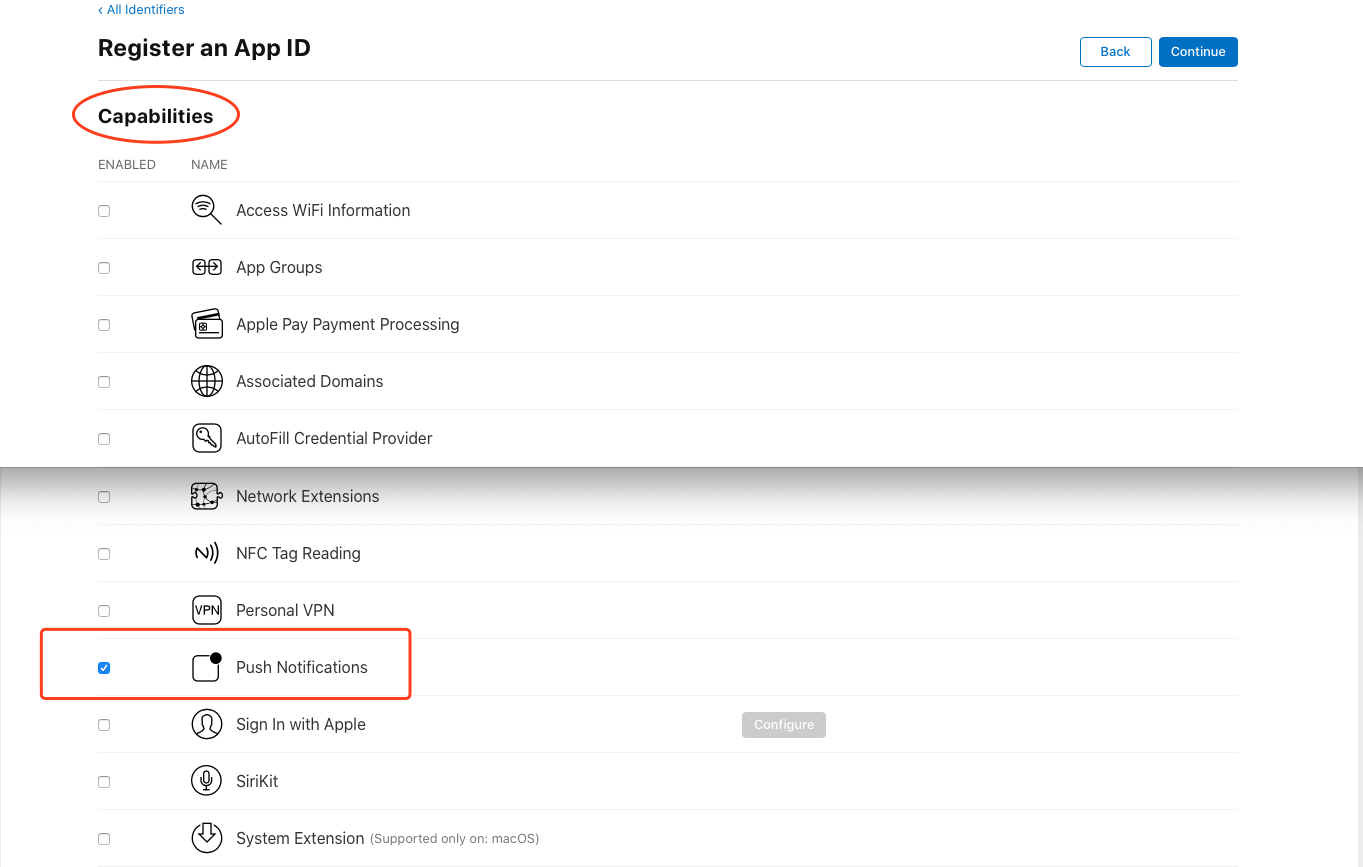
After filling in the above attributes, click "Continue", confirm that the App ID attributes are correct, and click "Register" to complete App ID registration.
Configure the Two Authentication Methods
Once the authentication information of an app on the Jiguang official website is configured, it can only be updated with authentication information using the same bundleID. It cannot be changed to another bundleID. Carefully check whether the bundleID is correct before configuration. If you need to modify it for special reasons, contact support@jiguang.cn.
Method 1: Authenticate with a.p12 Certificate
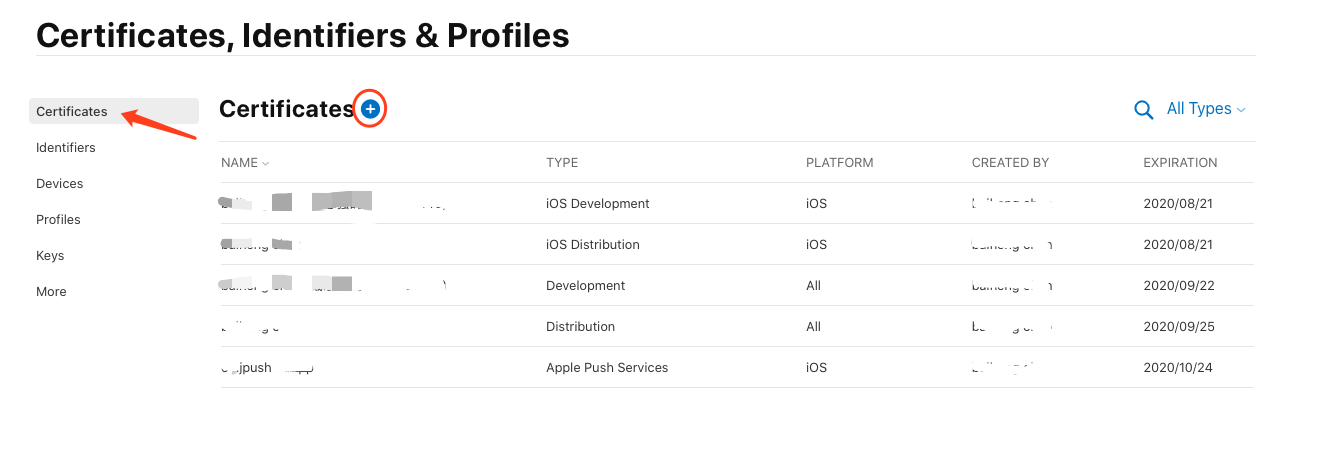
If you have not created a Push certificate before, or if you need to create a new one, create it under the certificate list.
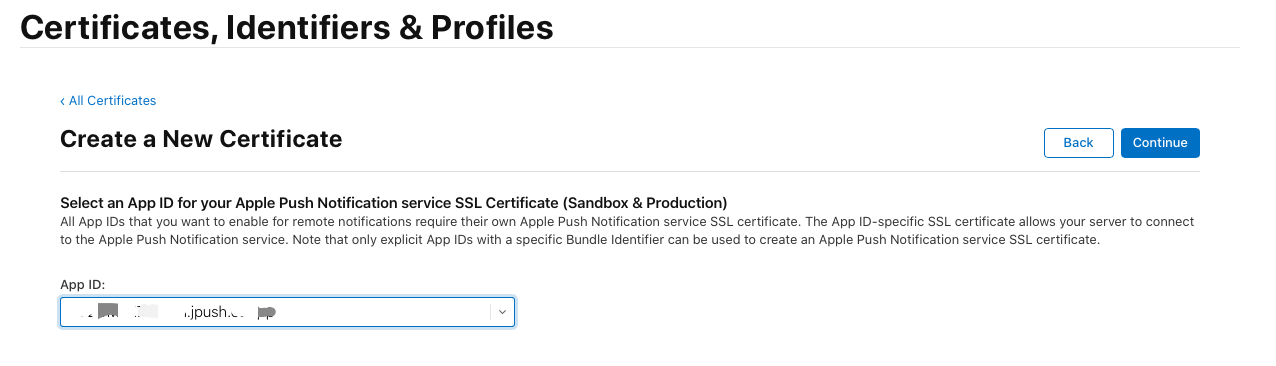
When creating a certificate, make sure to select the APNs certificate type. As shown below, APNs certificates include Development and Production types.
Note: The development certificate is used for development and debugging. The production certificate can be used both for development debugging and product release. Here we use the production certificate as an example. ~~~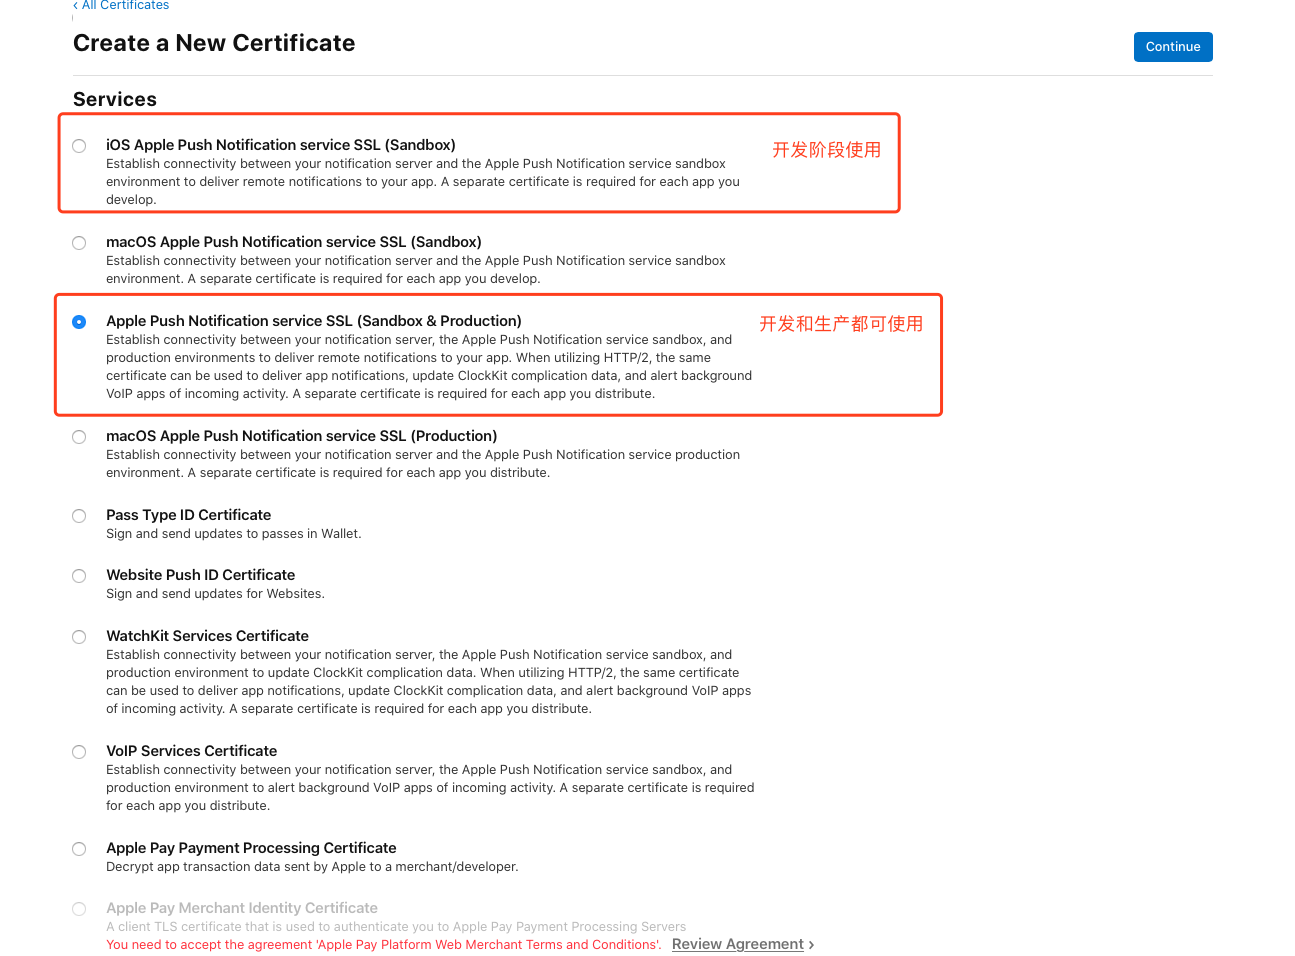Note: The development certificate is used for development and debugging. The production certificate can be used both for development debugging and product release. Here we use the production certificate as an example. ~~~This code block is shown in the floating windowClick "Continue", then select the App ID that this certificate will be bound to.
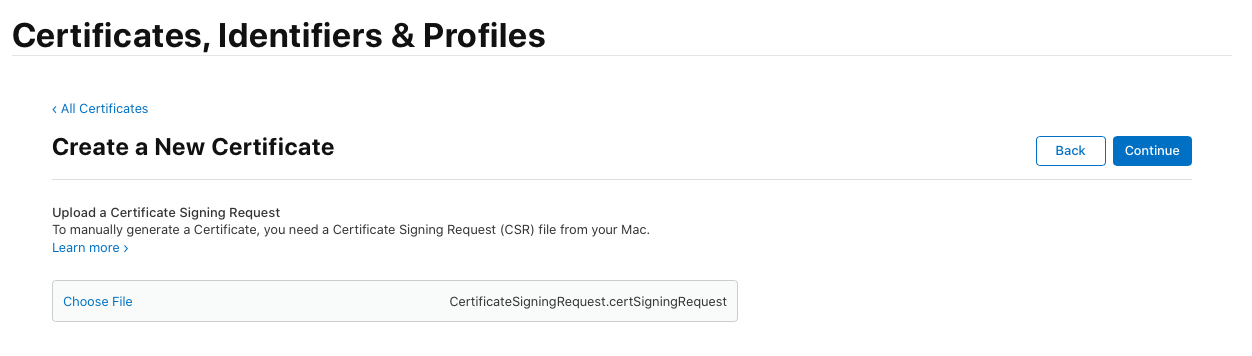
Click "Continue" again. You will be asked to upload a CSR file. The CSR file will be created in the next step.
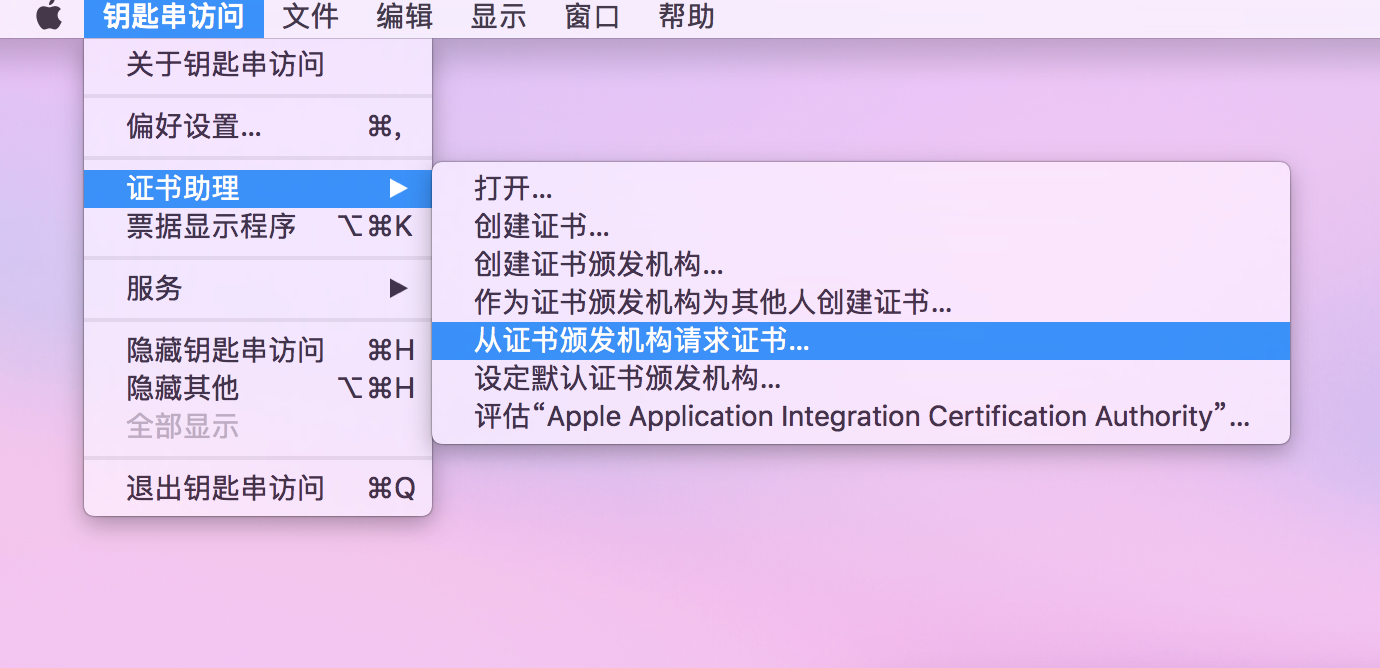
Open the built-in KeychainAccess app and create a Certificate Signing Request as shown below:
Fill in "User Email Address" and "Common Name", and select "Saved to disk". The certificate file suffix is
.certSigningRequest.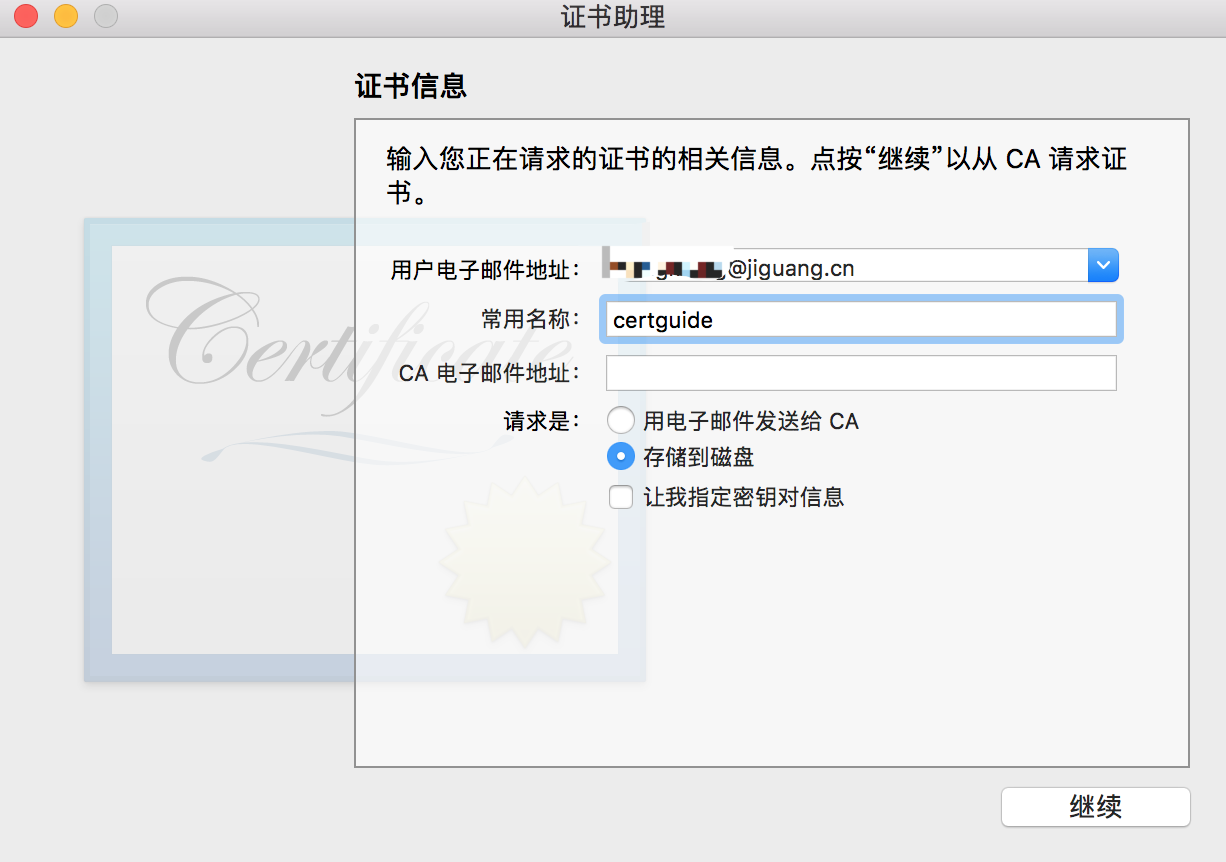
Return to the CSR upload page in the browser and upload the file with the
.certSigningRequestsuffix that you just generated.After the certificate is generated successfully, click the "Download" button to download the certificate. The file suffix is
.cer.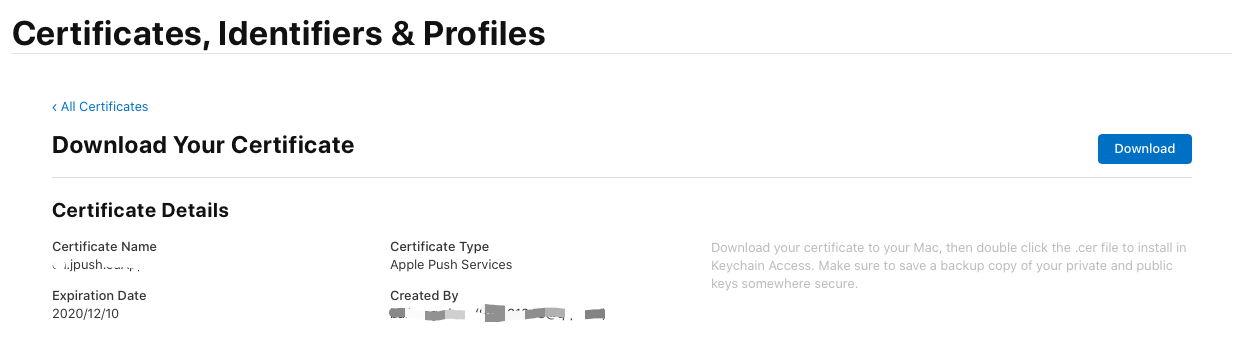
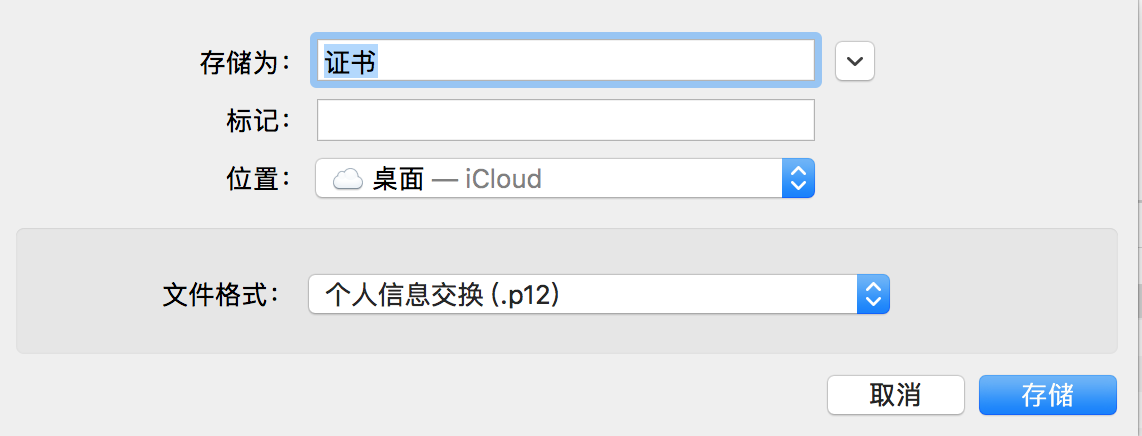
Double-click the certificate. It will open in "KeychainAccess". In the left "Keychains" list, select "login", and in the "Category" list, select "My Certificates". Find the certificate you just downloaded and export it as a
.p12file, as shown below: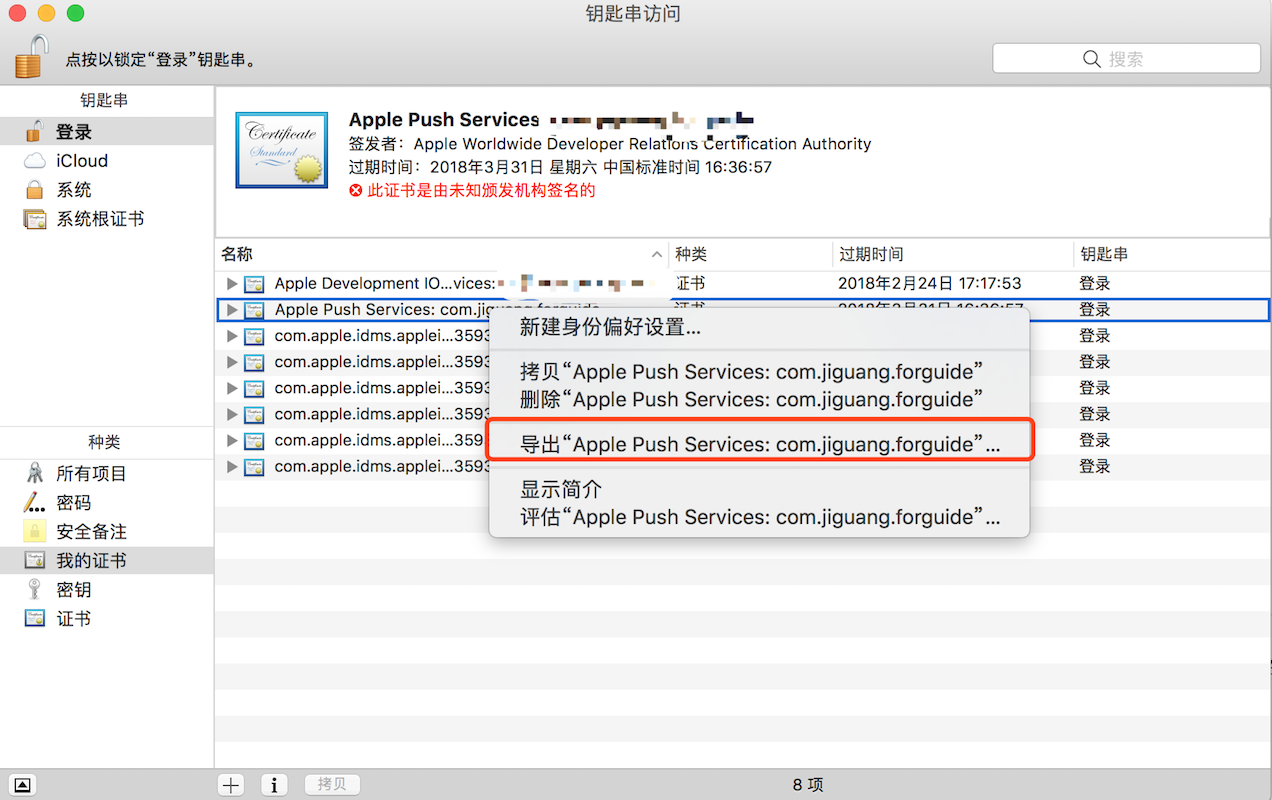
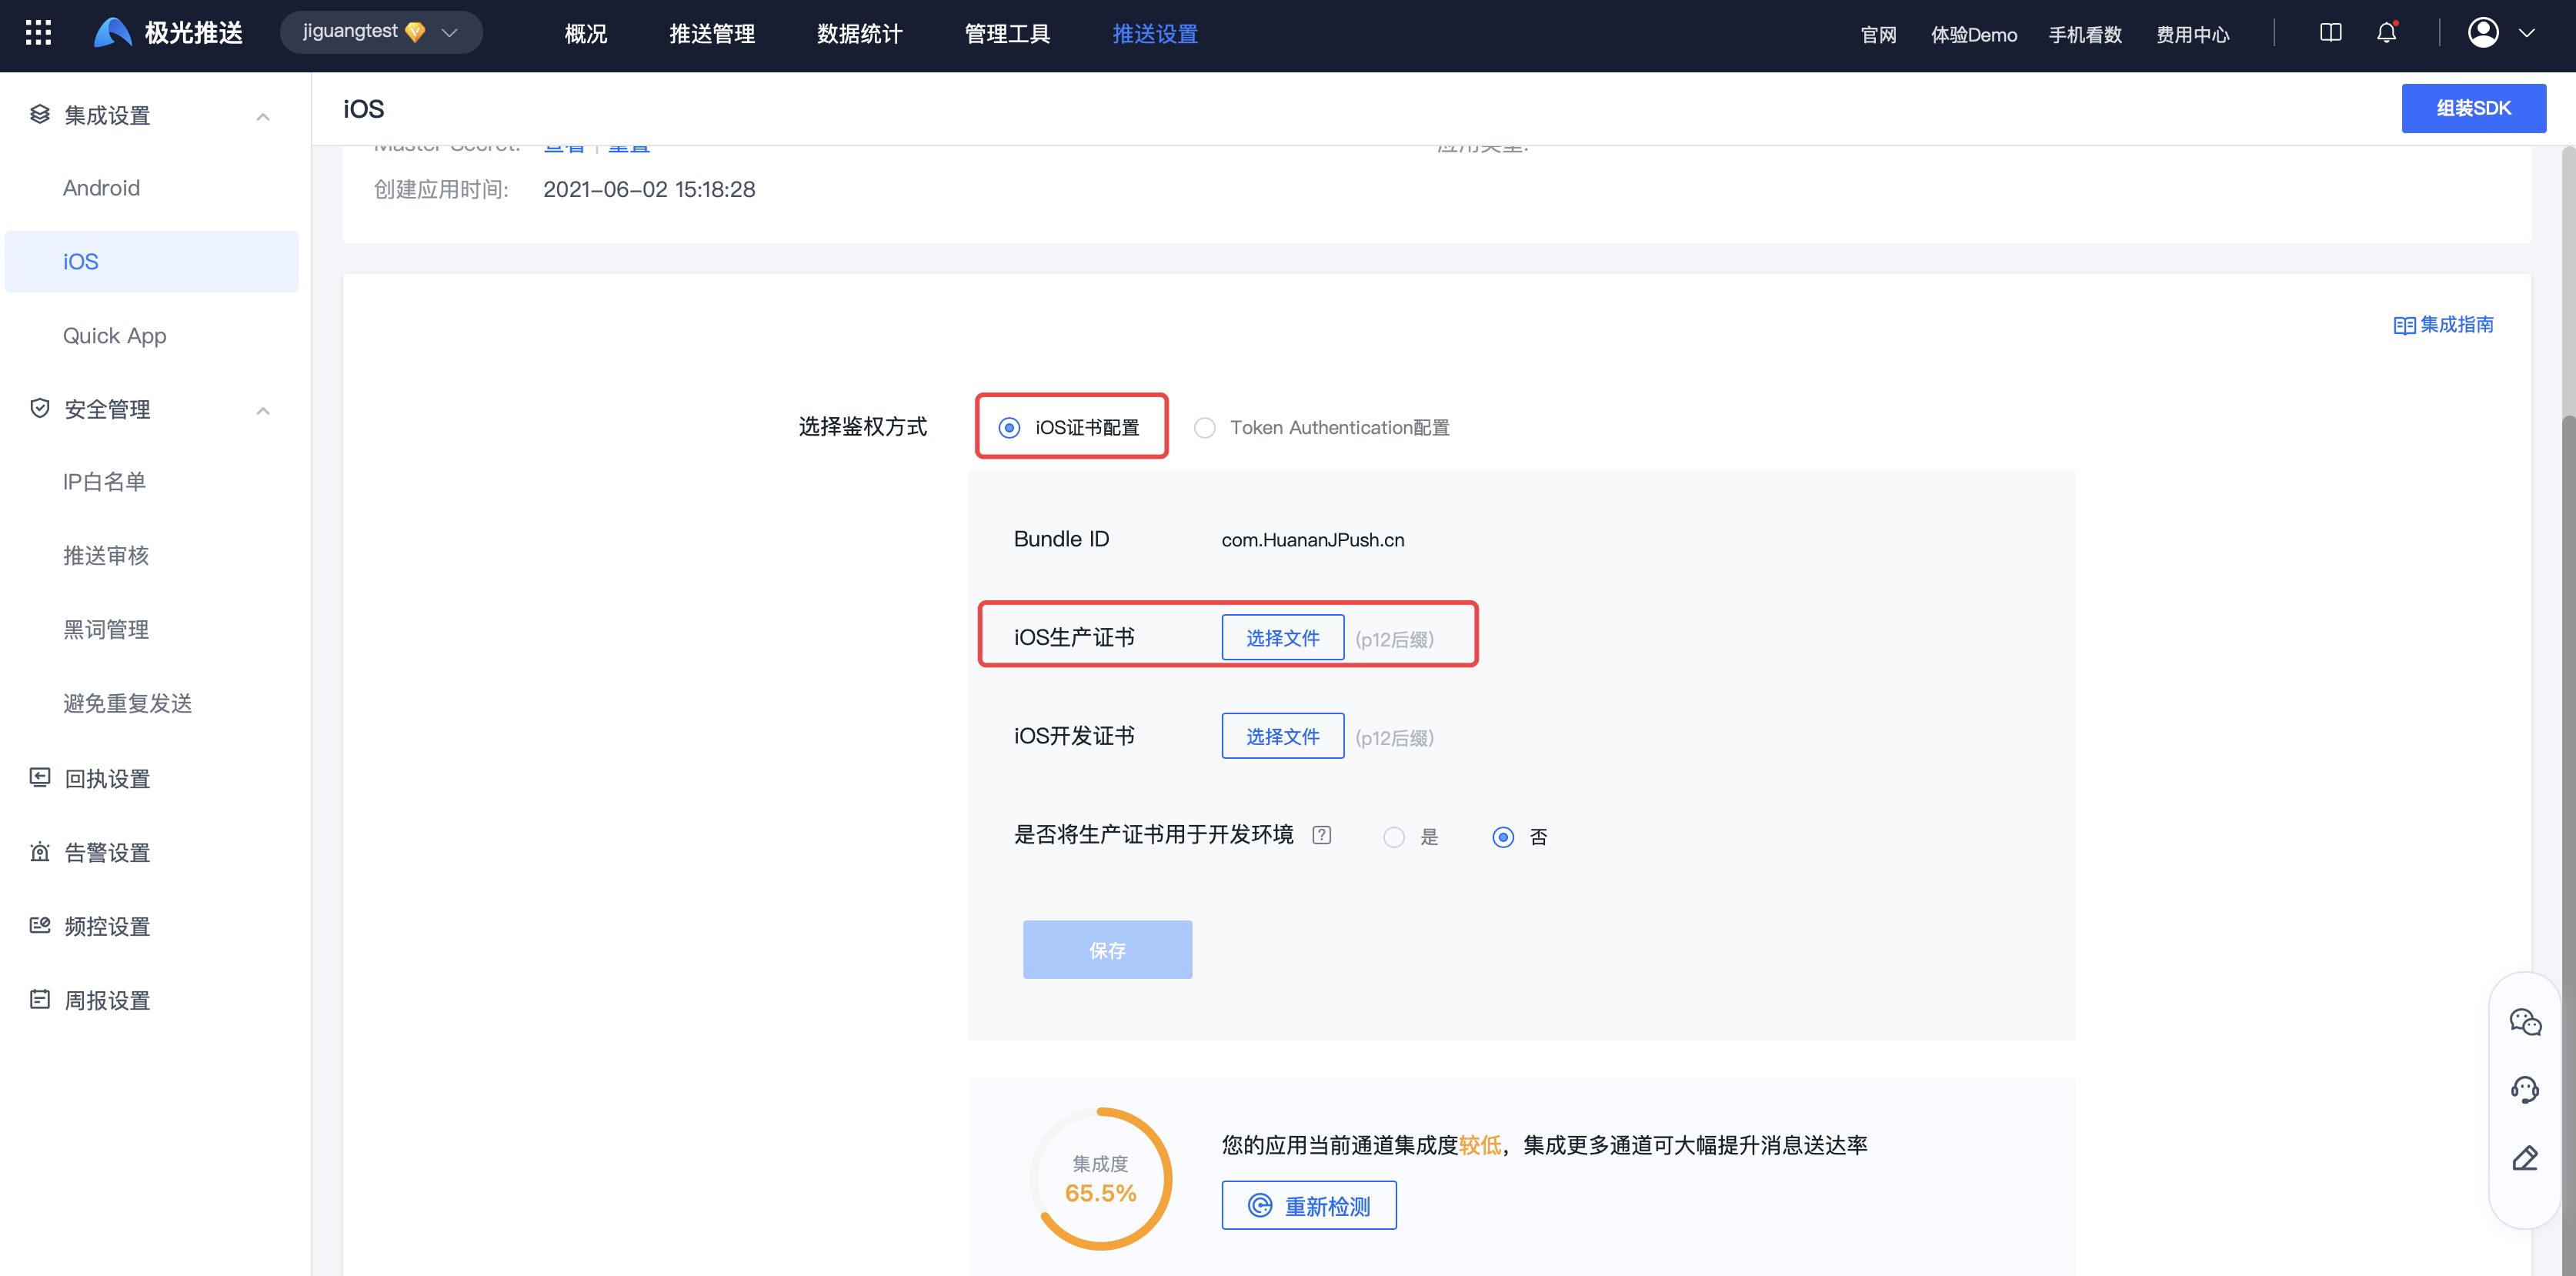
In the Jiguang console, go to the iOS authentication method under your app settings, select "iOS certificate configuration", and upload the
.p12certificate you just exported. Jiguang will authenticate your app in the background.Apple's production push certificate can be used for pushes in the development environment. By selecting "use the production certificate for the development environment", developers only need to upload the production certificate, and can then select the development environment on the official push platform without generating and uploading a separate development certificate.
Method 2: Authenticate with an APNs Auth Key
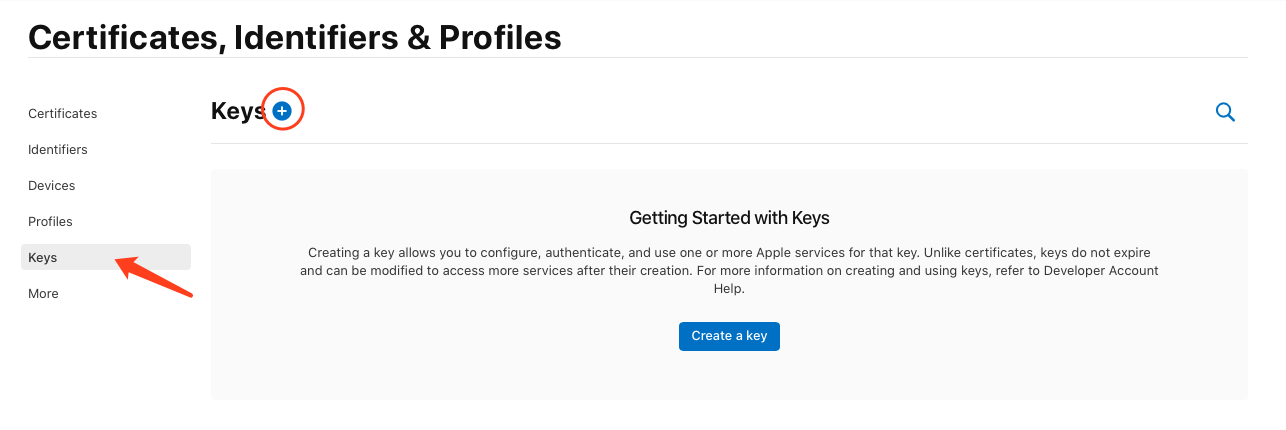
Click "All" under "Keys" in the left list to check whether the account already has an auth key. If not, click "+" to create one.
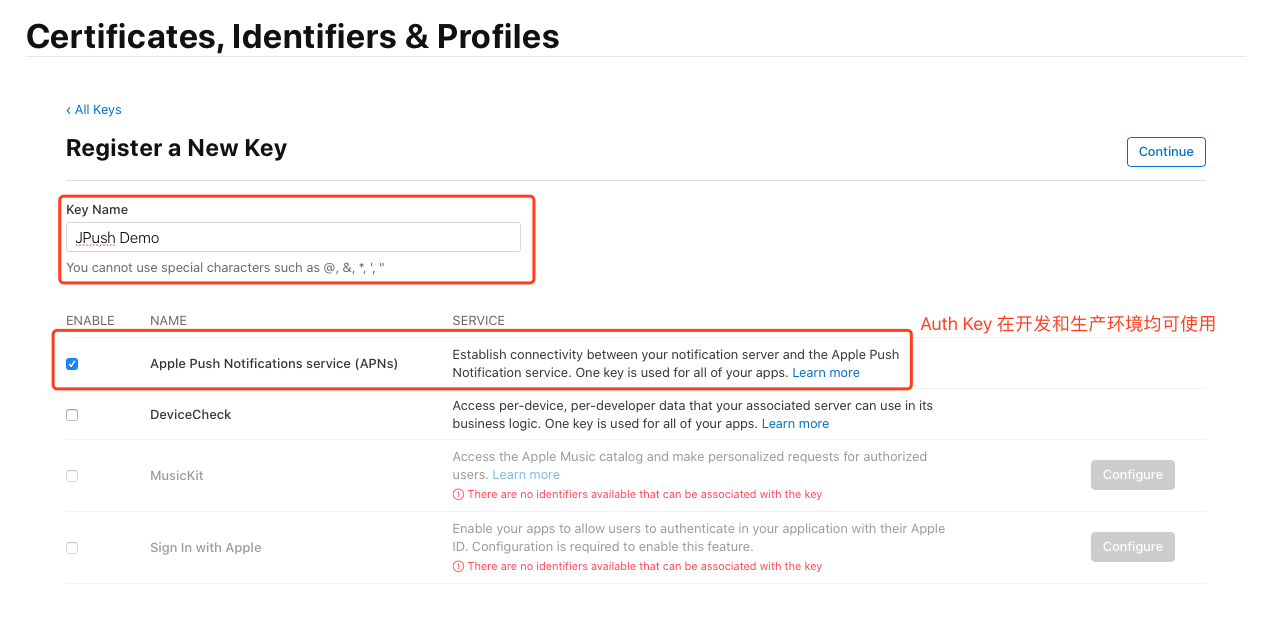
Fill in the description for the key and select the service, as shown below. Note: it can be used in both development and production environments and does not expire.
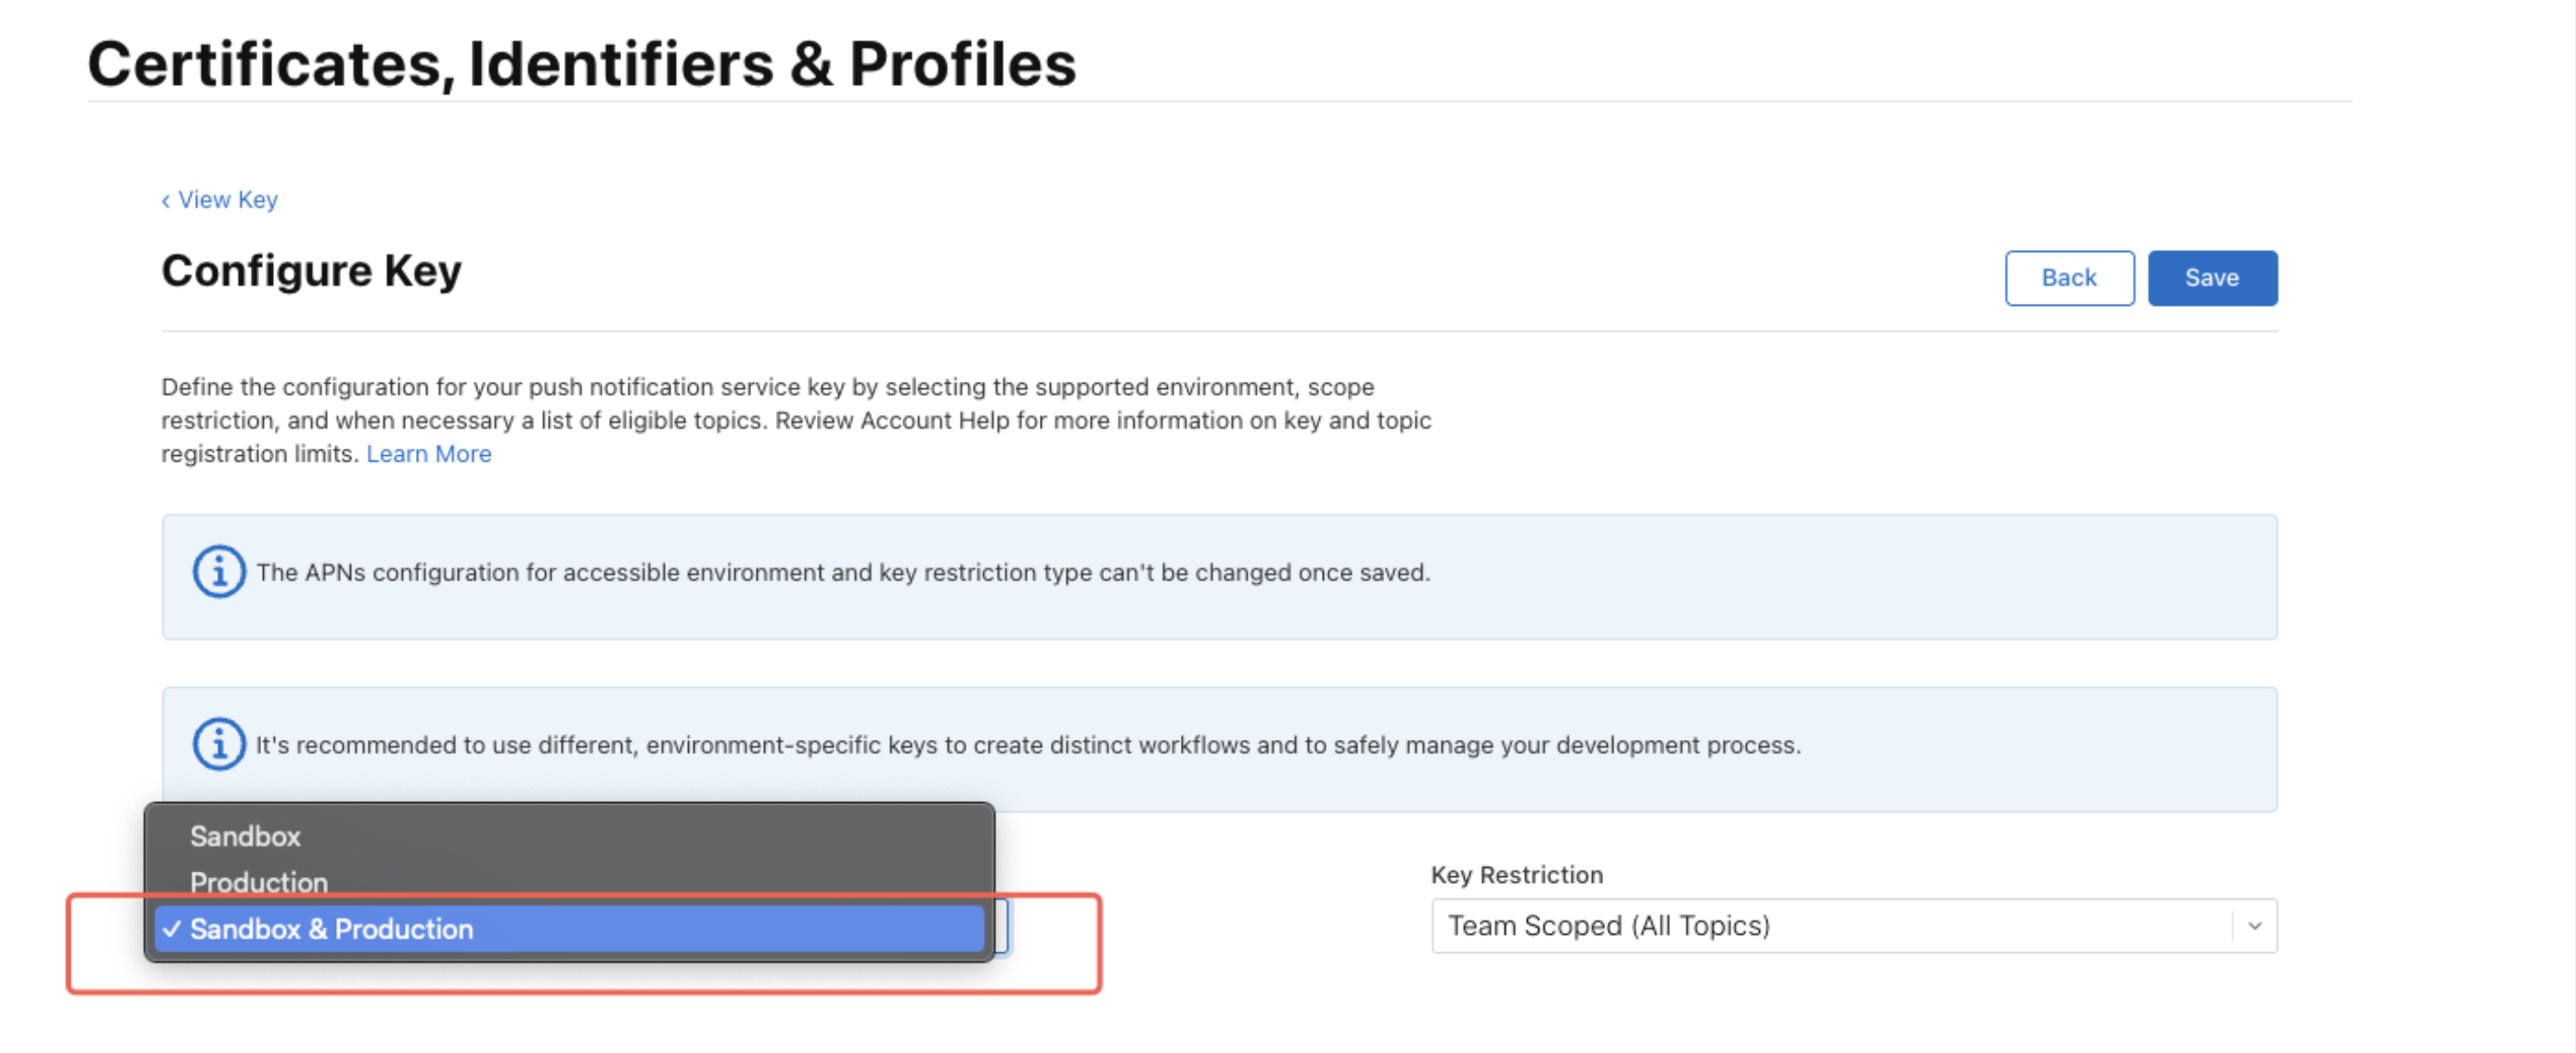
Select Sandbox & Production.
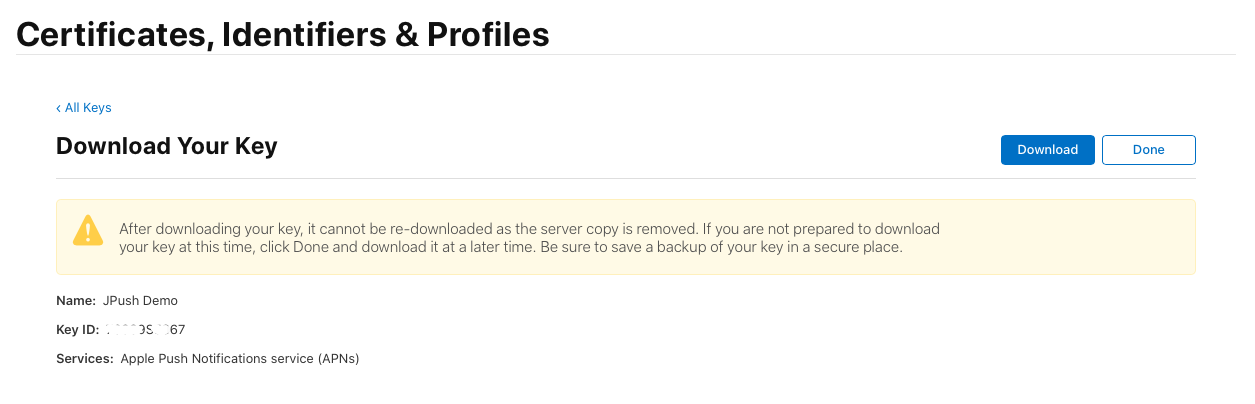
Click "Continue" to confirm the information, then click "confirm" to download the key. Note: record the key id. It can be downloaded only once, so keep it safe.
Get the Bundle ID of the app you created earlier.
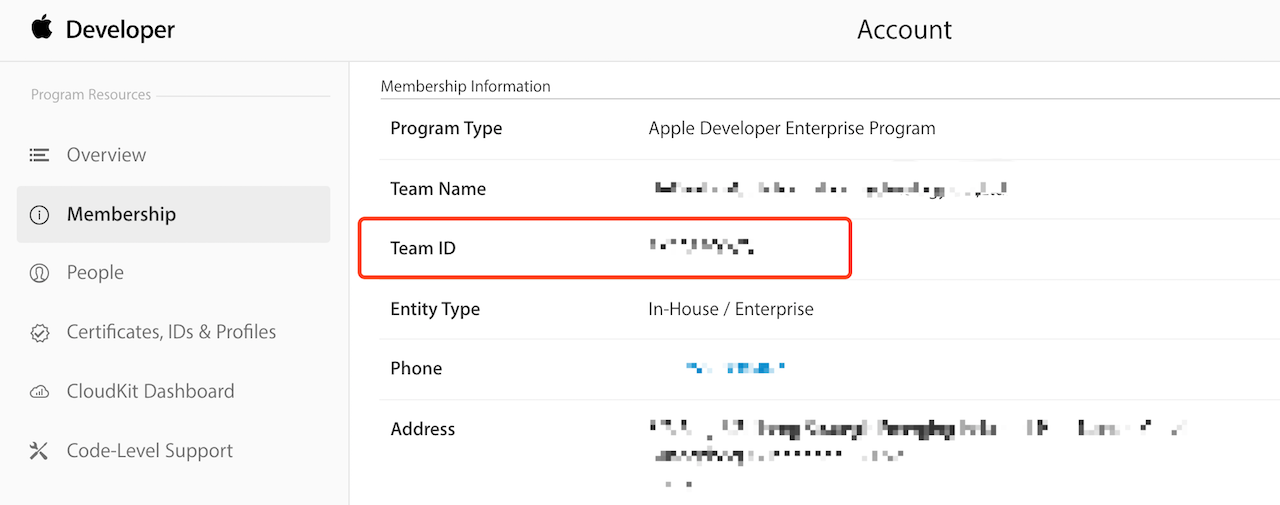
Get the Team ID on the "Membership" page of the developer account.
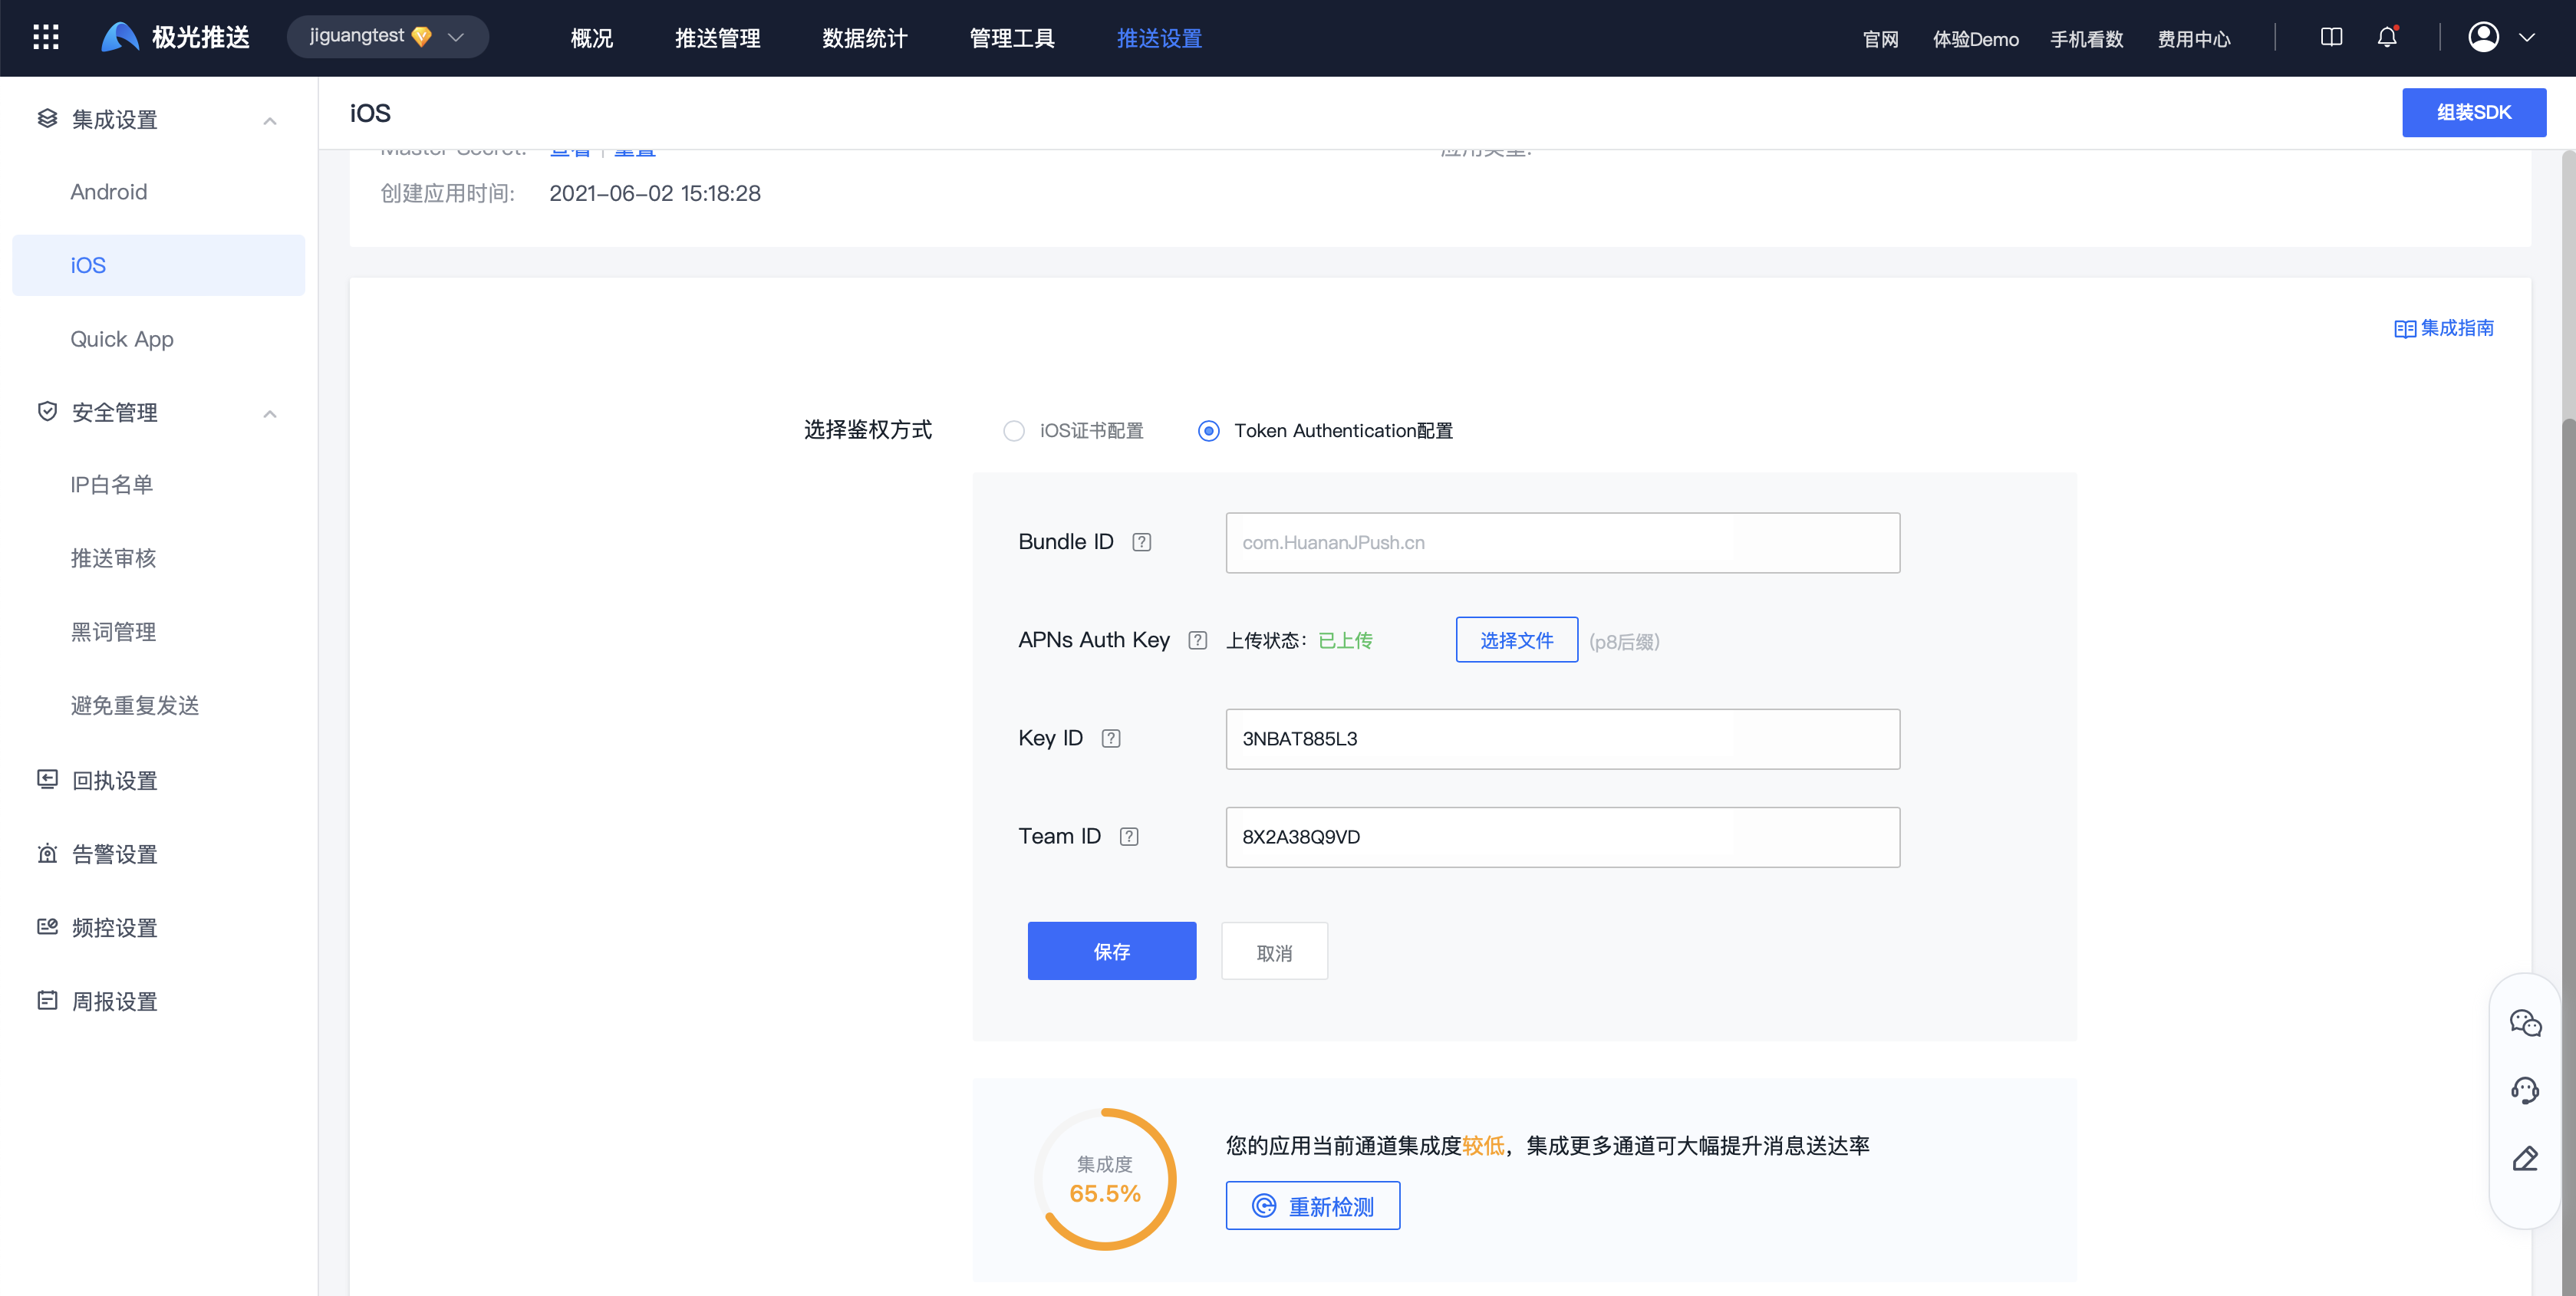
In the Jiguang console, go to the iOS authentication method under your app settings, select "Token Authentication configuration", upload the APNs Auth Key file, and fill in your KEY ID, Team ID, and the Bundle ID of the specified app. Jiguang will authenticate your app in the background.
Create a Provisioning Profile
Before creating a Provisioning Profile, make sure you have created the App ID for the Bundle ID used by the app to be released on the Apple Developer website, and that you have created an iOS Development certificate for this App ID.
On the Provisioning Profile page of the Apple Developer account, click the button shown below to create a Provisioning Profile.

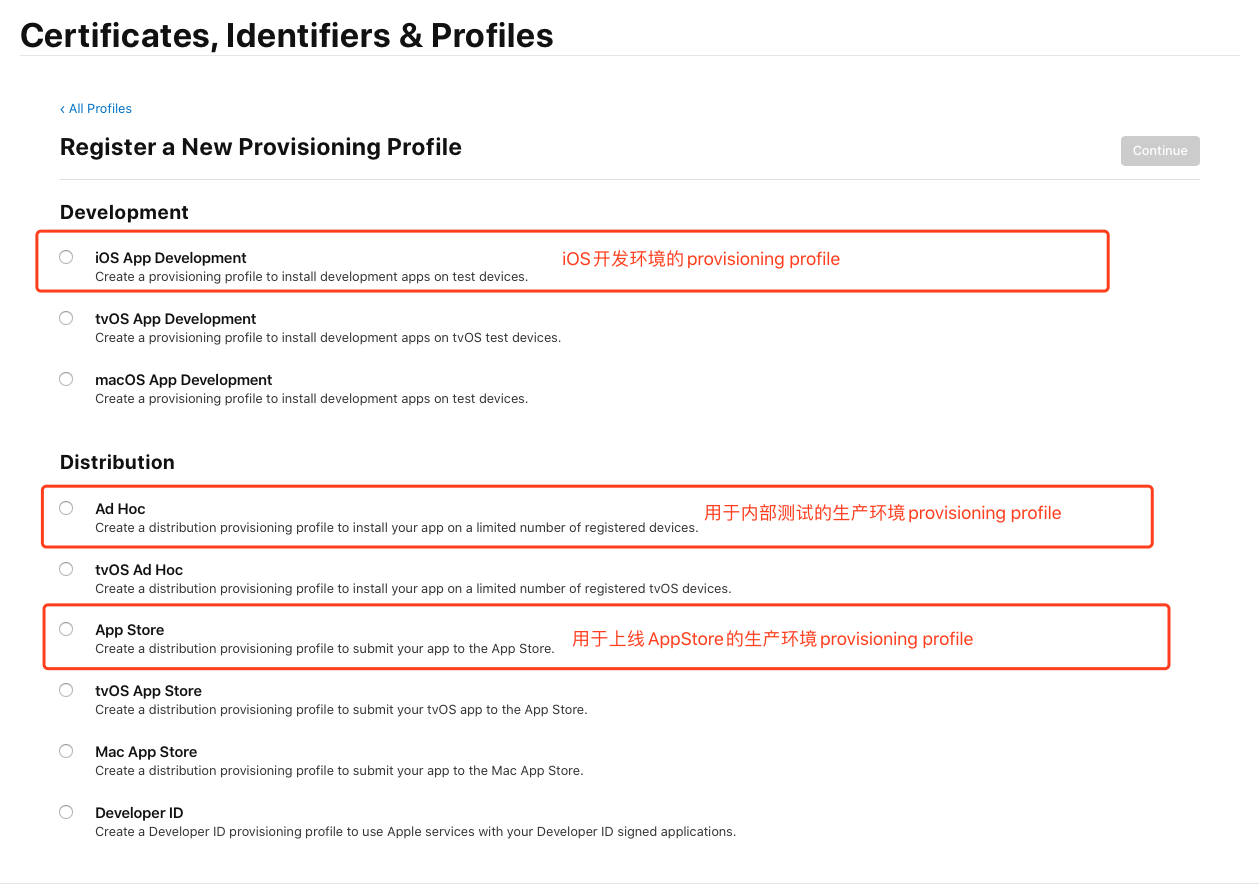
Select the environment of this Provisioning Profile and click [Continue]:
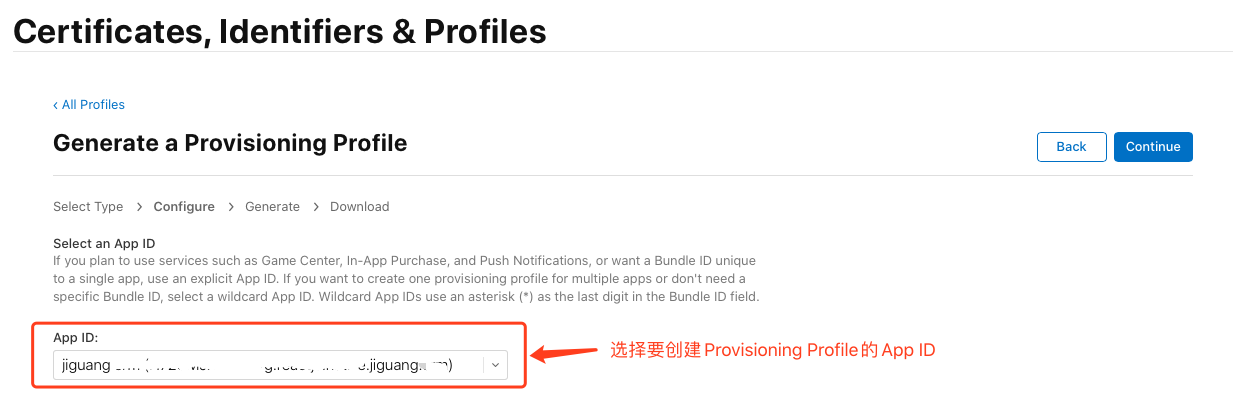
Select the App ID for which you want to create the Provisioning Profile and click [Continue]:
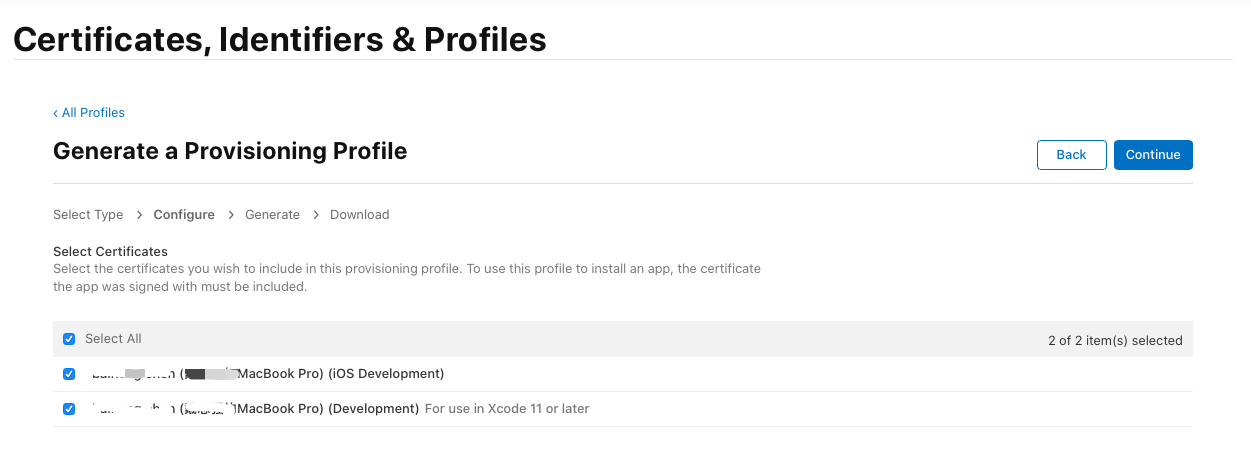
Select the developer certificate. If multiple developer certificates have been created, it is recommended to keep only one for easier management. For convenience, [Select All] is selected here. Then click [Continue] to go to the next step:
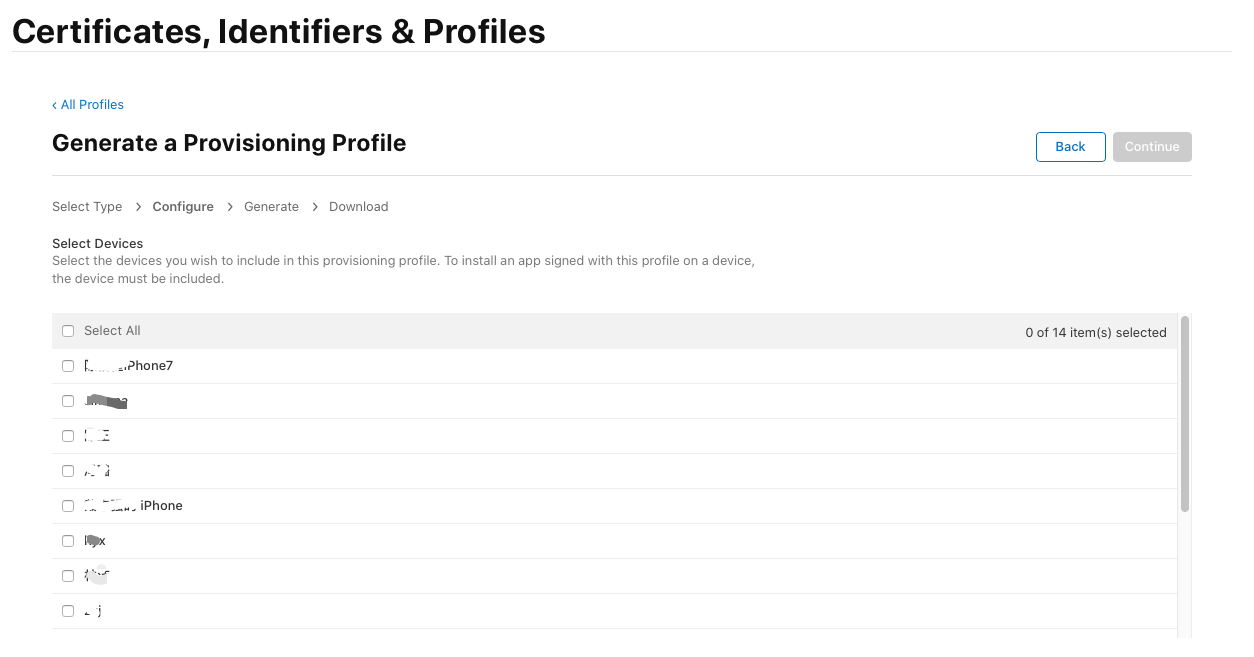
Select the devices on which this Provisioning Profile will be installed. Usually select [Select All], then click [Continue]:
Fill in the Profile Name for this Provisioning Profile and click [generate] to complete creation.
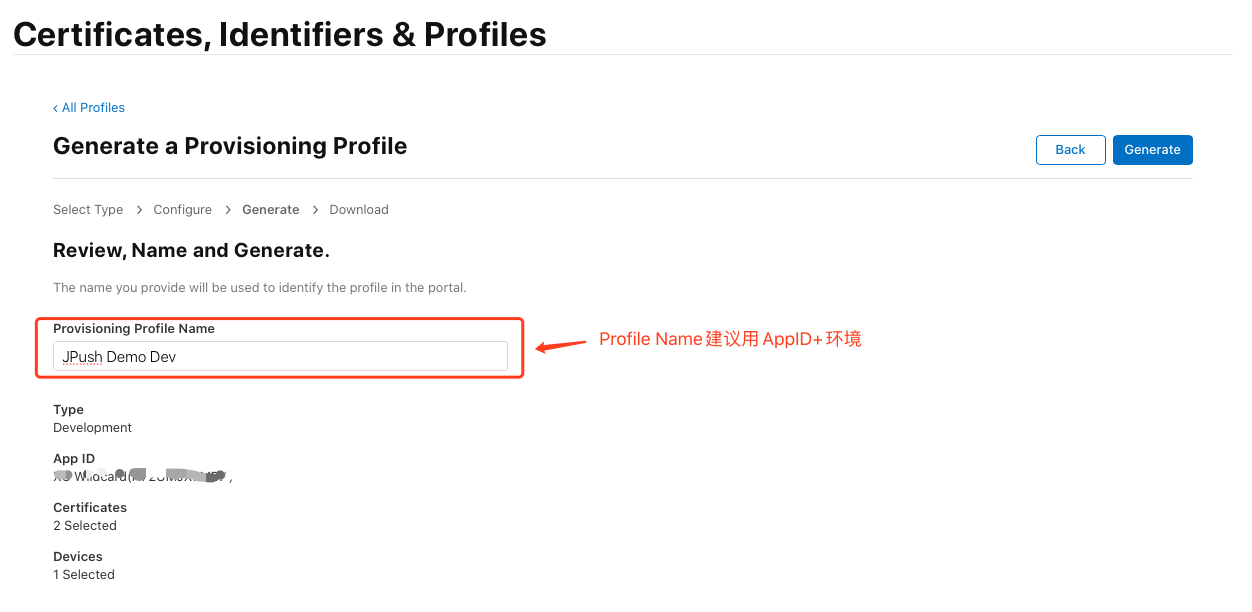
After filling in the Profile Name, click [generate] to complete creation, then click [DownLoad] to download the Provisioning Profile.
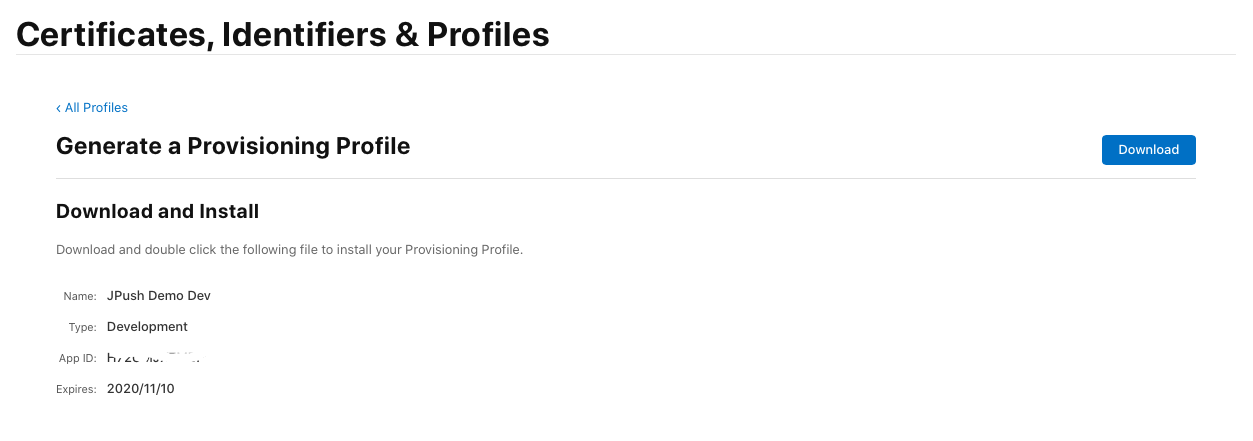
Double-click the downloaded Provisioning Profile to add it to Xcode.
Xcode Certificate Configuration Tutorial
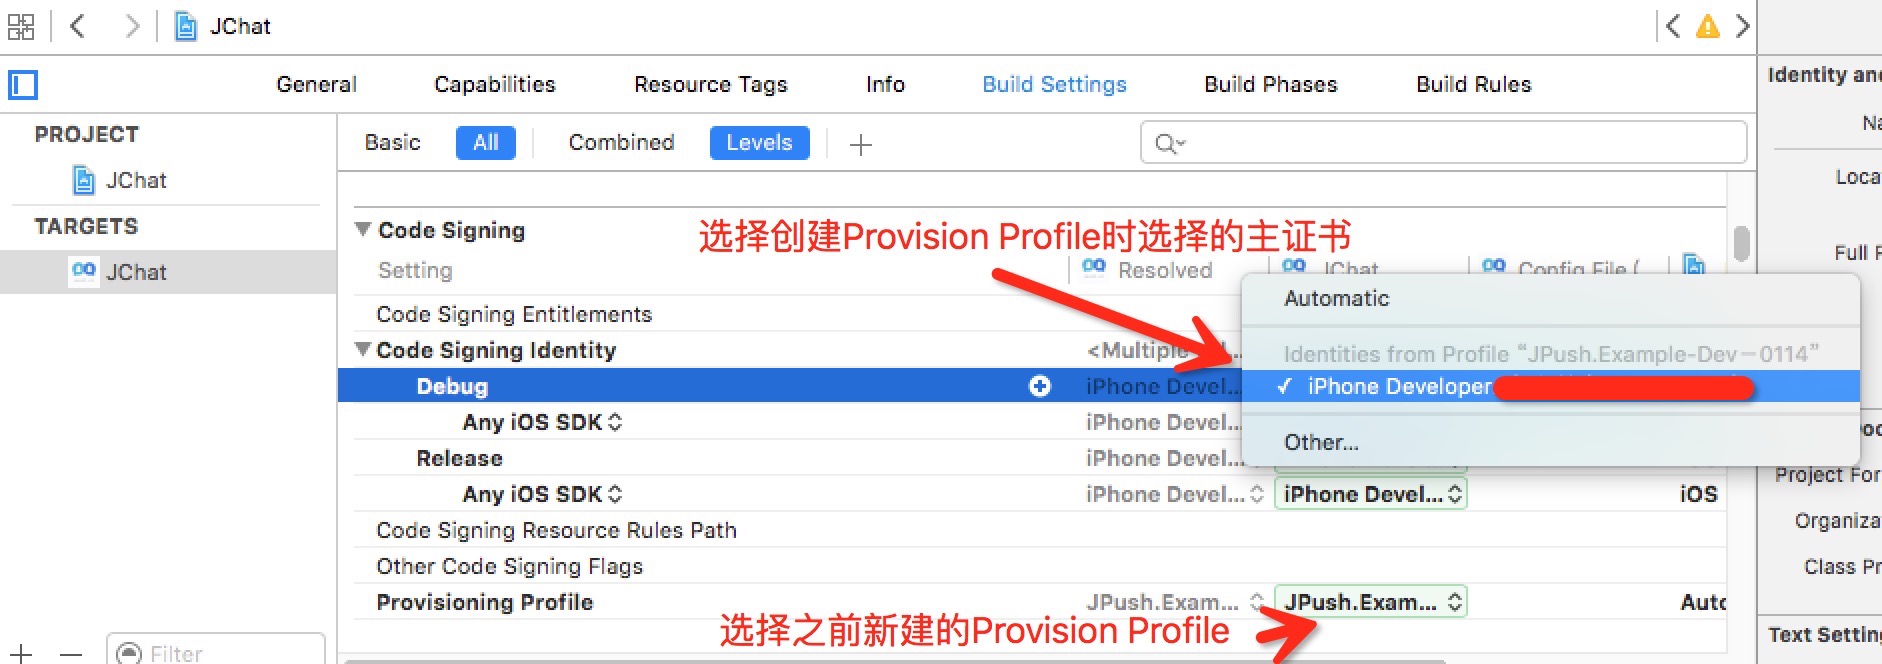
After integrating the JPush SDK by referring to the iOS SDK Integration Guide and uploading the p12 certificate used for push, configure the certificate before building and running the app. The steps are as follows:
Open the Bundle identifier item in
xxx-info.plistand fill in the bundle id uploaded to the JPush console: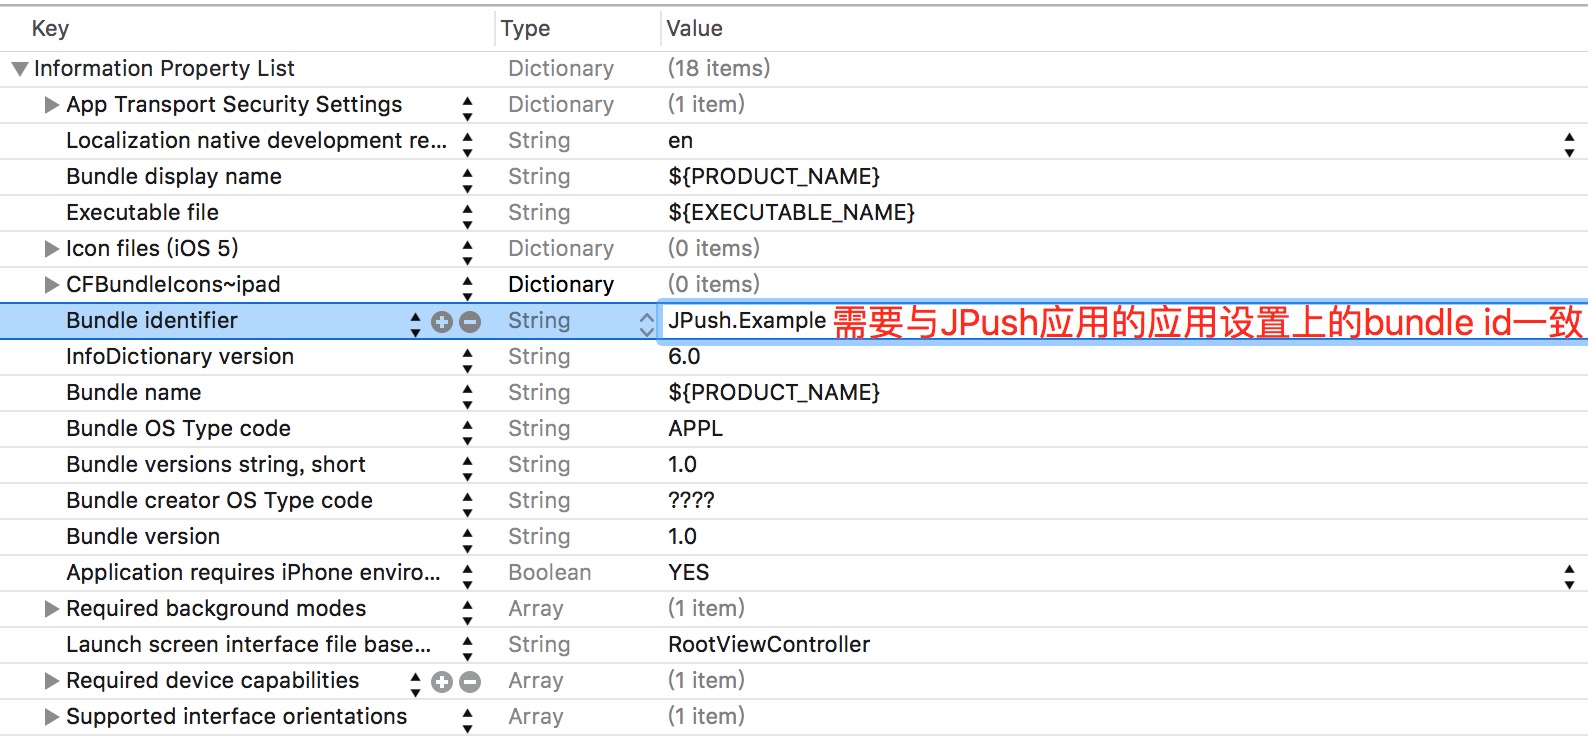
Click the project, select TARGETS, enter the Build Setting page, search for "Code signing", and configure it as shown below.