iOS 通知点击跳转
最近更新:2022-3-29
iOS 通知点击跳转
推送时下发附加参数,客户端获取参数后做相应的业务跳转逻辑。
服务端使用
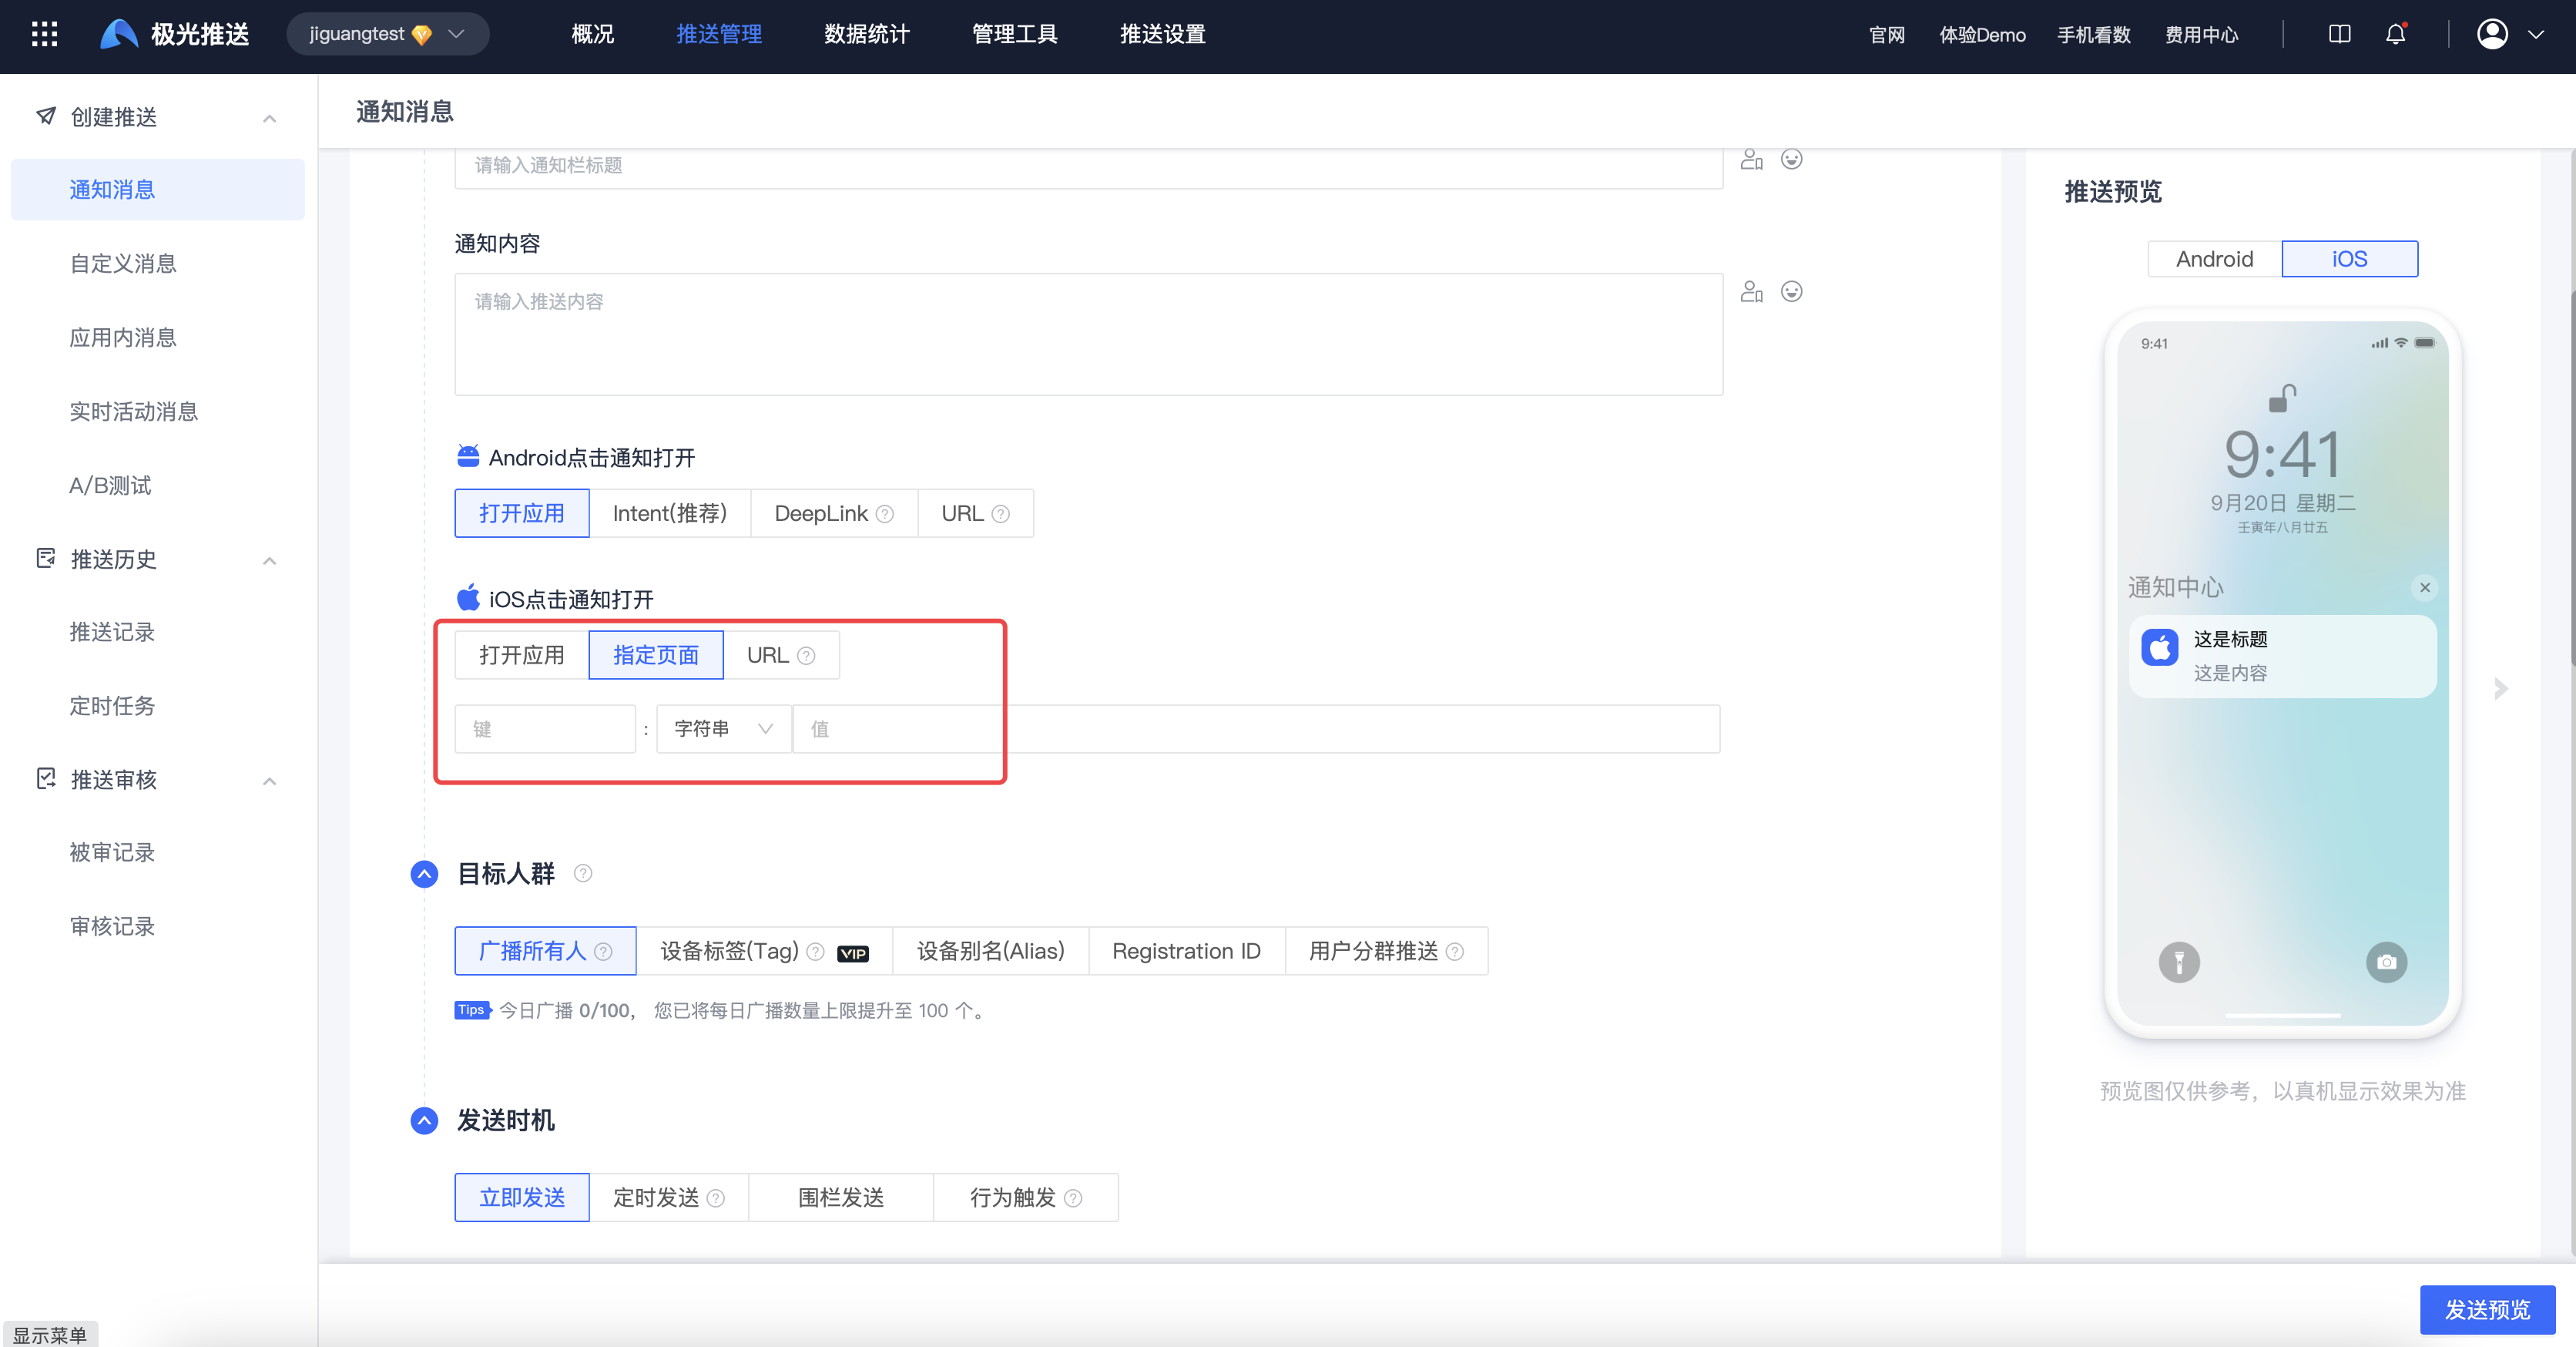
控制台使用
API 使用
| 关键字 | 类型 | 选项 | 含义 | 说明 |
|---|---|---|---|---|
| extras | JSON Object | 可选 | 附加字段 | 这里自定义 Key / value 信息,以供业务使用。 |
          "ios": {
    "alert": "hello, JPush!",
    "badge": 1,
    "extras": {
        "news_id": 134,
        "my_key": "a value"
    }
}
"ios": {
"alert": "hello, JPush!",
"badge": 1,
"extras": {
"news_id": 134,
"my_key": "a value"
}
}
此代码块在浮窗中显示
客户端获取参数
通知
iOS 设备收到通知推送(APNs ),用户点击推送通知打开应用时,应用程序根据运行状态进行不同处理:
- App 在前台运行:
          - (void)jpushNotificationCenter:(UNUserNotificationCenter *)center willPresentNotification:(UNNotification *)notification withCompletionHandler:(void (^)(NSInteger options))completionHandler {
  NSDictionary * userInfo = notification.request.content.userInfo;

  UNNotificationRequest *request = notification.request; // 收到推送的请求
  UNNotificationContent *content = request.content; // 收到推送的消息内容

  NSNumber *badge = content.badge;  // 推送消息的角标
  NSString *body = content.body;    // 推送消息体
  UNNotificationSound *sound = content.sound;  // 推送消息的声音
  NSString *subtitle = content.subtitle;  // 推送消息的副标题
  NSString *title = content.title;  // 推送消息的标题

  if([notification.request.trigger isKindOfClass:[UNPushNotificationTrigger class]]) {
    [JPUSHService handleRemoteNotification:userInfo];
    NSLog(@"iOS10 前台收到远程通知:%@", [self logDic:userInfo]);

    [rootViewController addNotificationCount];
  }
  else {
    // 判断为本地通知
    NSLog(@"iOS10 前台收到本地通知:{\nbody:%@,\ntitle:%@,\nsubtitle:%@,\nbadge:%@,\nsound:%@,\nuserInfo:%@\n}",body,title,subtitle,badge,sound,userInfo);
  }
  completionHandler(UNNotificationPresentationOptionBadge|UNNotificationPresentationOptionSound|UNNotificationPresentationOptionAlert); // 需要执行这个方法,选择是否提醒用户,有Badge、Sound、Alert三种类型可以设置
}
- (void)jpushNotificationCenter:(UNUserNotificationCenter *)center willPresentNotification:(UNNotification *)notification withCompletionHandler:(void (^)(NSInteger options))completionHandler {
NSDictionary * userInfo = notification.request.content.userInfo;
UNNotificationRequest *request = notification.request; // 收到推送的请求
UNNotificationContent *content = request.content; // 收到推送的消息内容
NSNumber *badge = content.badge; // 推送消息的角标
NSString *body = content.body; // 推送消息体
UNNotificationSound *sound = content.sound; // 推送消息的声音
NSString *subtitle = content.subtitle; // 推送消息的副标题
NSString *title = content.title; // 推送消息的标题
if([notification.request.trigger isKindOfClass:[UNPushNotificationTrigger class]]) {
[JPUSHService handleRemoteNotification:userInfo];
NSLog(@"iOS10 前台收到远程通知:%@", [self logDic:userInfo]);
[rootViewController addNotificationCount];
}
else {
// 判断为本地通知
NSLog(@"iOS10 前台收到本地通知:{\nbody:%@,\ntitle:%@,\nsubtitle:%@,\nbadge:%@,\nsound:%@,\nuserInfo:%@\n}",body,title,subtitle,badge,sound,userInfo);
}
completionHandler(UNNotificationPresentationOptionBadge|UNNotificationPresentationOptionSound|UNNotificationPresentationOptionAlert); // 需要执行这个方法,选择是否提醒用户,有Badge、Sound、Alert三种类型可以设置
}
此代码块在浮窗中显示
- App 在后台时(需要点击通知才能触发回调):
          - (void)jpushNotificationCenter:(UNUserNotificationCenter *)center didReceiveNotificationResponse:(UNNotificationResponse *)response withCompletionHandler:(void(^)(void))completionHandler {

  NSDictionary * userInfo = response.notification.request.content.userInfo;
  UNNotificationRequest *request = response.notification.request; // 收到推送的请求
  UNNotificationContent *content = request.content; // 收到推送的消息内容

  NSNumber *badge = content.badge;  // 推送消息的角标
  NSString *body = content.body;    // 推送消息体
  UNNotificationSound *sound = content.sound;  // 推送消息的声音
  NSString *subtitle = content.subtitle;  // 推送消息的副标题
  NSString *title = content.title;  // 推送消息的标题

  if([response.notification.request.trigger isKindOfClass:[UNPushNotificationTrigger class]]) {
    [JPUSHService handleRemoteNotification:userInfo];
    NSLog(@"iOS10 收到远程通知:%@", [self logDic:userInfo]);
    [rootViewController addNotificationCount];

  }
  else {
    // 判断为本地通知
    NSLog(@"iOS10 收到本地通知:{\nbody:%@,\ntitle:%@,\nsubtitle:%@,\nbadge:%@,\nsound:%@,\nuserInfo:%@\n}",body,title,subtitle,badge,sound,userInfo);
  }

  completionHandler();  // 系统要求执行这个方法
}
- (void)jpushNotificationCenter:(UNUserNotificationCenter *)center didReceiveNotificationResponse:(UNNotificationResponse *)response withCompletionHandler:(void(^)(void))completionHandler {
NSDictionary * userInfo = response.notification.request.content.userInfo;
UNNotificationRequest *request = response.notification.request; // 收到推送的请求
UNNotificationContent *content = request.content; // 收到推送的消息内容
NSNumber *badge = content.badge; // 推送消息的角标
NSString *body = content.body; // 推送消息体
UNNotificationSound *sound = content.sound; // 推送消息的声音
NSString *subtitle = content.subtitle; // 推送消息的副标题
NSString *title = content.title; // 推送消息的标题
if([response.notification.request.trigger isKindOfClass:[UNPushNotificationTrigger class]]) {
[JPUSHService handleRemoteNotification:userInfo];
NSLog(@"iOS10 收到远程通知:%@", [self logDic:userInfo]);
[rootViewController addNotificationCount];
}
else {
// 判断为本地通知
NSLog(@"iOS10 收到本地通知:{\nbody:%@,\ntitle:%@,\nsubtitle:%@,\nbadge:%@,\nsound:%@,\nuserInfo:%@\n}",body,title,subtitle,badge,sound,userInfo);
}
completionHandler(); // 系统要求执行这个方法
}
此代码块在浮窗中显示
- App 未启动状态:
          - (BOOL)application:(UIApplication *)application didFinishLaunchingWithOptions:(NSDictionary *)launchOptions;
// apn 内容获取:
NSDictionary *remoteNotification = [launchOptions objectForKey: UIApplicationLaunchOptionsRemoteNotificationKey]
- (BOOL)application:(UIApplication *)application didFinishLaunchingWithOptions:(NSDictionary *)launchOptions;
// apn 内容获取:
NSDictionary *remoteNotification = [launchOptions objectForKey: UIApplicationLaunchOptionsRemoteNotificationKey]
此代码块在浮窗中显示
自定义消息
- 仅 APP 在前台运行时才能收到自定义消息的推送。
- 从 JPush 服务器获取用户推送的自定义消息内容和标题以及附加字段等。
实现方法
获取 iOS 的推送内容需要在 delegate 类中注册通知并实现回调方法。
在方法- (BOOL)application:(UIApplication _)application didFinishLaunchingWithOptions:(NSDictionary _) launchOptions 加入下面的代码:
          NSNotificationCenter *defaultCenter = [NSNotificationCenter defaultCenter];
[defaultCenter addObserver:self selector:@selector(networkDidReceiveMessage:) name:kJPFNetworkDidReceiveMessageNotification object:nil];
NSNotificationCenter *defaultCenter = [NSNotificationCenter defaultCenter];
[defaultCenter addObserver:self selector:@selector(networkDidReceiveMessage:) name:kJPFNetworkDidReceiveMessageNotification object:nil];
此代码块在浮窗中显示
实现回调方法 networkDidReceiveMessage
          - (void)networkDidReceiveMessage:(NSNotification *)notification {
    NSDictionary * userInfo = [notification userInfo];
    NSString *content = [userInfo valueForKey:@"content"];
    NSString *messageID = [userInfo valueForKey:@"_j_msgid"];
    NSDictionary *extras = [userInfo valueForKey:@"extras"];
    NSString *customizeField1 = [extras valueForKey:@"customizeField1"]; //服务端传递的 Extras 附加字段,key 是自己定义的
}
- (void)networkDidReceiveMessage:(NSNotification *)notification {
NSDictionary * userInfo = [notification userInfo];
NSString *content = [userInfo valueForKey:@"content"];
NSString *messageID = [userInfo valueForKey:@"_j_msgid"];
NSDictionary *extras = [userInfo valueForKey:@"extras"];
NSString *customizeField1 = [extras valueForKey:@"customizeField1"]; //服务端传递的 Extras 附加字段,key 是自己定义的
}
此代码块在浮窗中显示
文档内容是否对您有帮助?