Create a Marketing Score
This document guides users on how to create a marketing score in the Jiguang console.
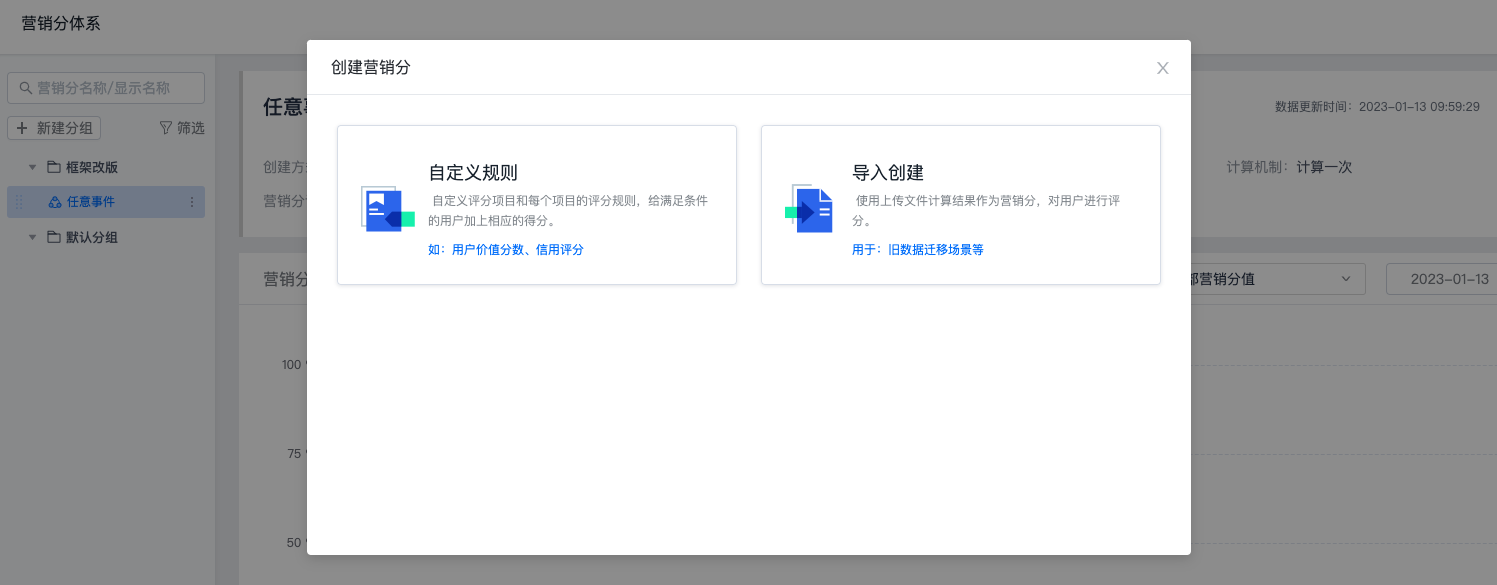
Select Creation Method
Currently, custom rule creation and import creation are supported. Go to [Marketing Center] - [App Marketing Score] - [Marketing Score System], and click "Create Marketing Score" to select a creation method.
- Customize scoring items and scoring rules for each item, and add corresponding scores to users who meet the conditions. Examples: user value score and credit score.
- Import creation: use calculation results from an uploaded file as the marketing score to score users. This is used for scenarios such as old data migration.
Basic Information Settings
Fill in the marketing score display name, marketing score name, marketing score group, marketing score status, and description.The marketing score name supports uppercase and lowercase letters, numbers, underscores, and symbols, such as
open_APP. It cannot be changed after setting.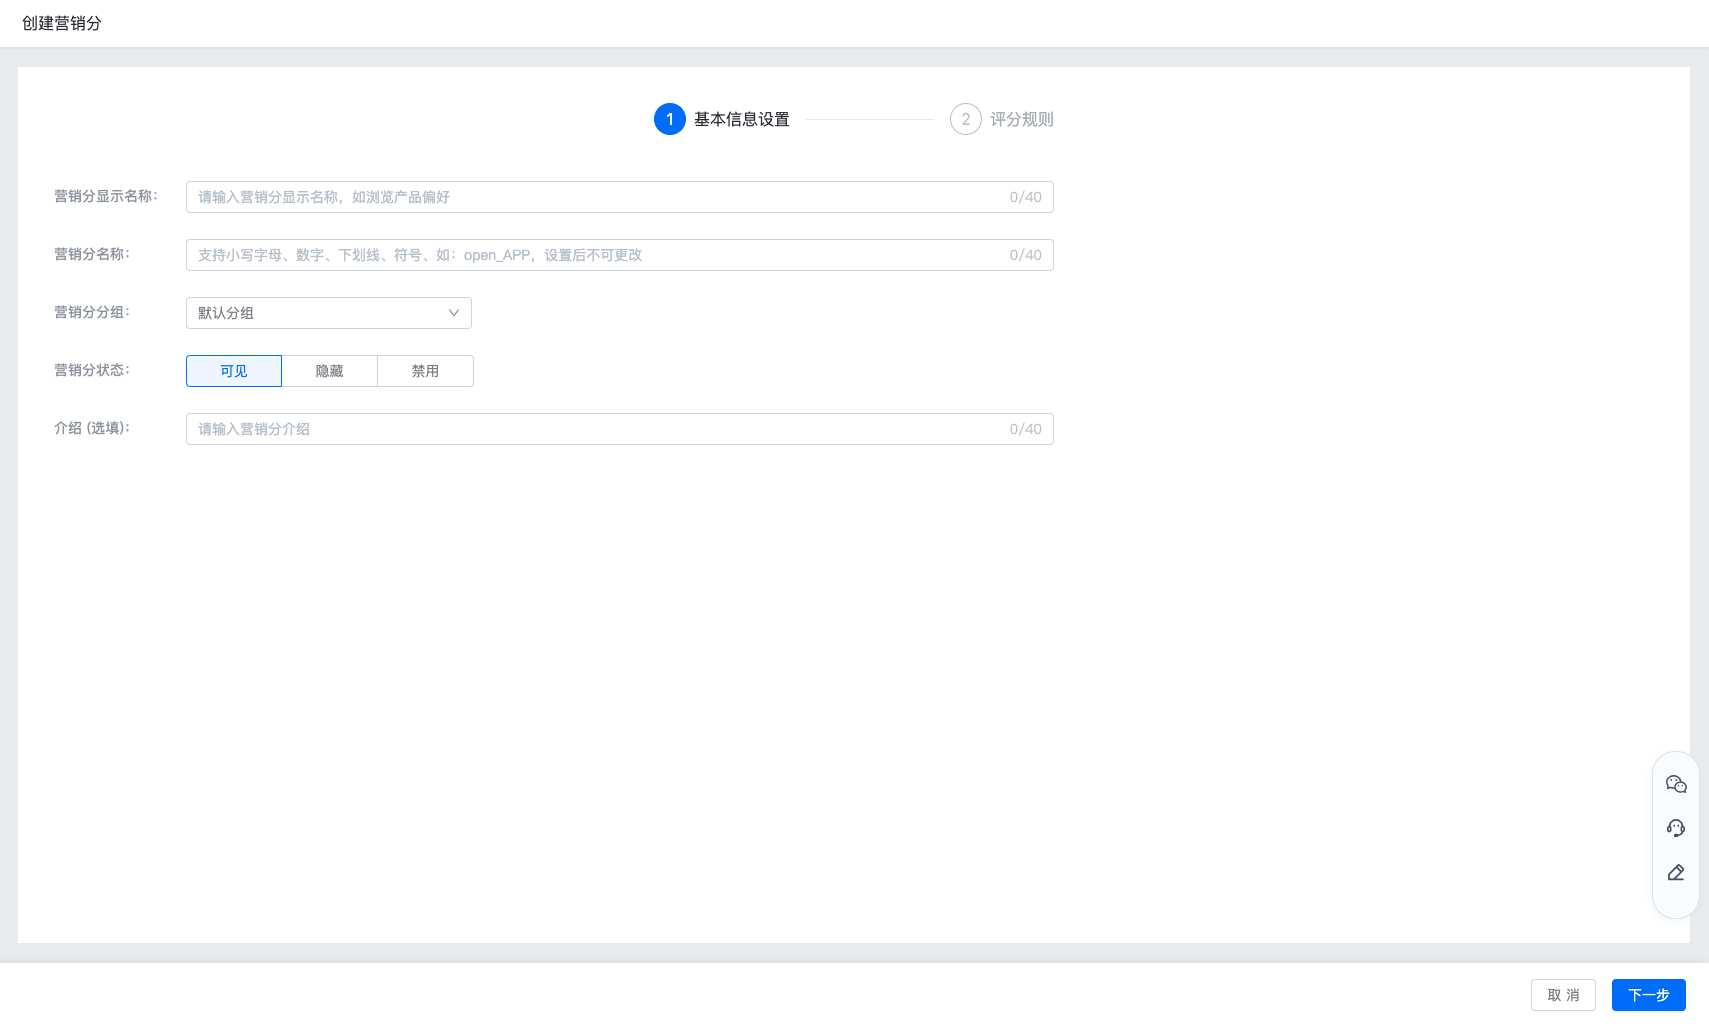
Custom Rule Creation
- On the Create Marketing Score page, select Custom Rule as the creation method.
- Select the calculation mechanism: calculate once, once per day, once every week on day X, or once every month on day XX. The corresponding marketing score type is displayed on the right based on the selected calculation mechanism.
- Dynamic marketing score: a marketing score calculated routinely.
- Static marketing score: a marketing score calculated only once.
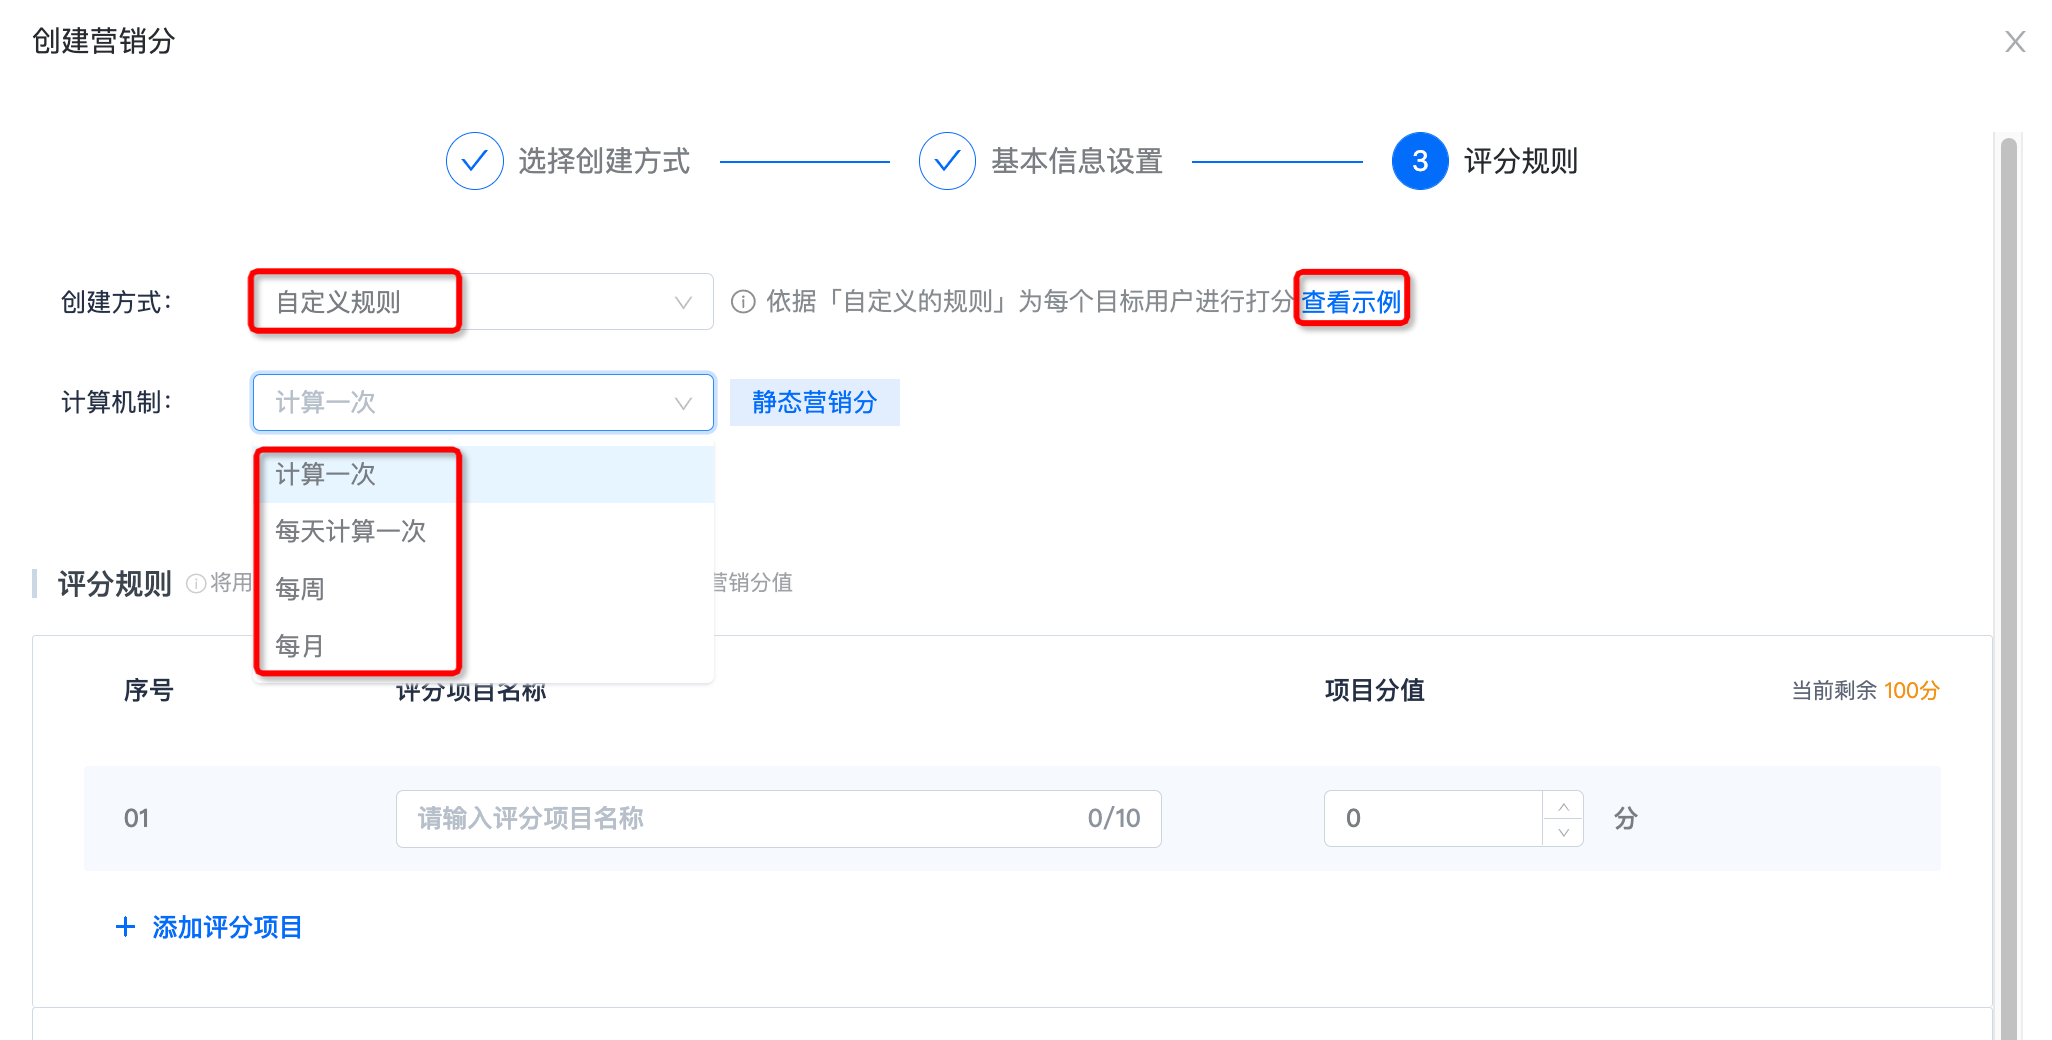
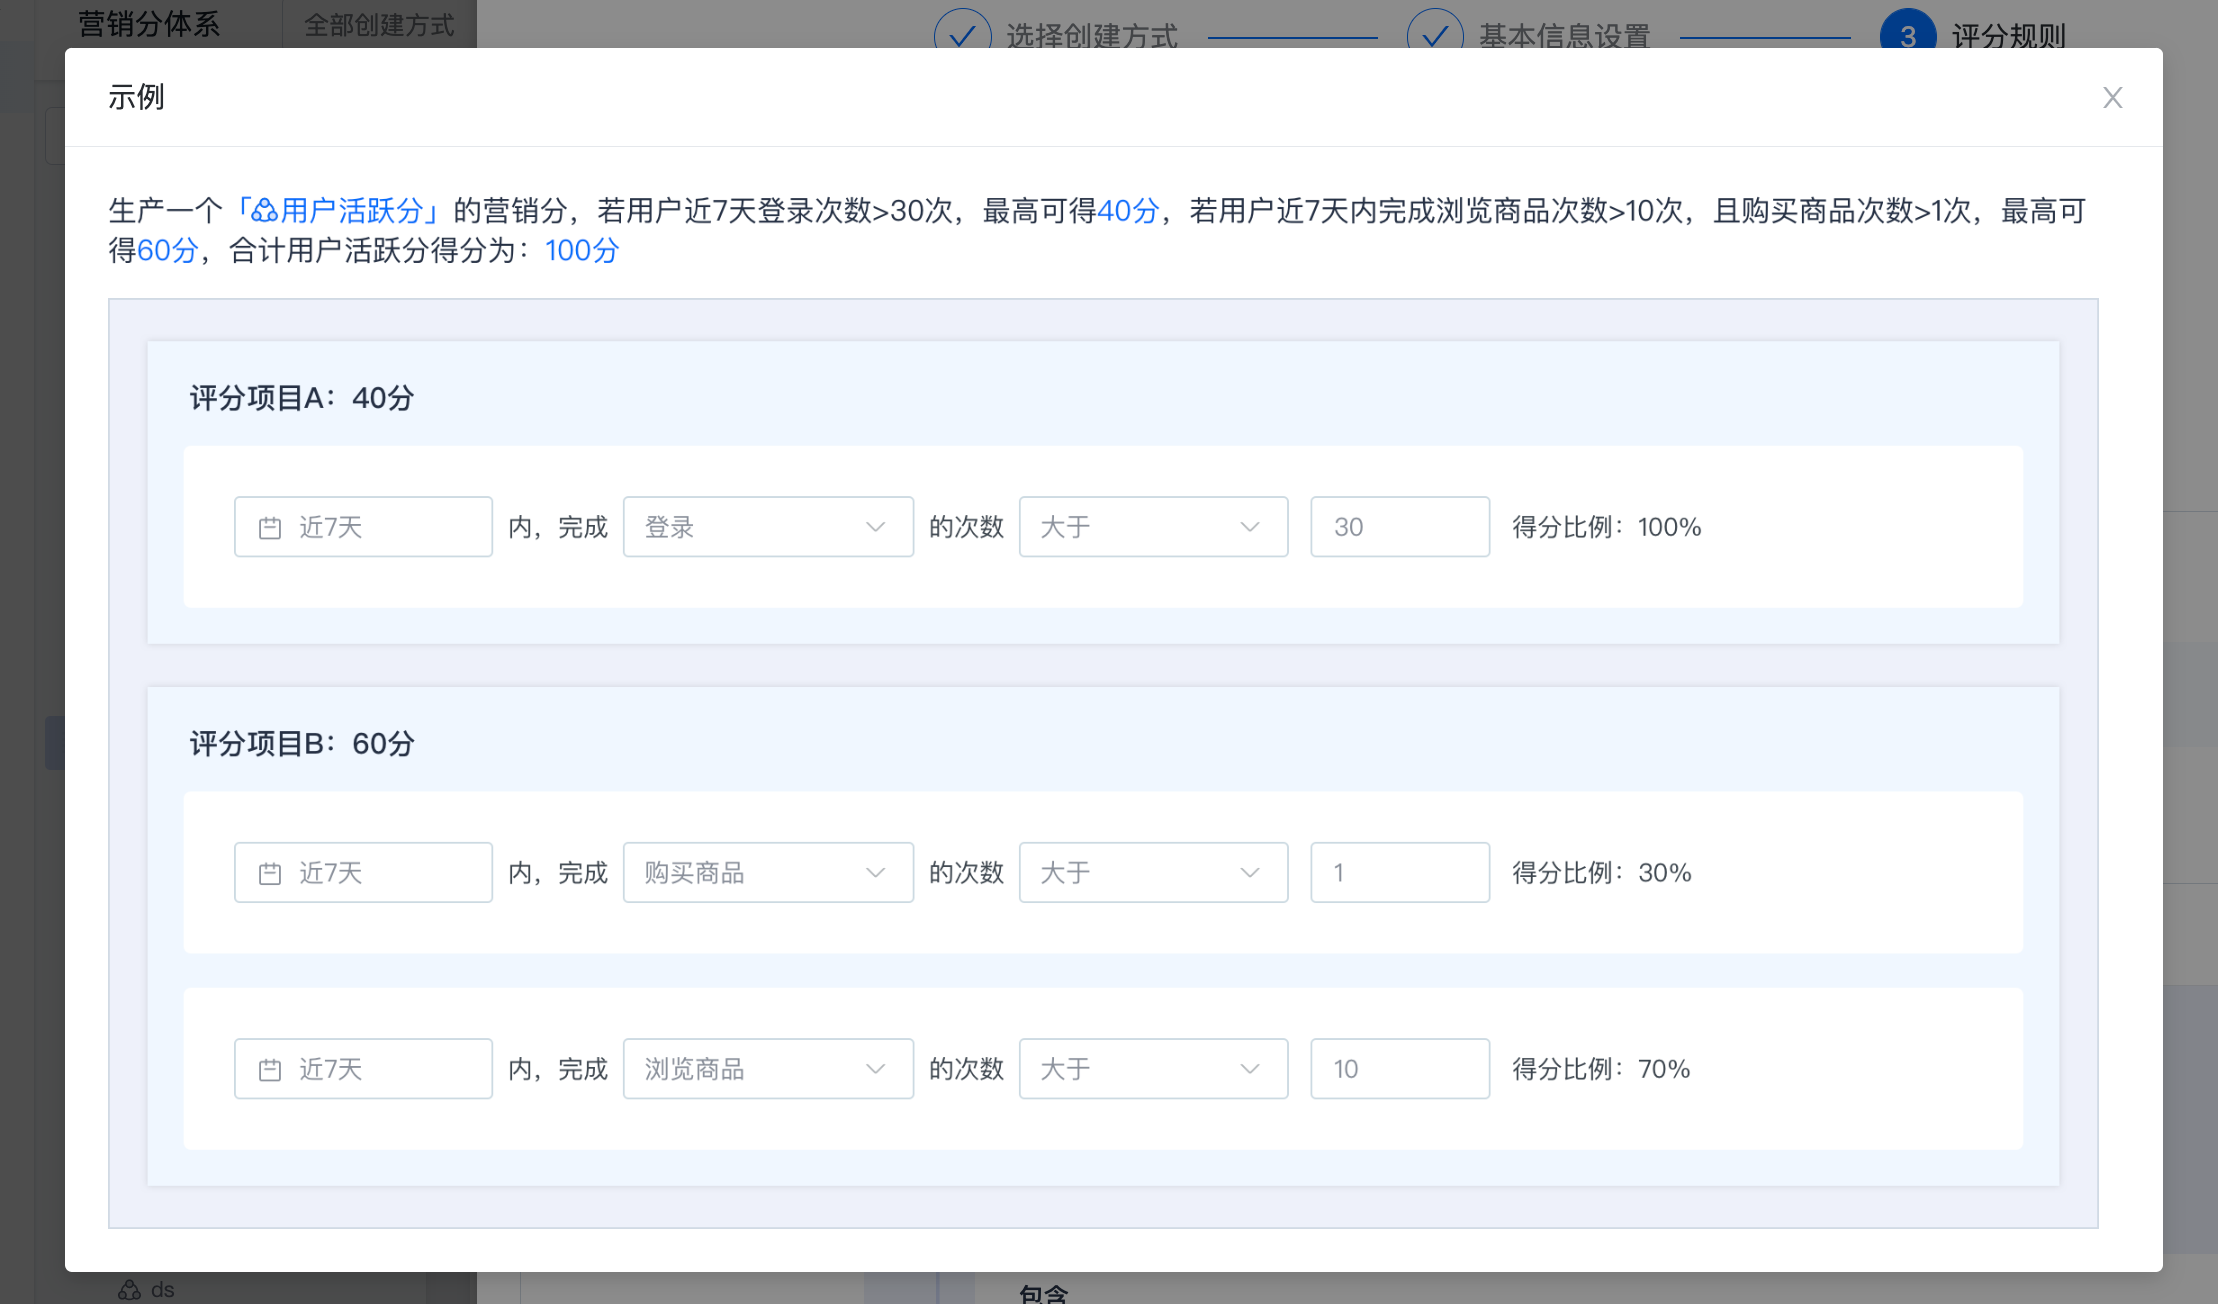
- Click "View Example". The display is as follows:
- Add scoring items and scoring rules.
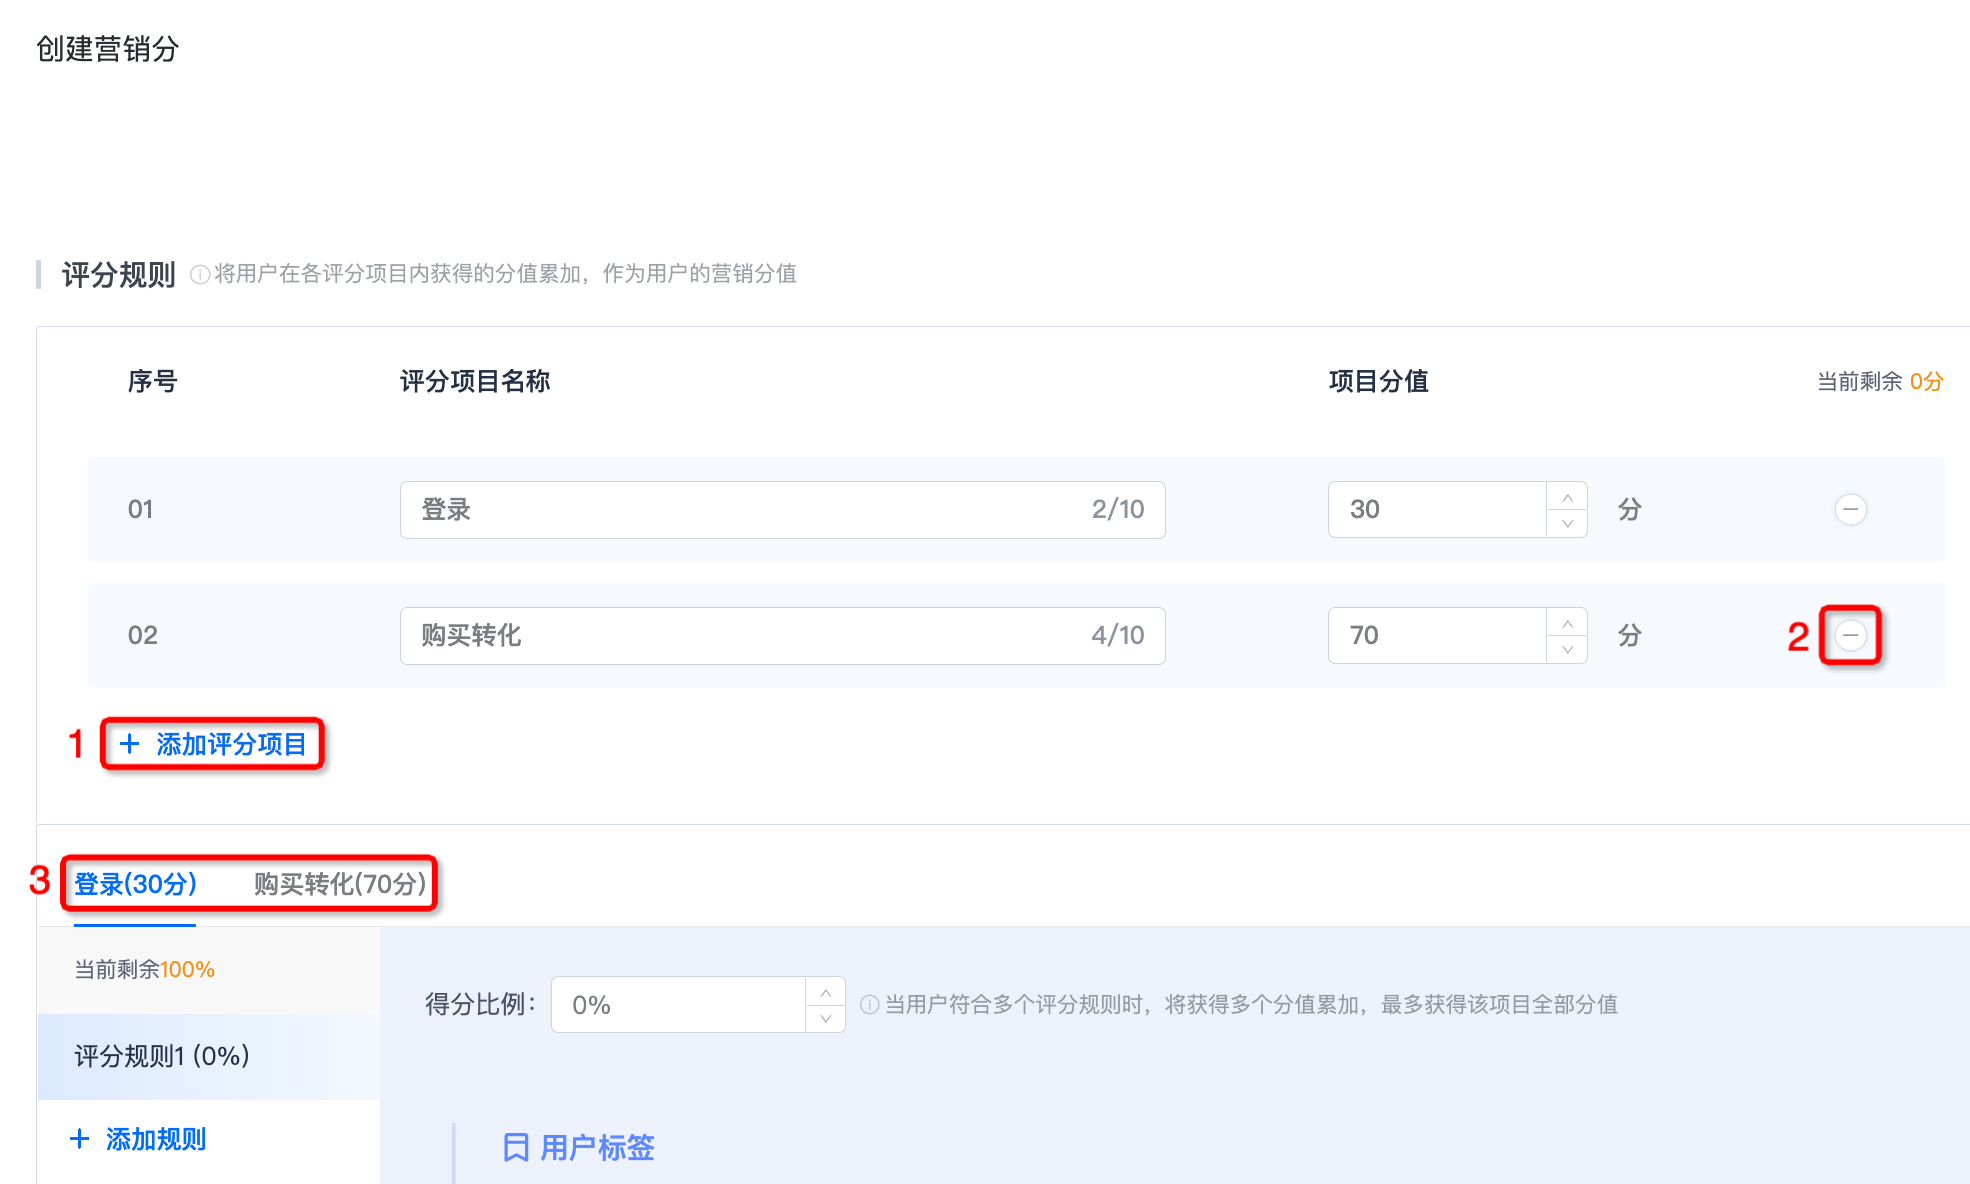
Add Scoring Items
A marketing score can add up to 5 scoring items. The total score of all scoring items must be 100 points. Only integer input from 1 to 100 is supported.
Click position 1 to add a scoring item, and fill in the scoring item name and item score.
Click position 2 to delete a scoring item.
Added scoring items and their scores are displayed at position 3.
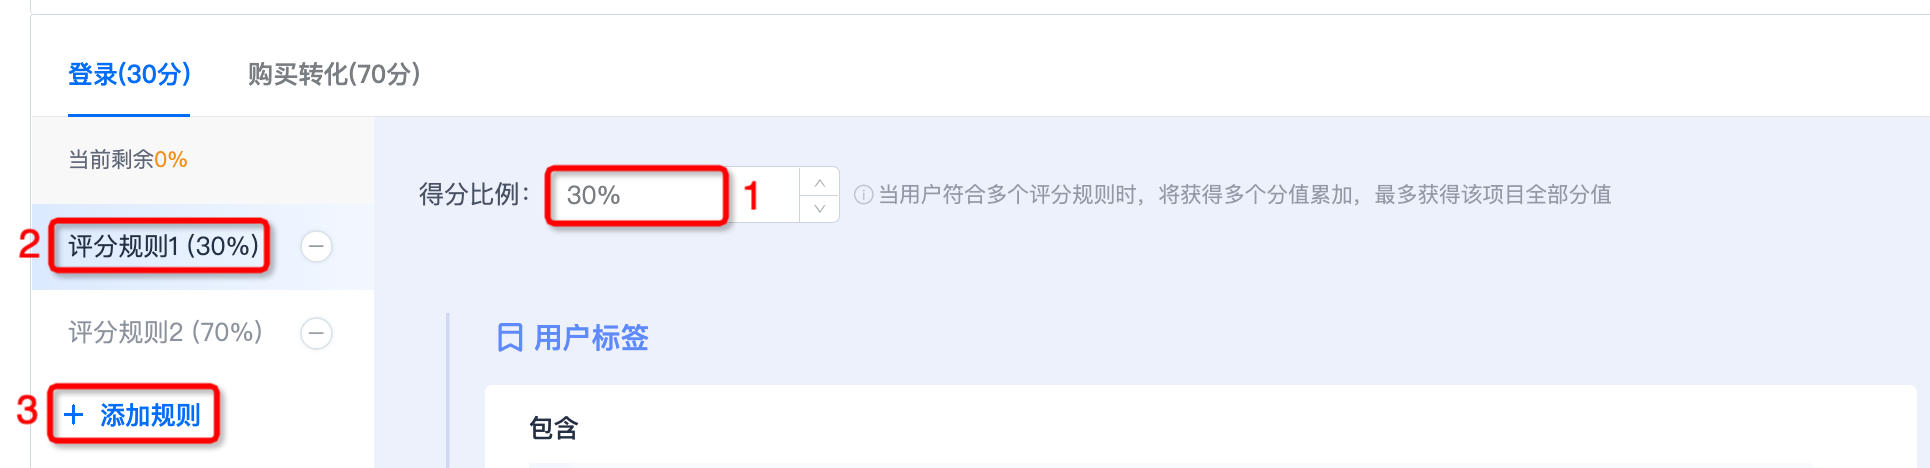
Add Rules
Fill in the ratio of the current scoring rule at position 1, and the currently set ratio is automatically displayed at position 2.
Click "Add Rule" at position 3 to add rules. Each scoring item can add up to 5 scoring rules, and the total score ratio of all rules in this item must be 100%.
Set Rules
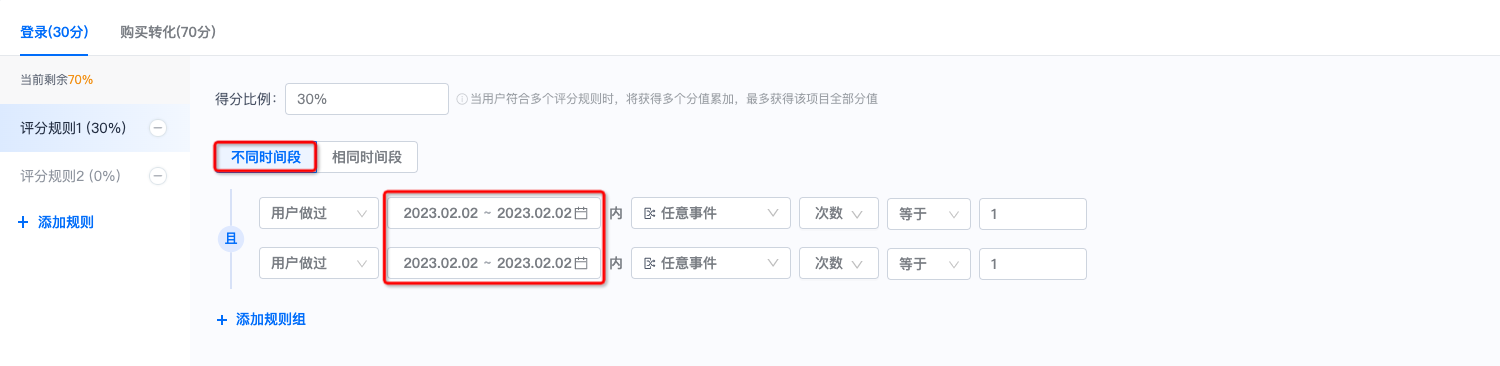
Set Rule Time Period
Different time periods and the same time period are supported. If different time periods are selected, each rule needs to set its time period separately.
Set Rule Group Content
At position 1, you can select the user identifier: user has done, user has not done, or user feature.
If user has done/user has not done is selected at position 1, the options at position 2 are user events.
If user feature is selected at position 1, the options at position 2 are user attributes, user segments, and user labels.

Click position 3 to add filter conditions. Selecting event attributes, user attributes, user segments, and user labels is supported.
Click "Add" at position 4 to add a rule.
After adding a rule, the intersection/union relationship of the new rule is added at position 5. Click "AND" to switch the intersection/union relationship of rules.
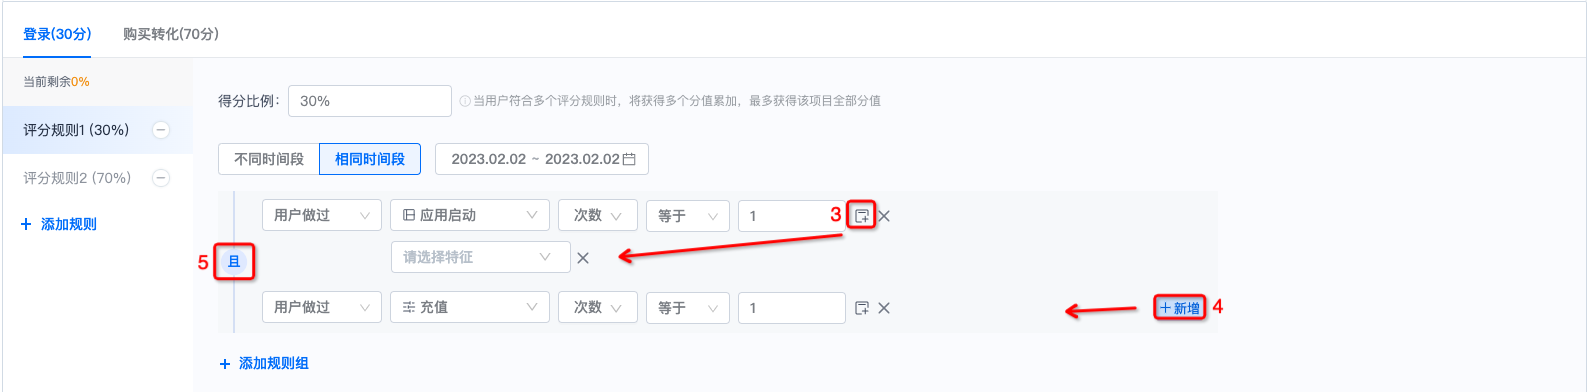
Click "Add Rule Group" at position 6 to add a rule group, as shown at position 7.
After adding a rule group, the intersection/union relationship of the new rule group is added at position 8. Click "AND" to switch the intersection/union relationship.

Complete Creation
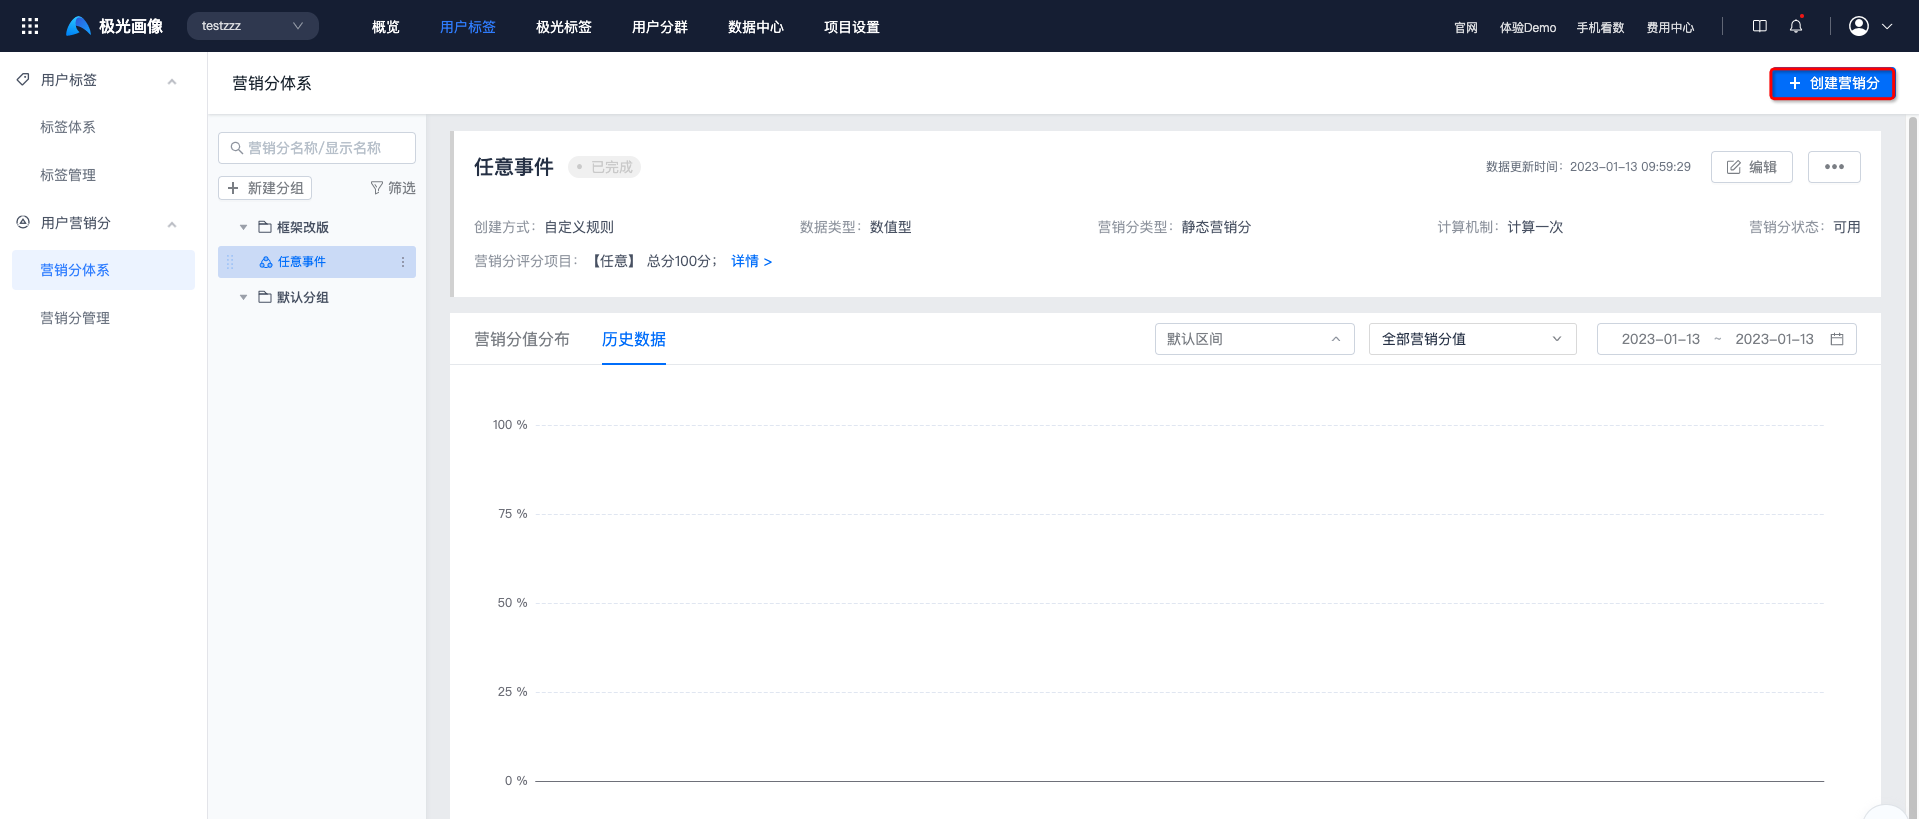
After conditions have been added to the scoring rules of each scoring item, click "Save" to complete creation. The creation method is displayed as Custom Creation. After calculation is complete, the marketing score distribution and historical data are displayed.

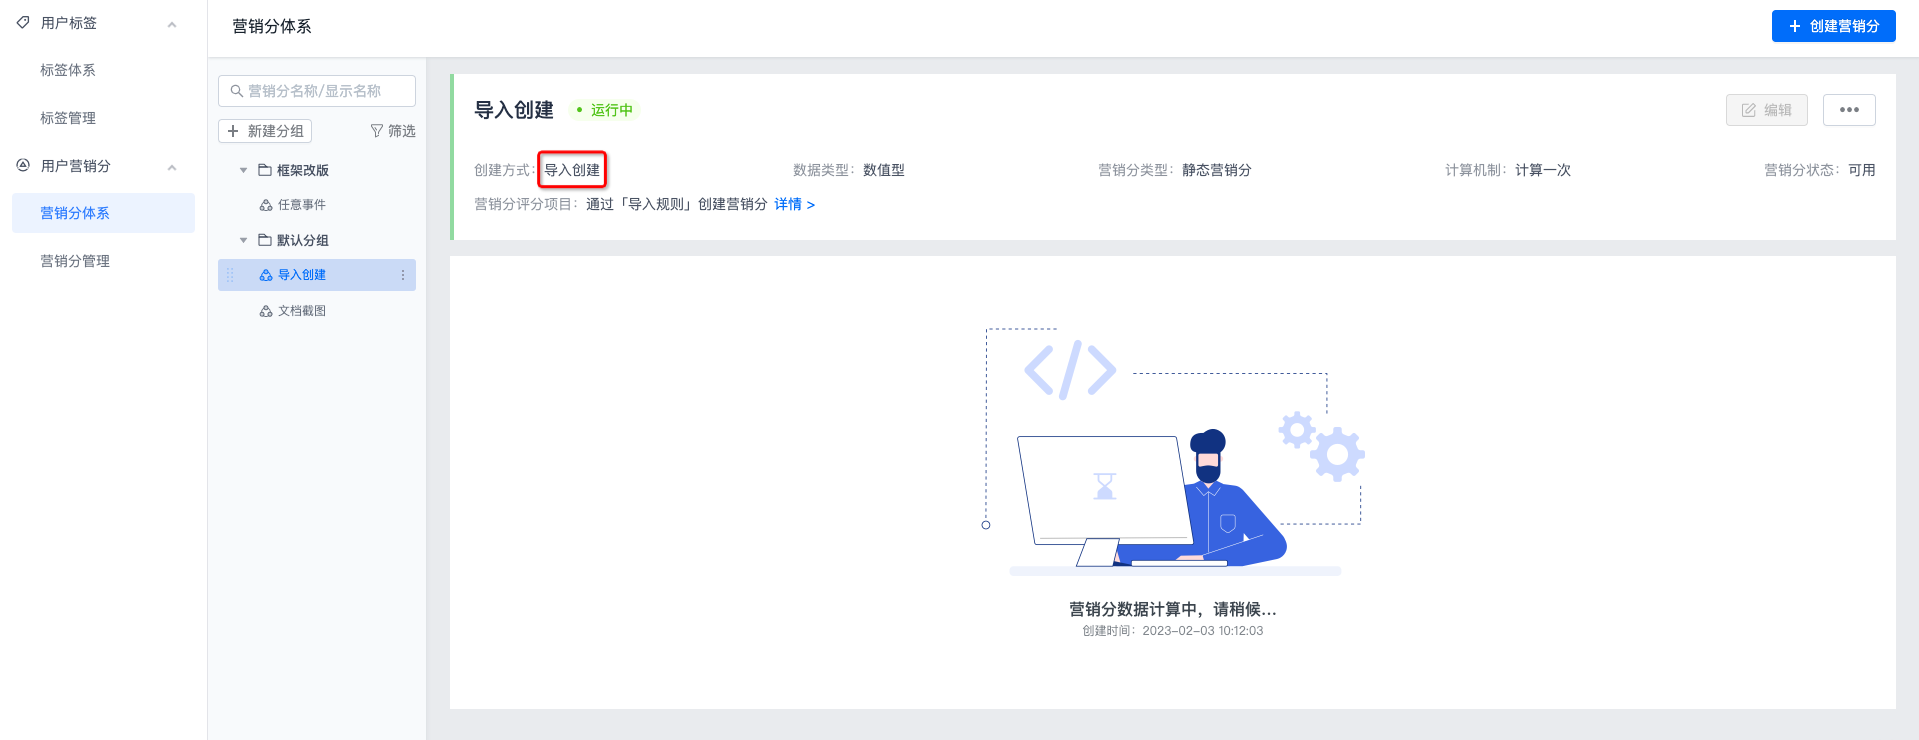
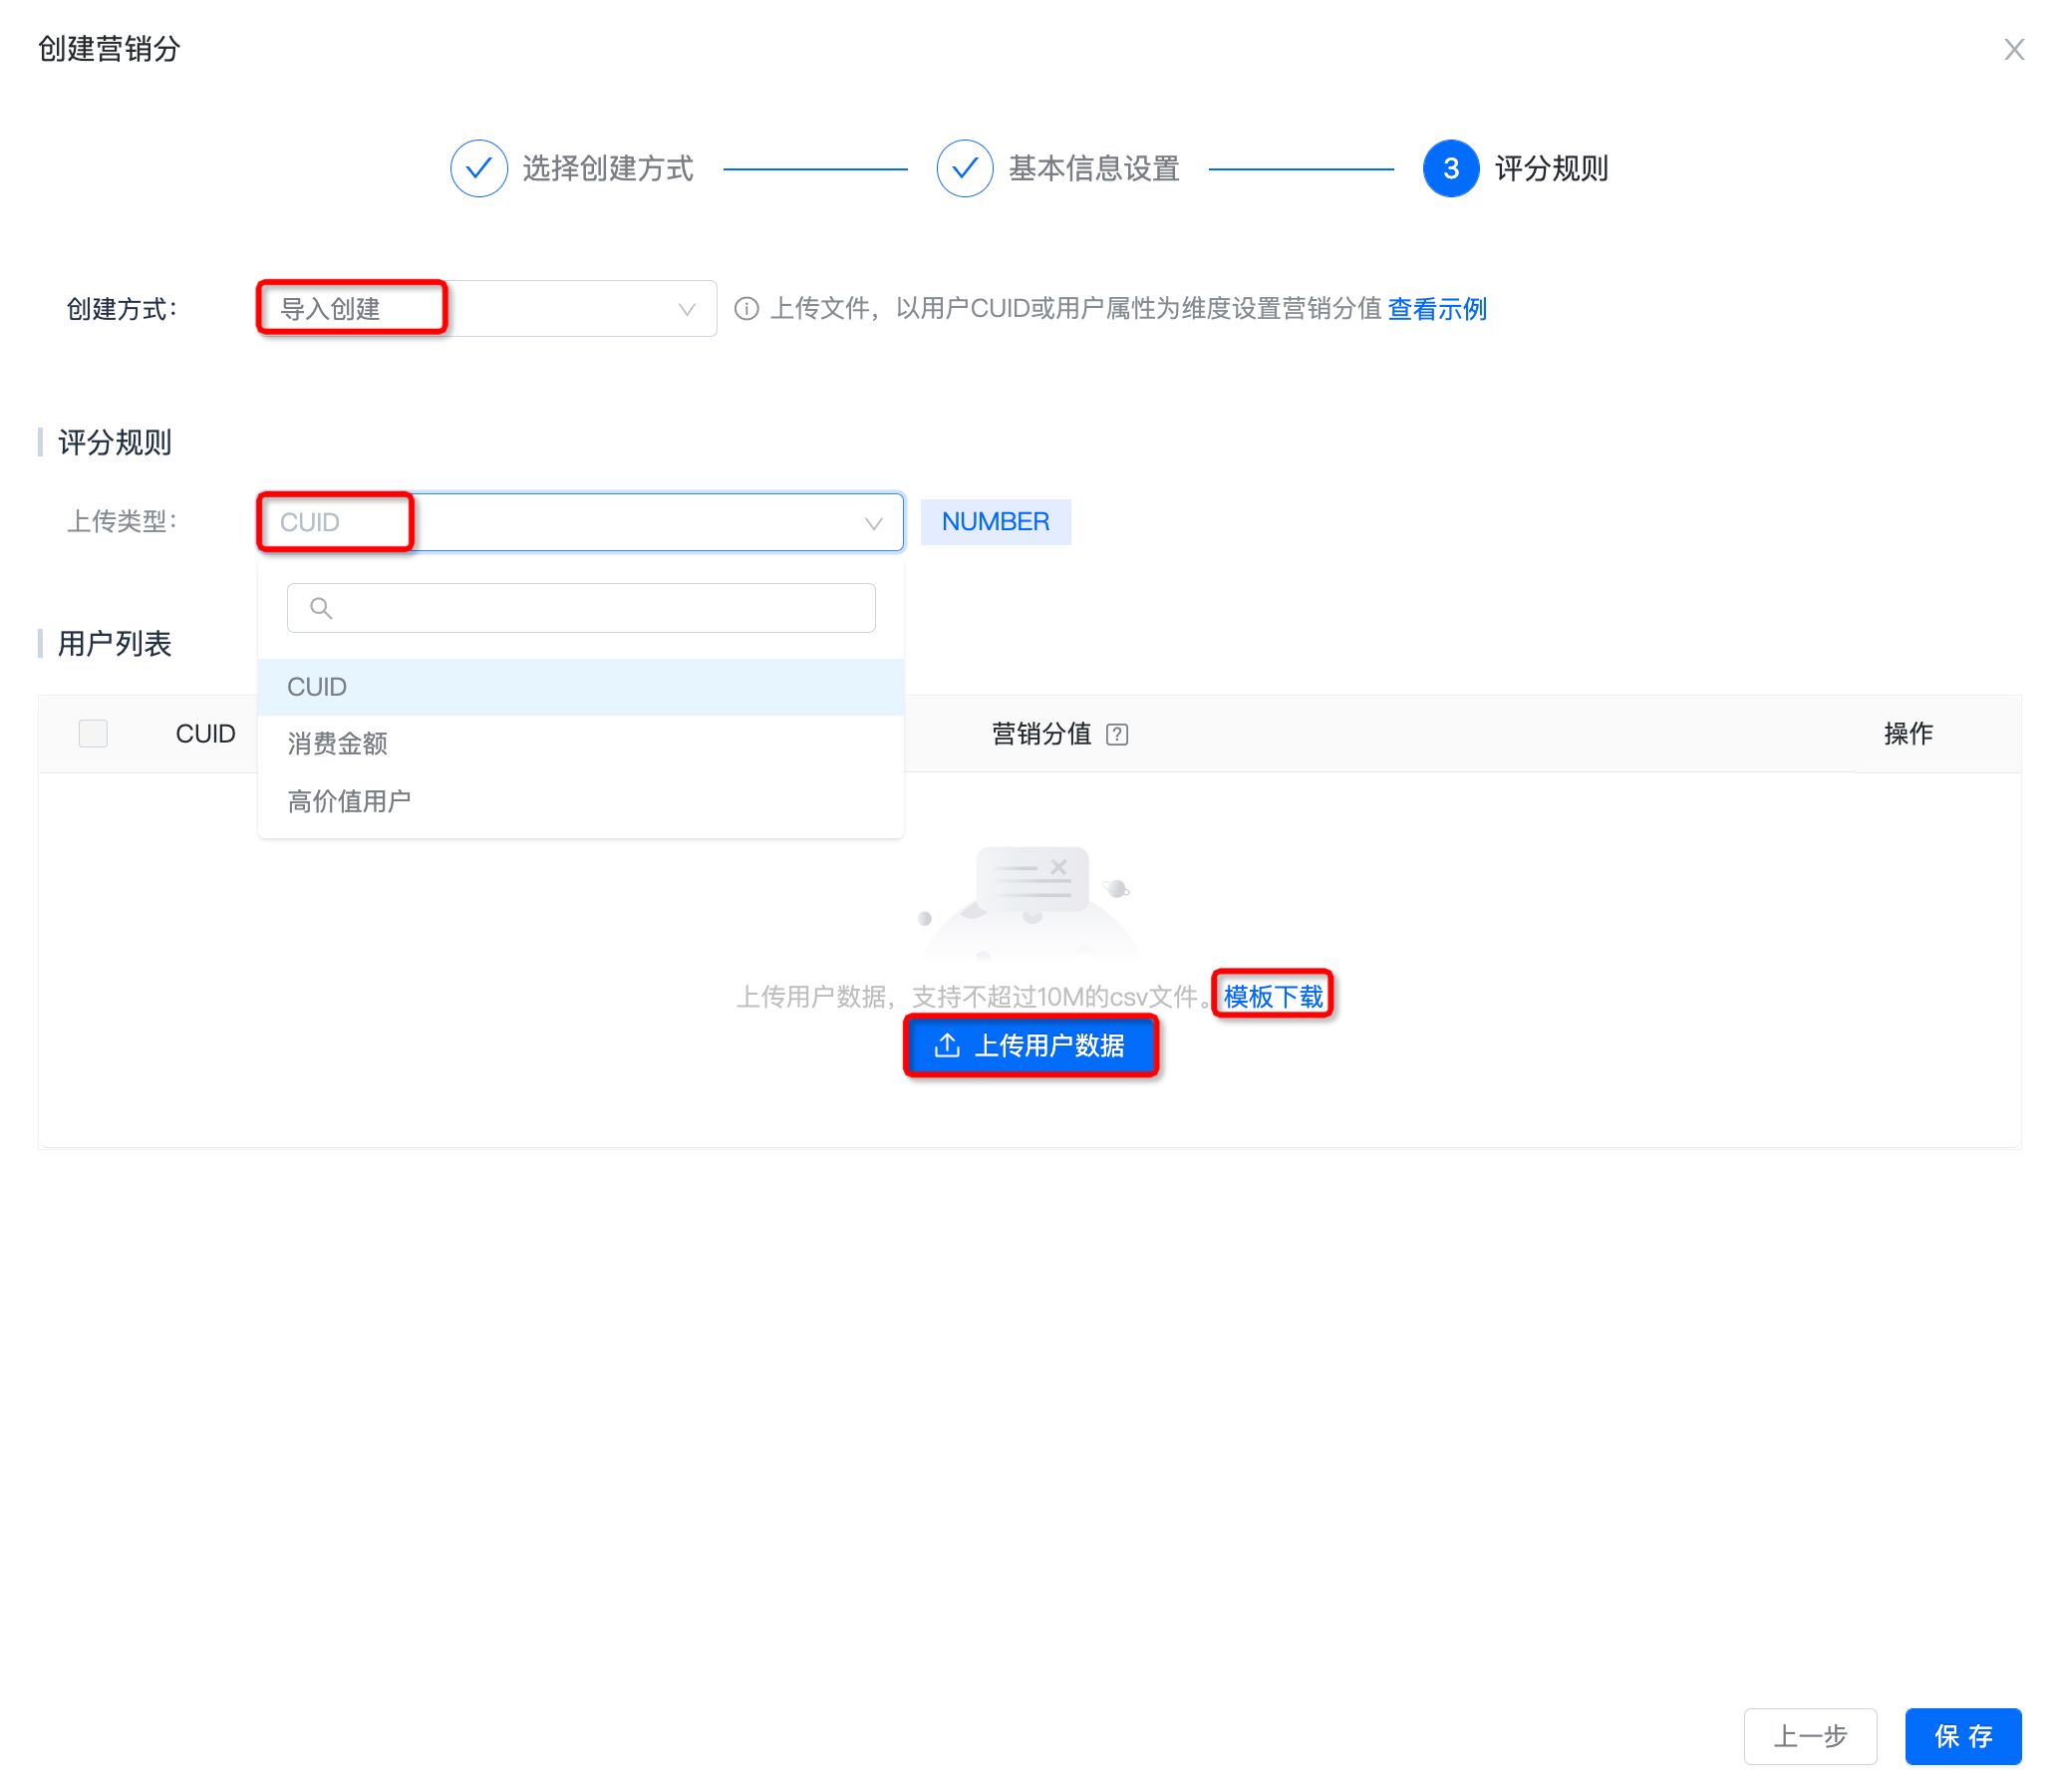
Import Creation
Set marketing score values by uploading a file, using user CUID or user attributes as the dimension. Click "View Example"; details are as follows:

Upload File
On the Create Marketing Score page, select "Import Creation" as the creation method.
Select CUID or one user attribute as the upload type.
Click "Download Template" to obtain the template corresponding to the upload type.
Fill in user data based on the downloaded template, and click "Upload User Data".
If the marketing score value field is empty or the data type does not match, it is discarded as invalid data.
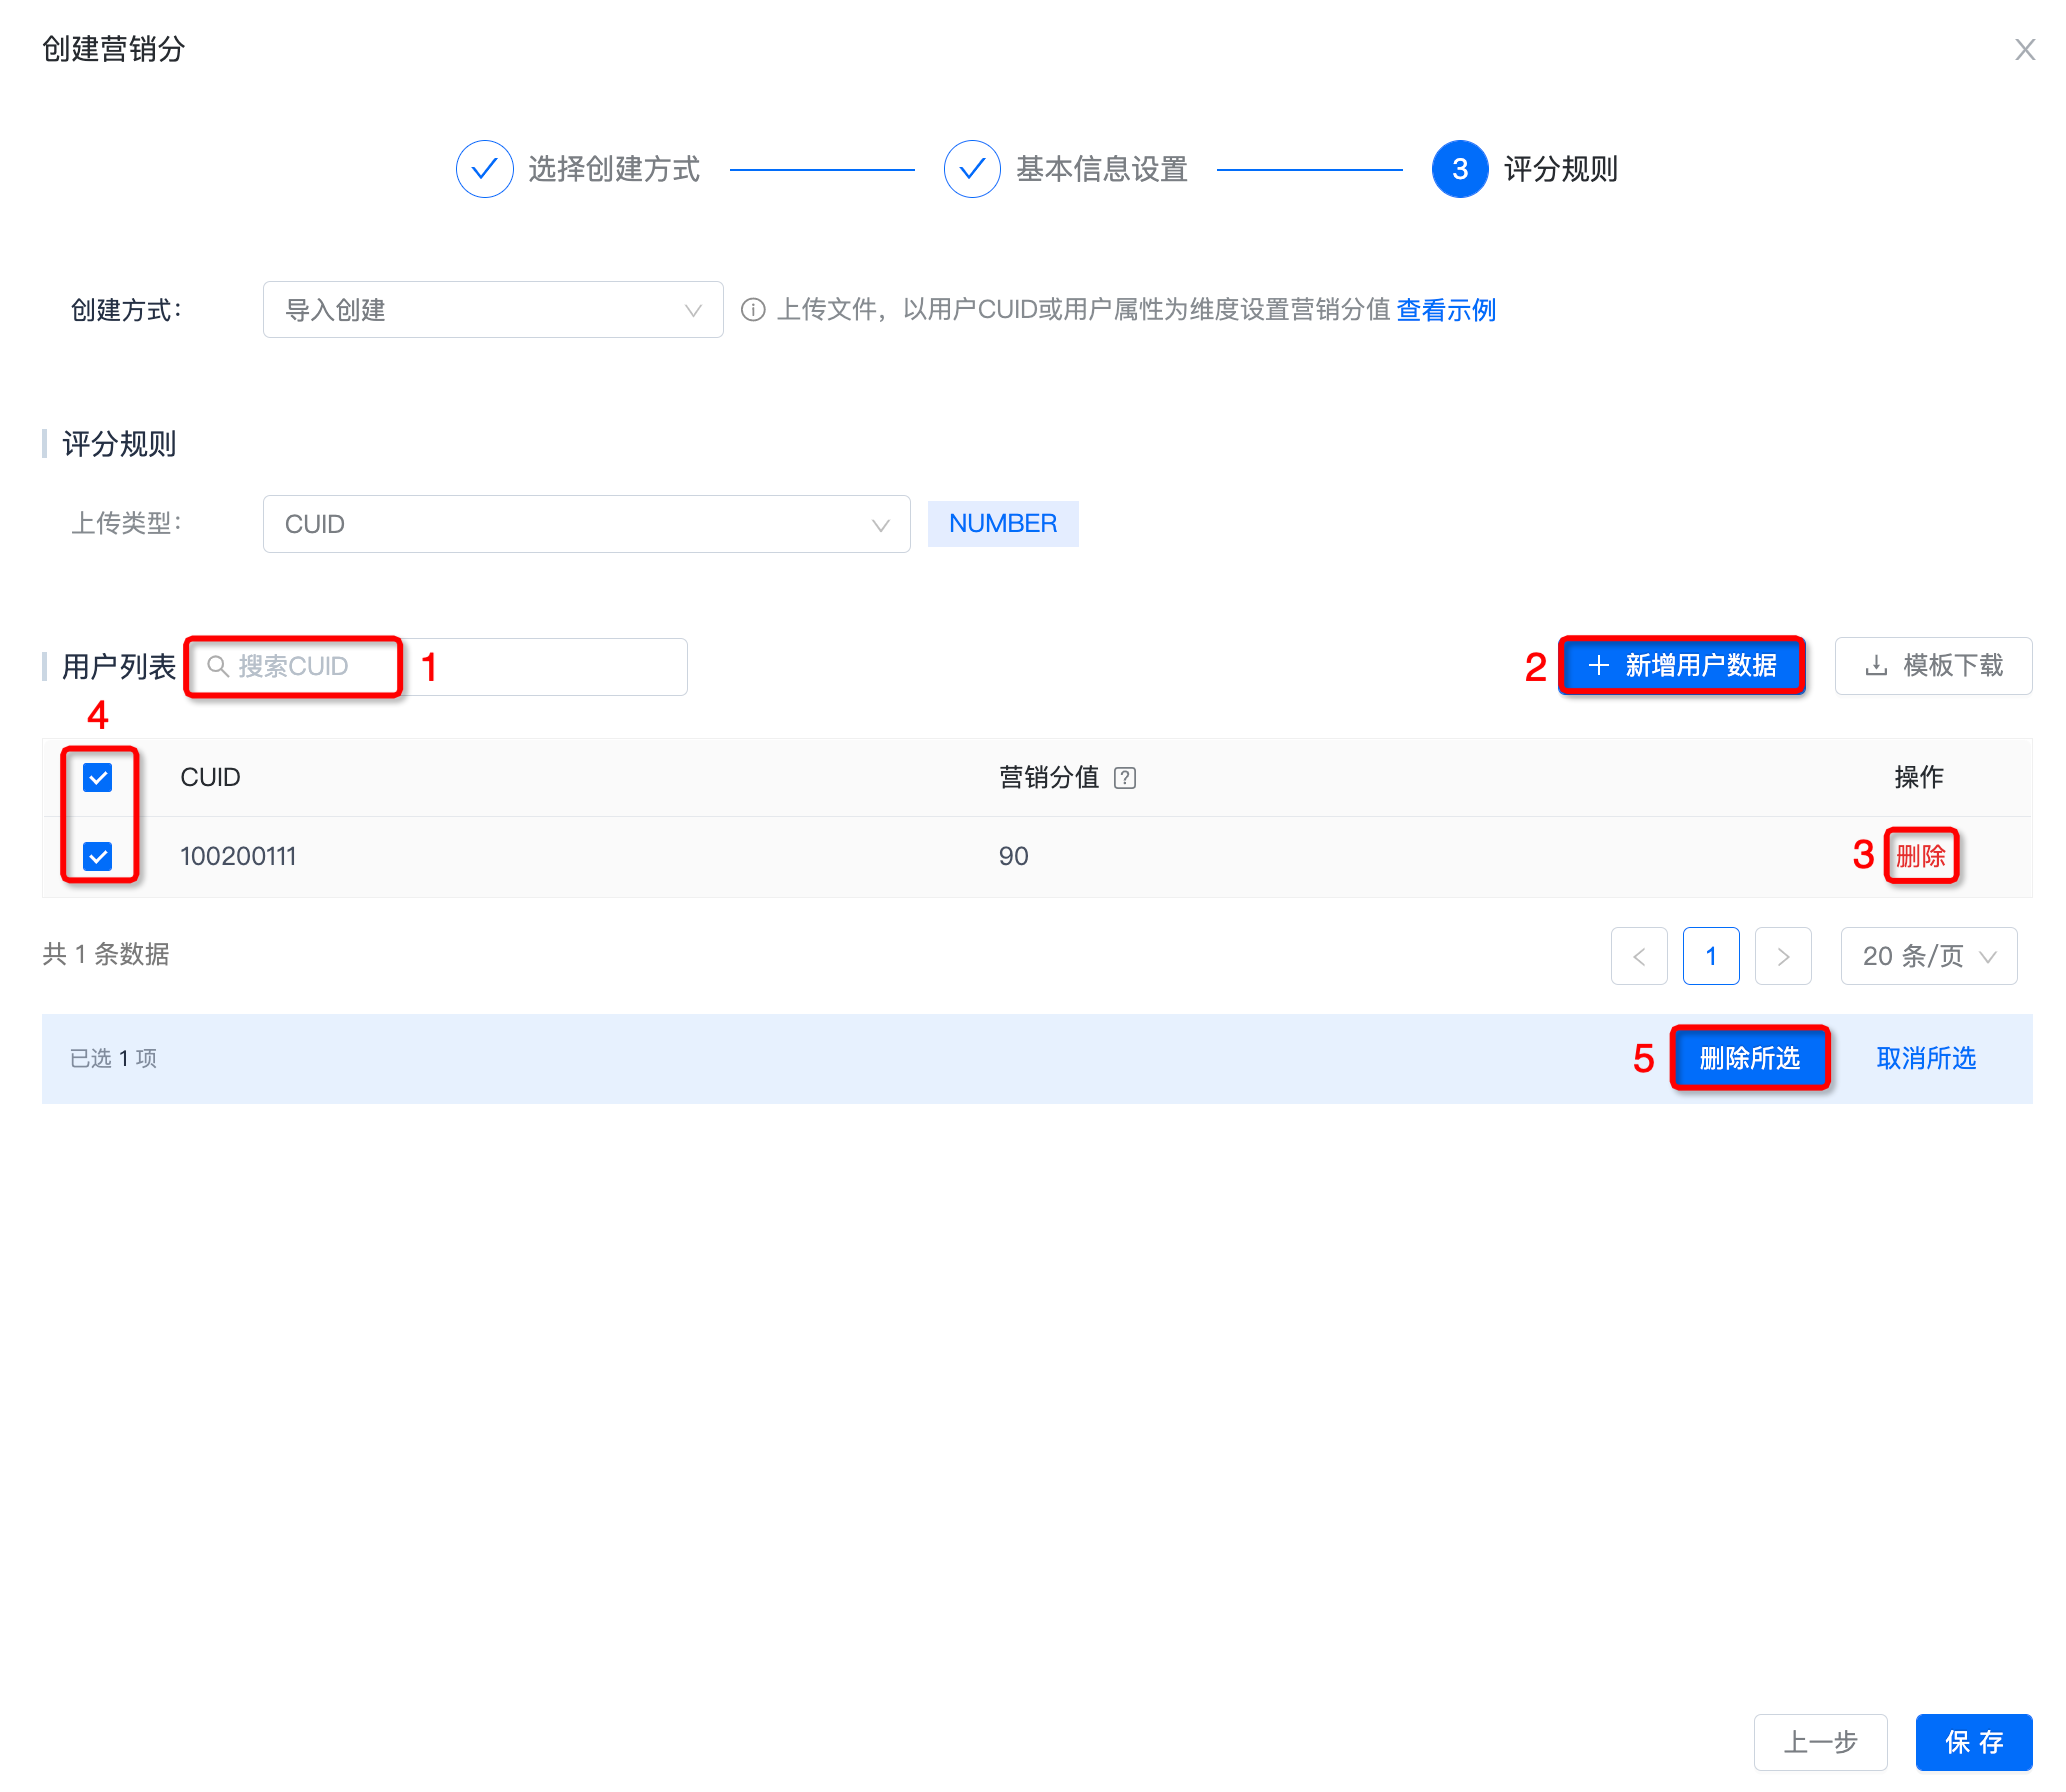
User List Management
Taking CUID as the upload type as an example, after uploading data, you can search by CUID at position 1.
Click "Add User Data" at position 2 to continue uploading files. Up to 1 million records can be uploaded.
To delete a user record, click "Delete" at position 3 to delete it immediately.
Batch deletion of user records is supported. Select the user records to delete at position 4, then click "Delete Selected" at position 5 to delete them immediately.
Complete Creation
Click "Save" to complete creation. The creation method is displayed as Import Creation. After calculation is complete, the marketing score distribution and historical data are displayed.