
从 0 集成运营增长 Andoird SDK
1、环境准备
集成时默认开发者具备基本的 Android 开发能力,至少要求能够安装基础的 Android 开发环境,以及能够正常的在 Android Studio 上创建并运行空项目。
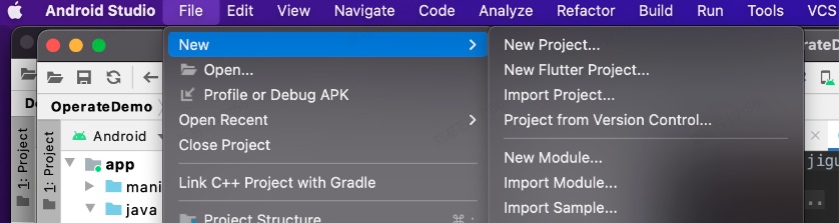
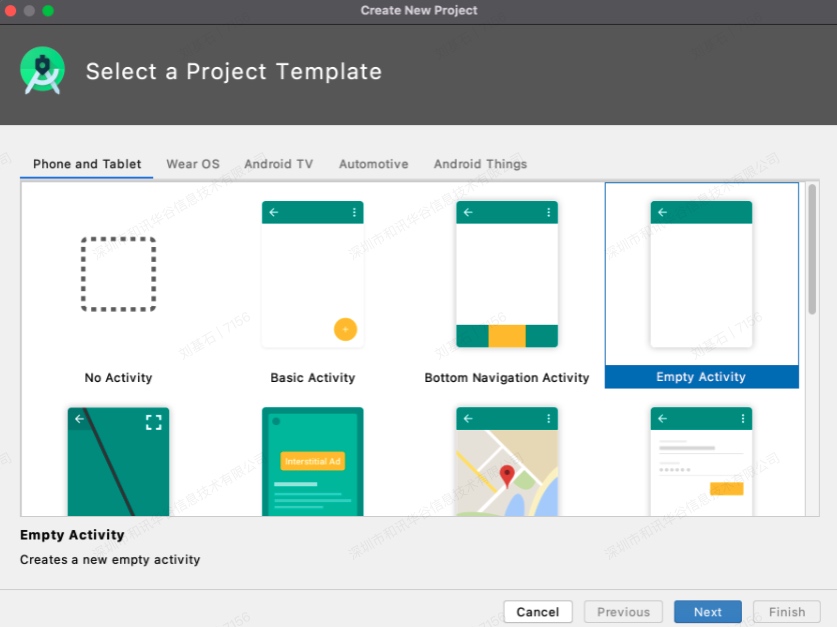
2、创建一个新的项目
打开 Android Studio->File->New->New Project->Next->Next->Finish
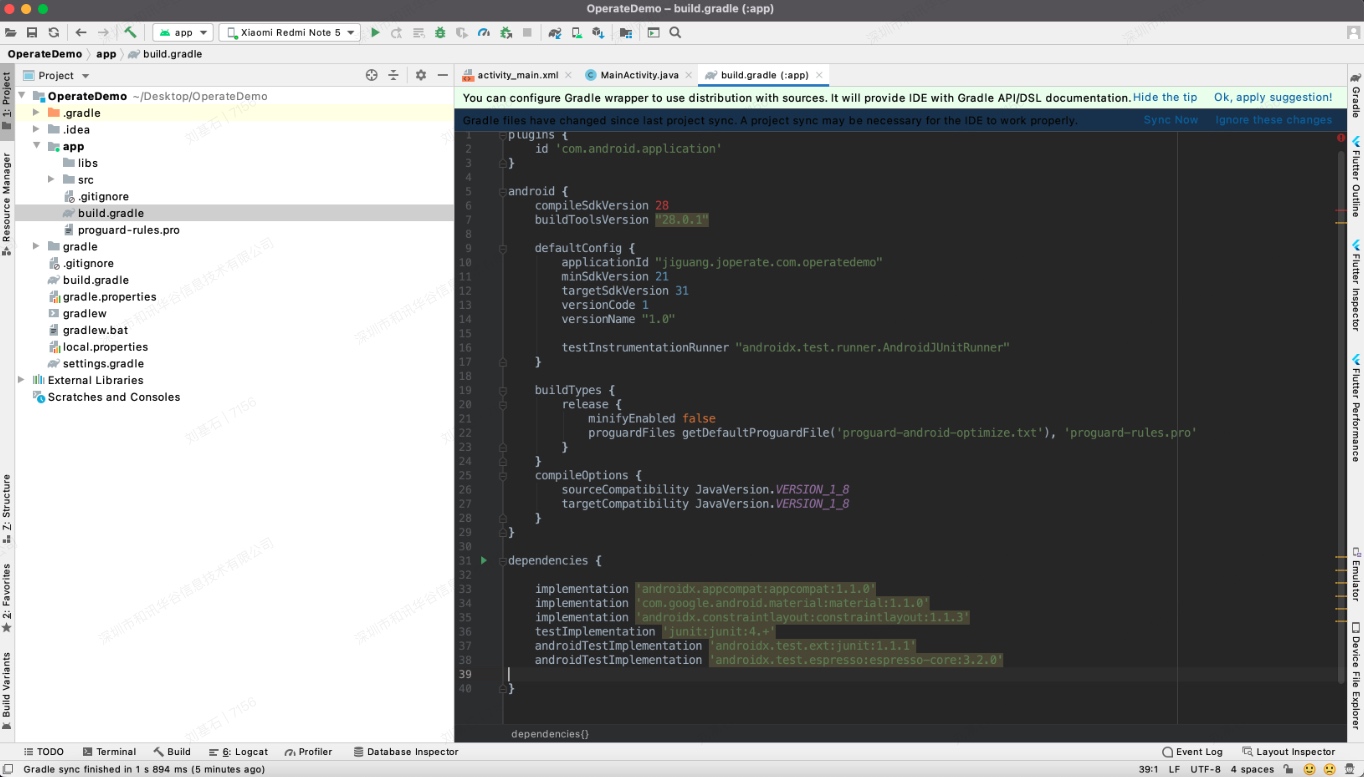
3、使用自动集成功能集成 SDK
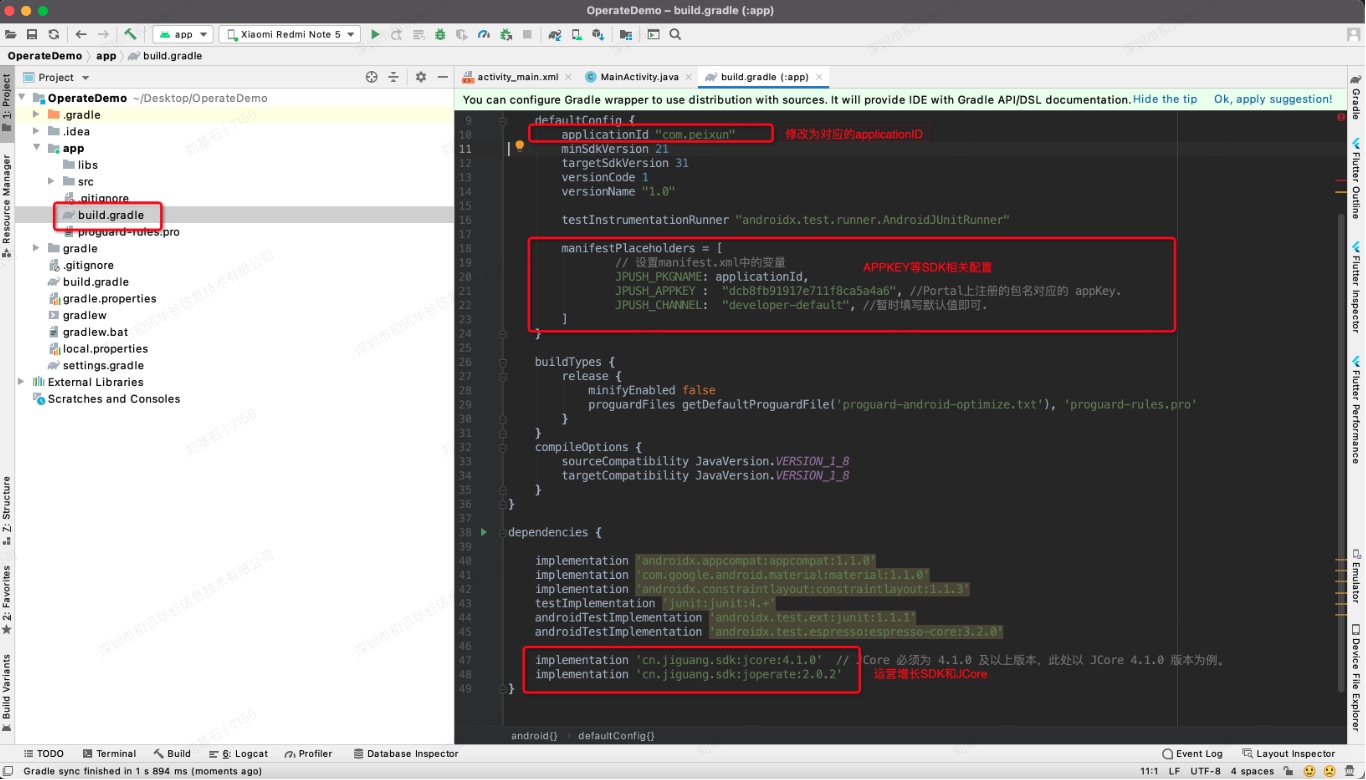
项目创建成功后,我们开始集成 SDK,打 app 文件夹下的 build.gradle 文件,在 dependencies 中增加运营增长 SDK 的依赖。
          dependencies {
......
implementation 'cn.jiguang.sdk:jcore:4.1.0'  // JCore
implementation 'cn.jiguang.sdk:joperate:2.0.2' //JOperate
......
}
将 applicationId 修改为你自在后台创建的 applicationId ,添加 manifestPlaceholders 并填写 AppKey 等相关配置。
          defaultConfig {
    applicationId "com.peixun"  //你在后台创建的 appid
    minSdkVersion 21
    targetSdkVersion 31
    versionCode 1
    versionName "1.0"

    testInstrumentationRunner "androidx.test.runner.AndroidJUnitRunner"
    //AppKey 等相关配置
    manifestPlaceholders = [
            // 设置 manifest.xml 中的变量
            JPUSH_PKGNAME: applicationId,
            JPUSH_APPKEY :  "dcb8fb91917e711f8ca5a4a6", //Portal 上注册的包名对应的 appKey.
            JPUSH_CHANNEL:  "developer-default", //暂时填写默认值即可。
    ]
}
如图所示
配置前:
配置后:
4、在代码中添加 SDK
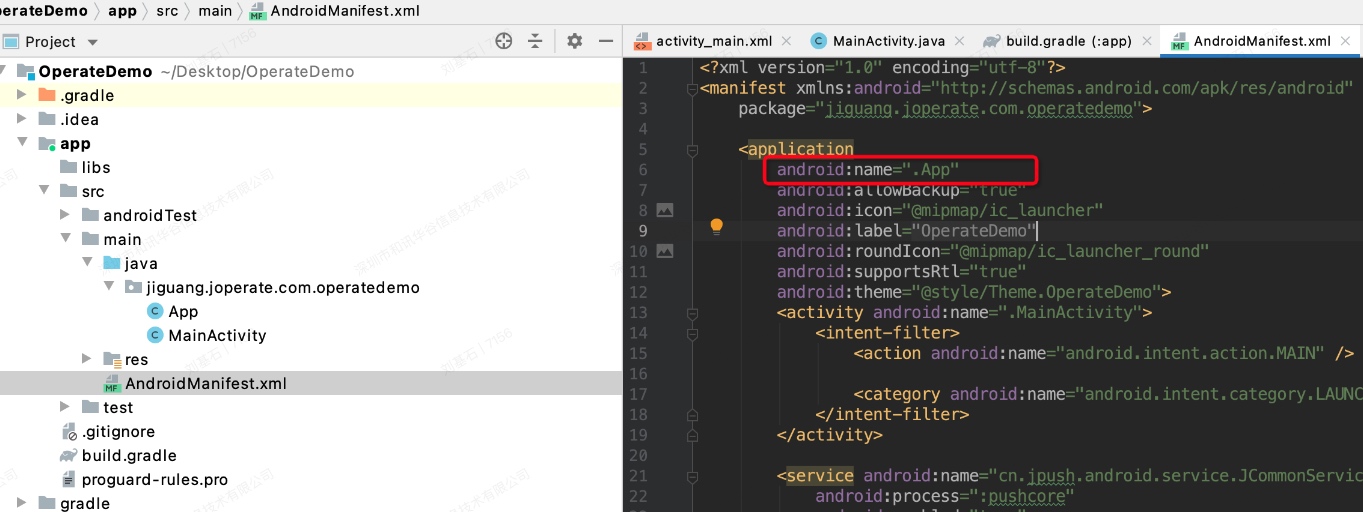
打开 app/src/main/AndroidManifest.xml 文件,添加 service 配置(可选):
          <service android:name="cn.jpush.android.service.JCommonService"
    android:process=":pushcore"
    android:enabled="true"
    android:exported="true">
    <intent-filter>
        <action android:name="cn.jiguang.user.service.action" />
    </intent-filter>
</service>
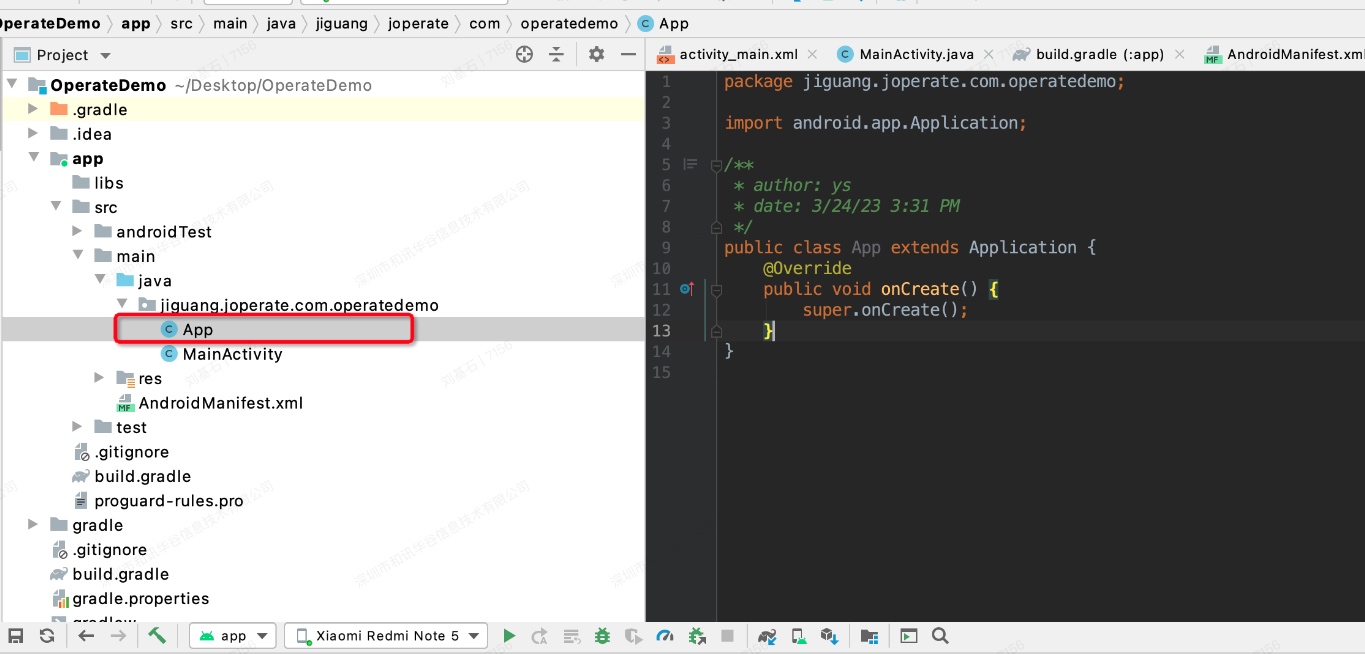
创建 Application 入口(JCore 4.2.0 后为可选,当前演示版本必须要创建),在包中创建 Application 文件并在 AndroidManifest 中配置,如图:
 在 App 中添加极光运营增长 SDK 初始化代码:
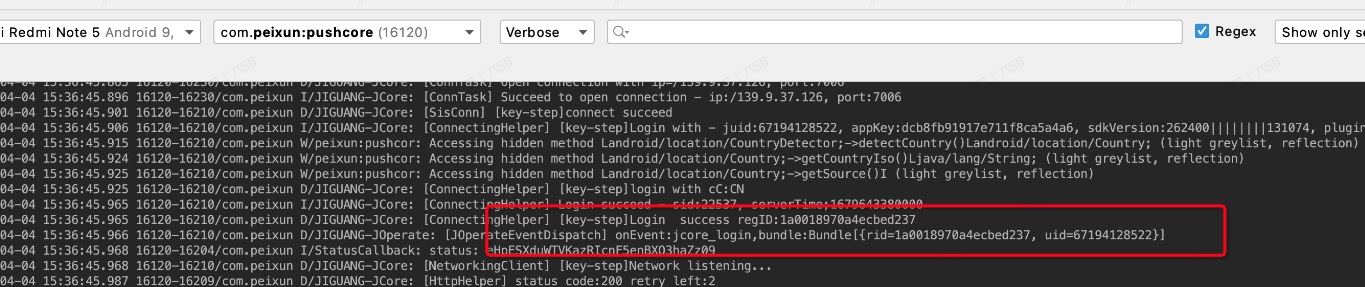
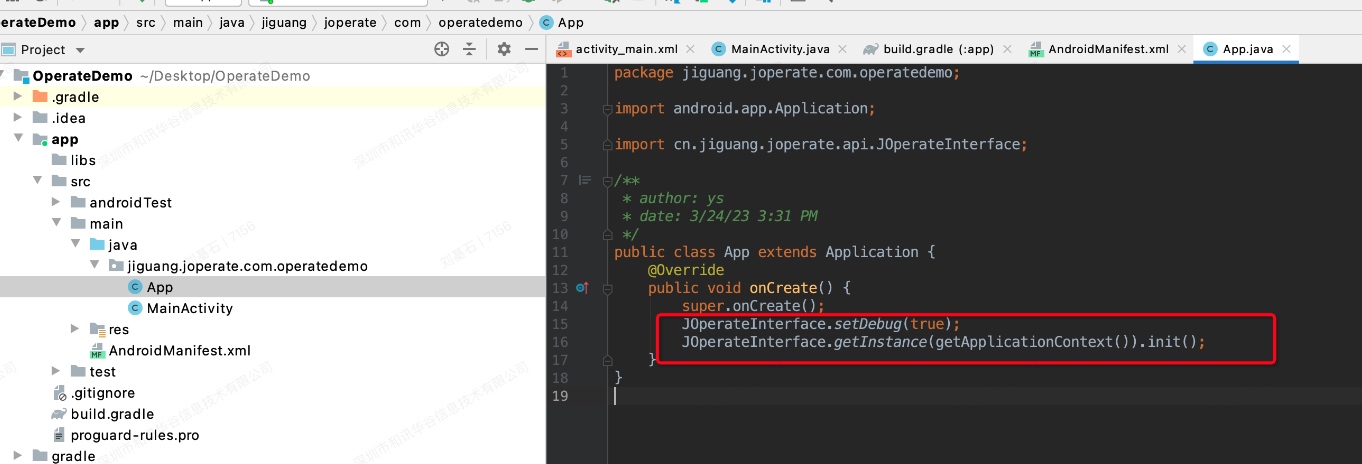 运行应用程序,您已经成功集成了极光运营增长 SDK,在日志中能看到 regID,此时已经成功注册(运营增长的 cuid 日志需要在 JCore 4.2.0 版本后才能看到)。
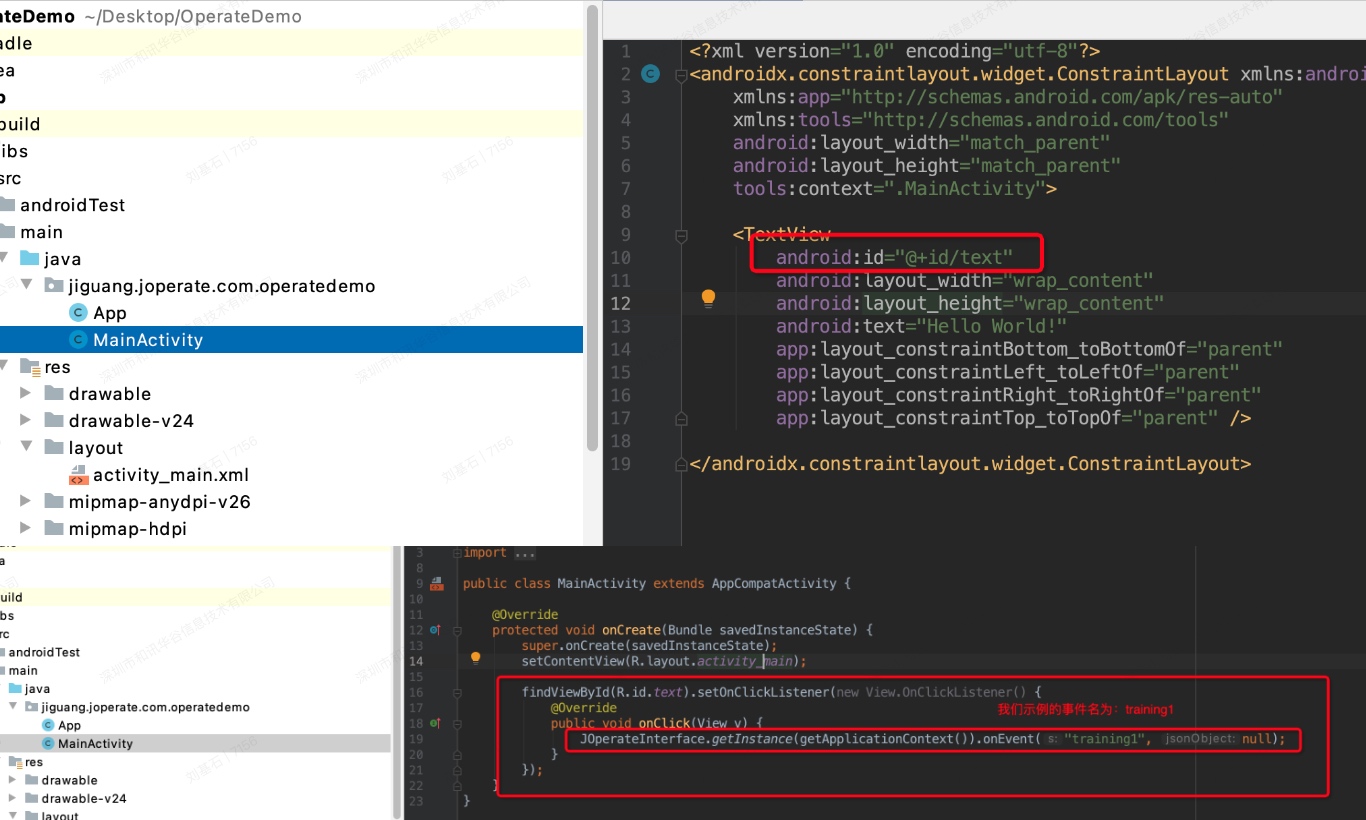
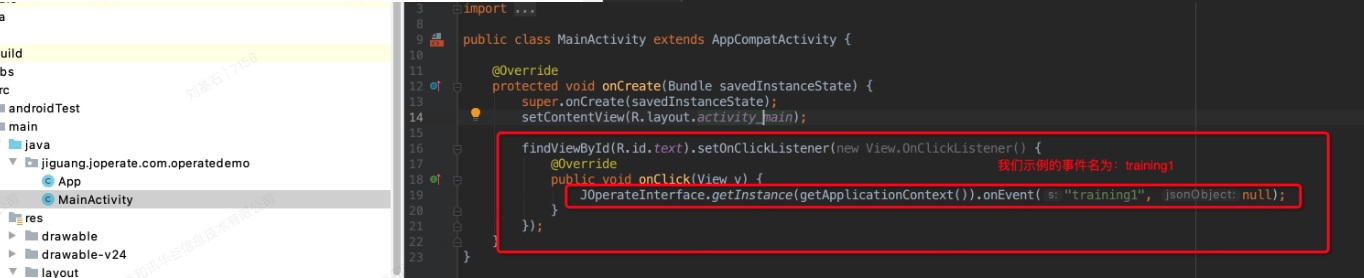
5、添加一个埋点事件
我们在 MainActivity 中添加一个按钮,并设置点击时触发事件上报
JOperateInterface.getInstance(getApplicationContext()).onEvent("training1", null);
启动 SDK 并点击该按钮,看到如下日志,此时事件上报成功
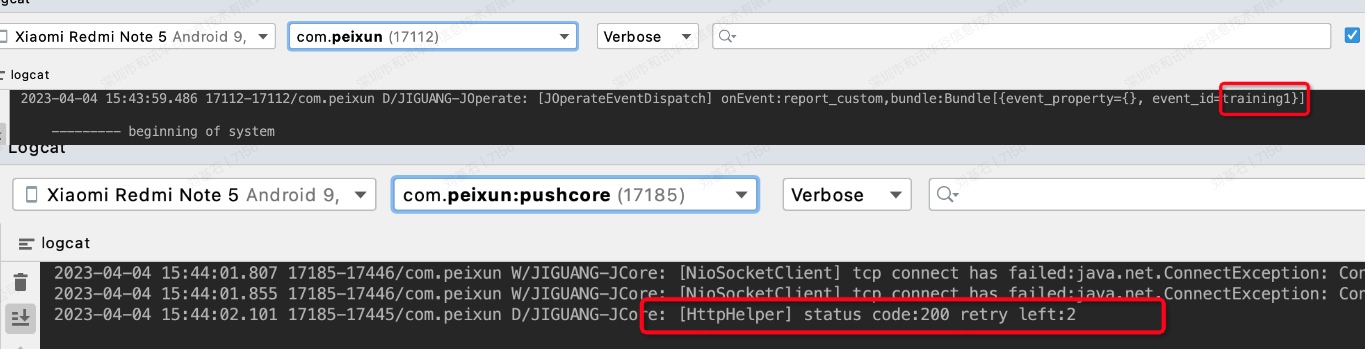
至此,即已完成极光运营增长 SDK 的埋点事件上报,可以在数据中心-数据校验功能。客户端通过扫码拉起配置的 URL scheme 进入数据校验模式,可以在控制台上查看该设备用户 CUID 的数据上报情况。其他说明参考 数据校验定义。

