Recharge and Billing
This document guides users on how to recharge authentication resources in Billing Center and manage bills and invoices.
Recharge
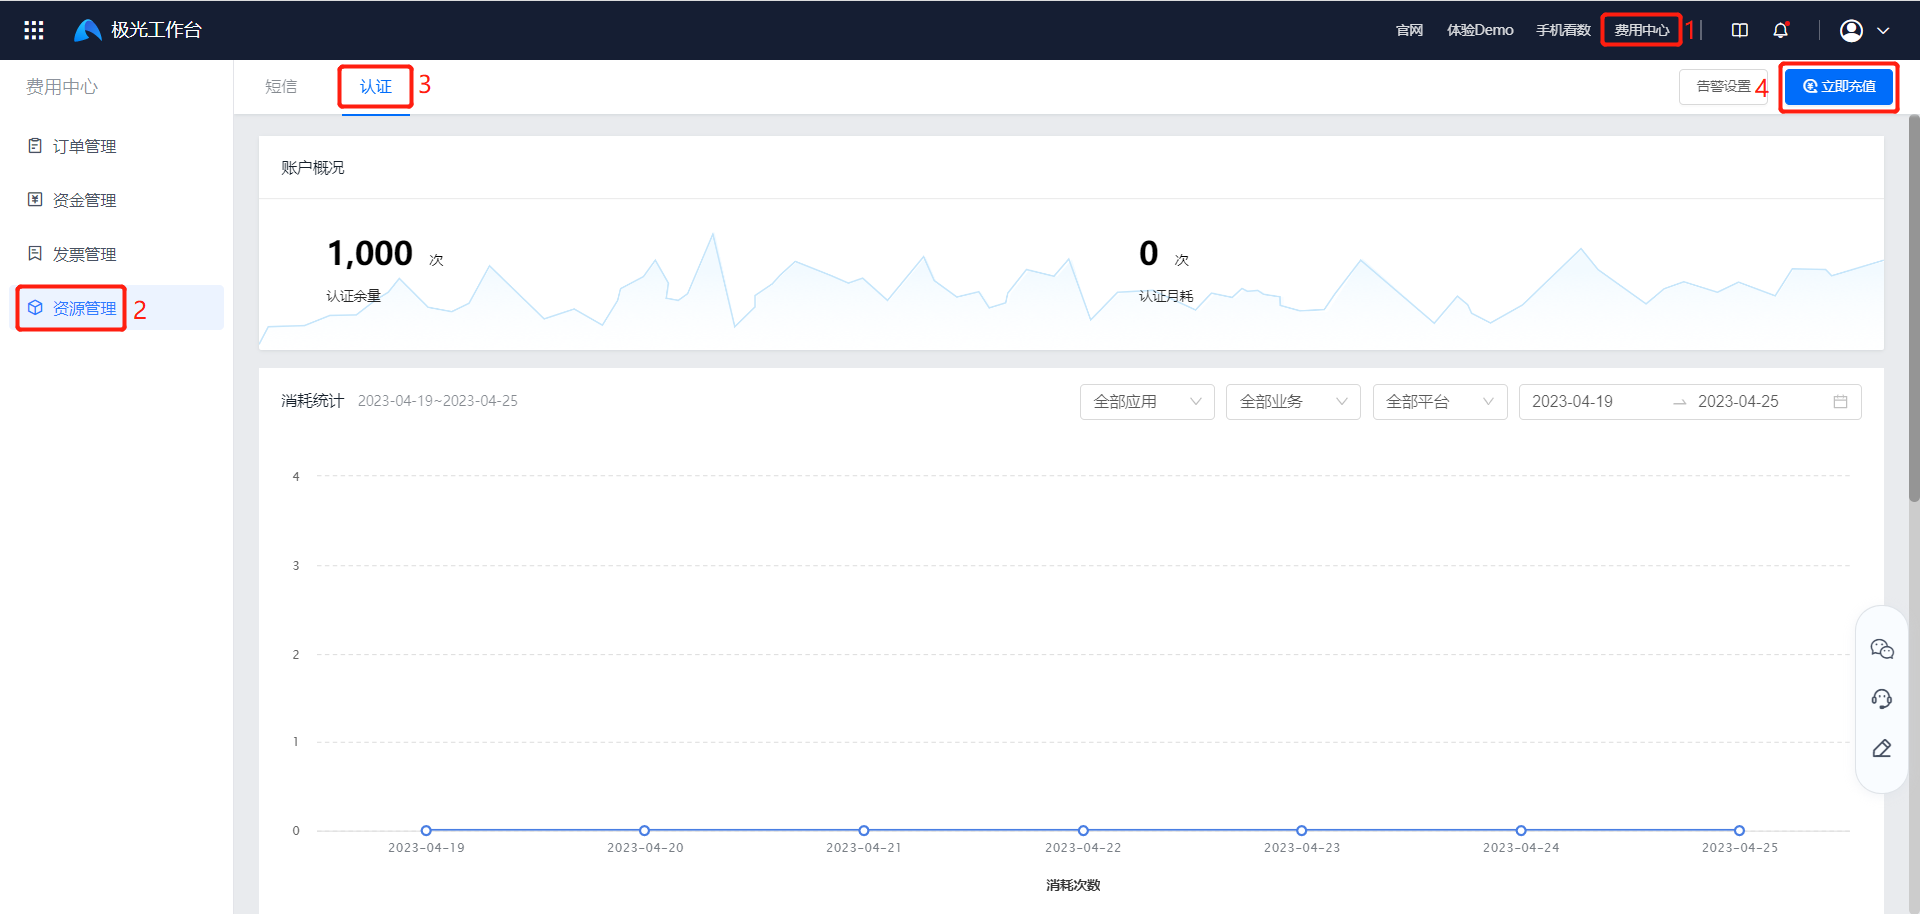
- Go to [Billing Center] - [Resource Management] - [Authentication], and click "Recharge Now".
2. Select the purchase quantity. Custom purchase quantity is supported. Click "Custom" and enter a specific number, in thousands.
- The product validity period is 3 years.
- For purchases over 500,000, contact business support to apply for a discount.
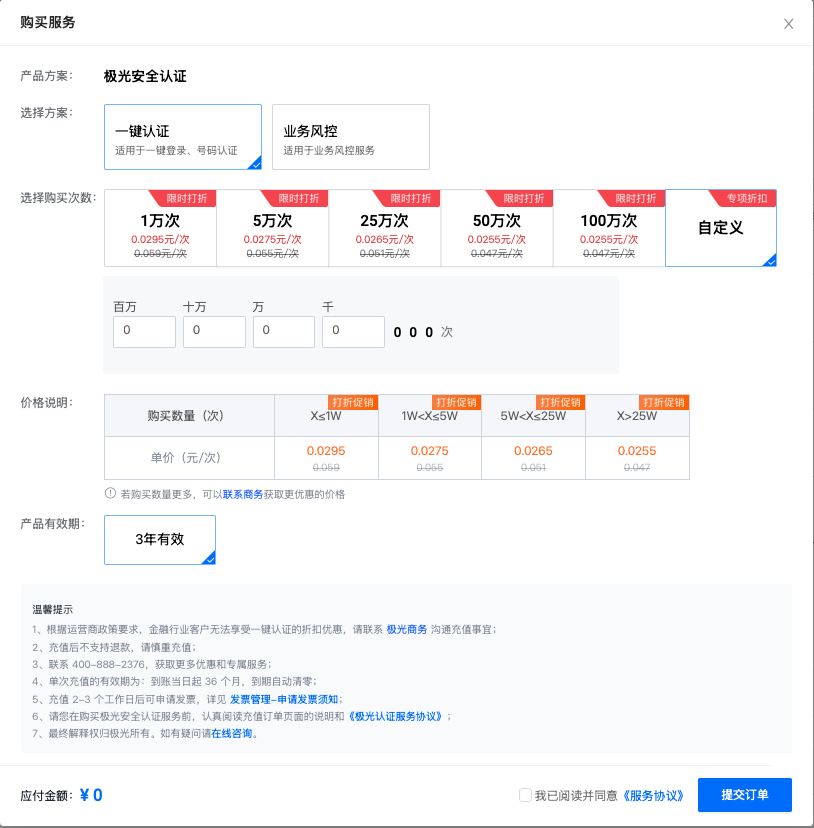
3. Agree to the privacy agreement and click "Submit Order".
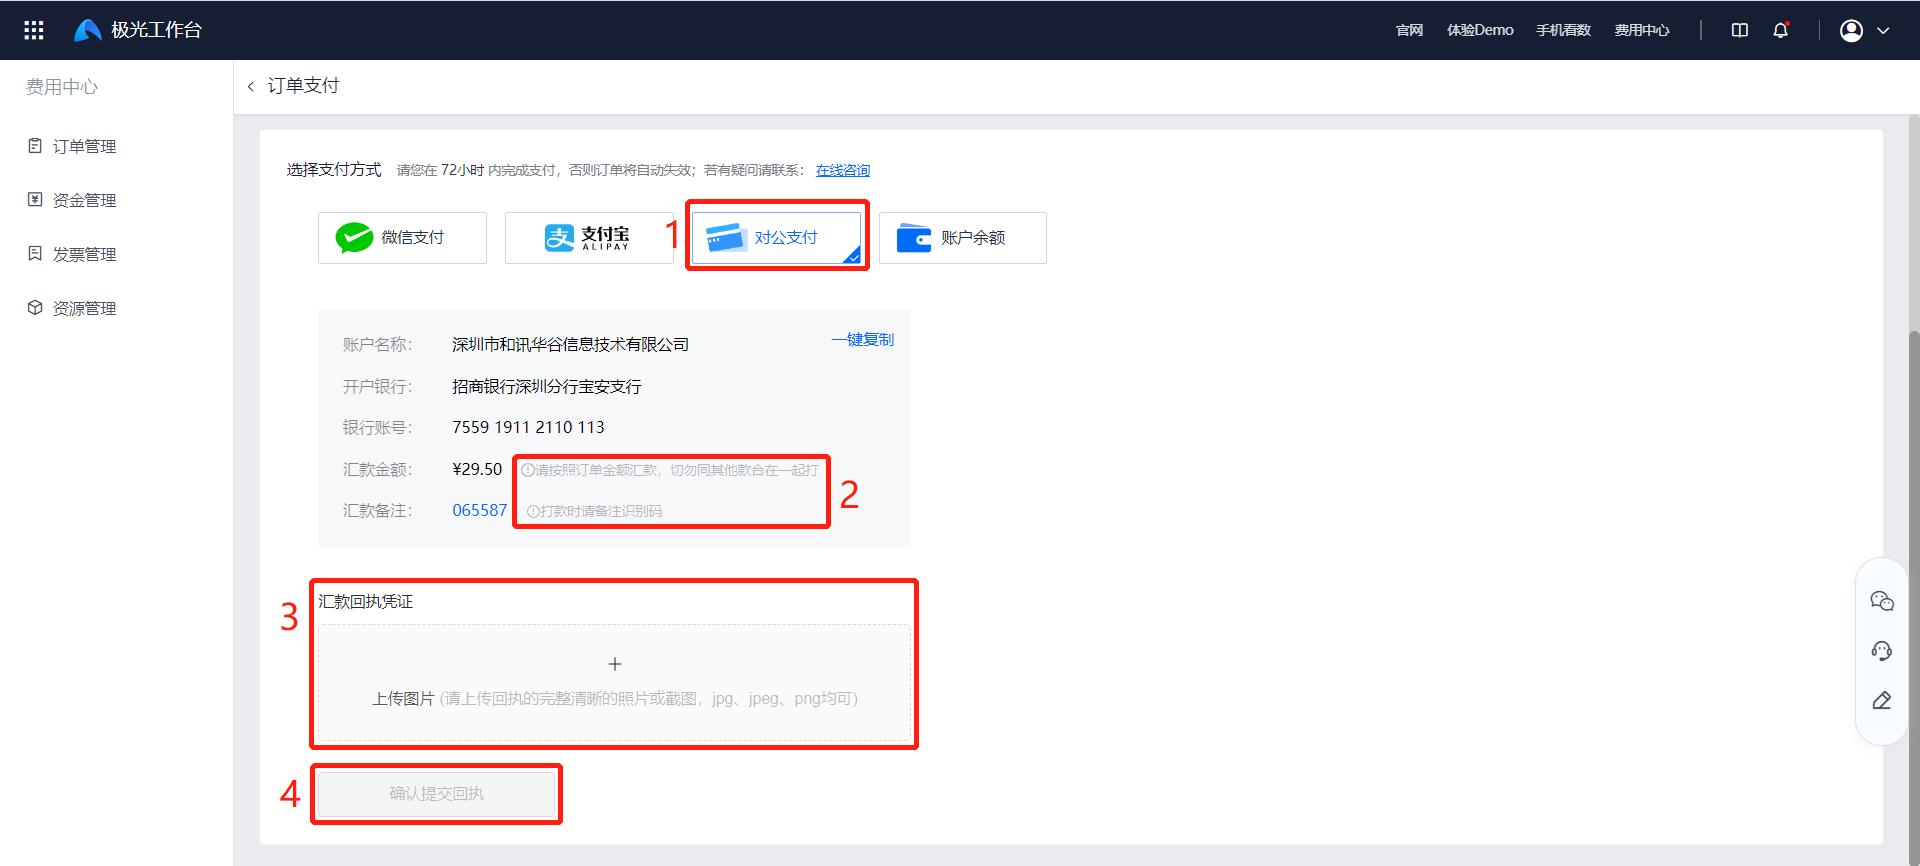
4. Select a payment method and click "Pay Now" to complete the recharge.
Three payment methods are supported: WeChat Pay, Alipay, and corporate payment. Account balance is not supported for now.
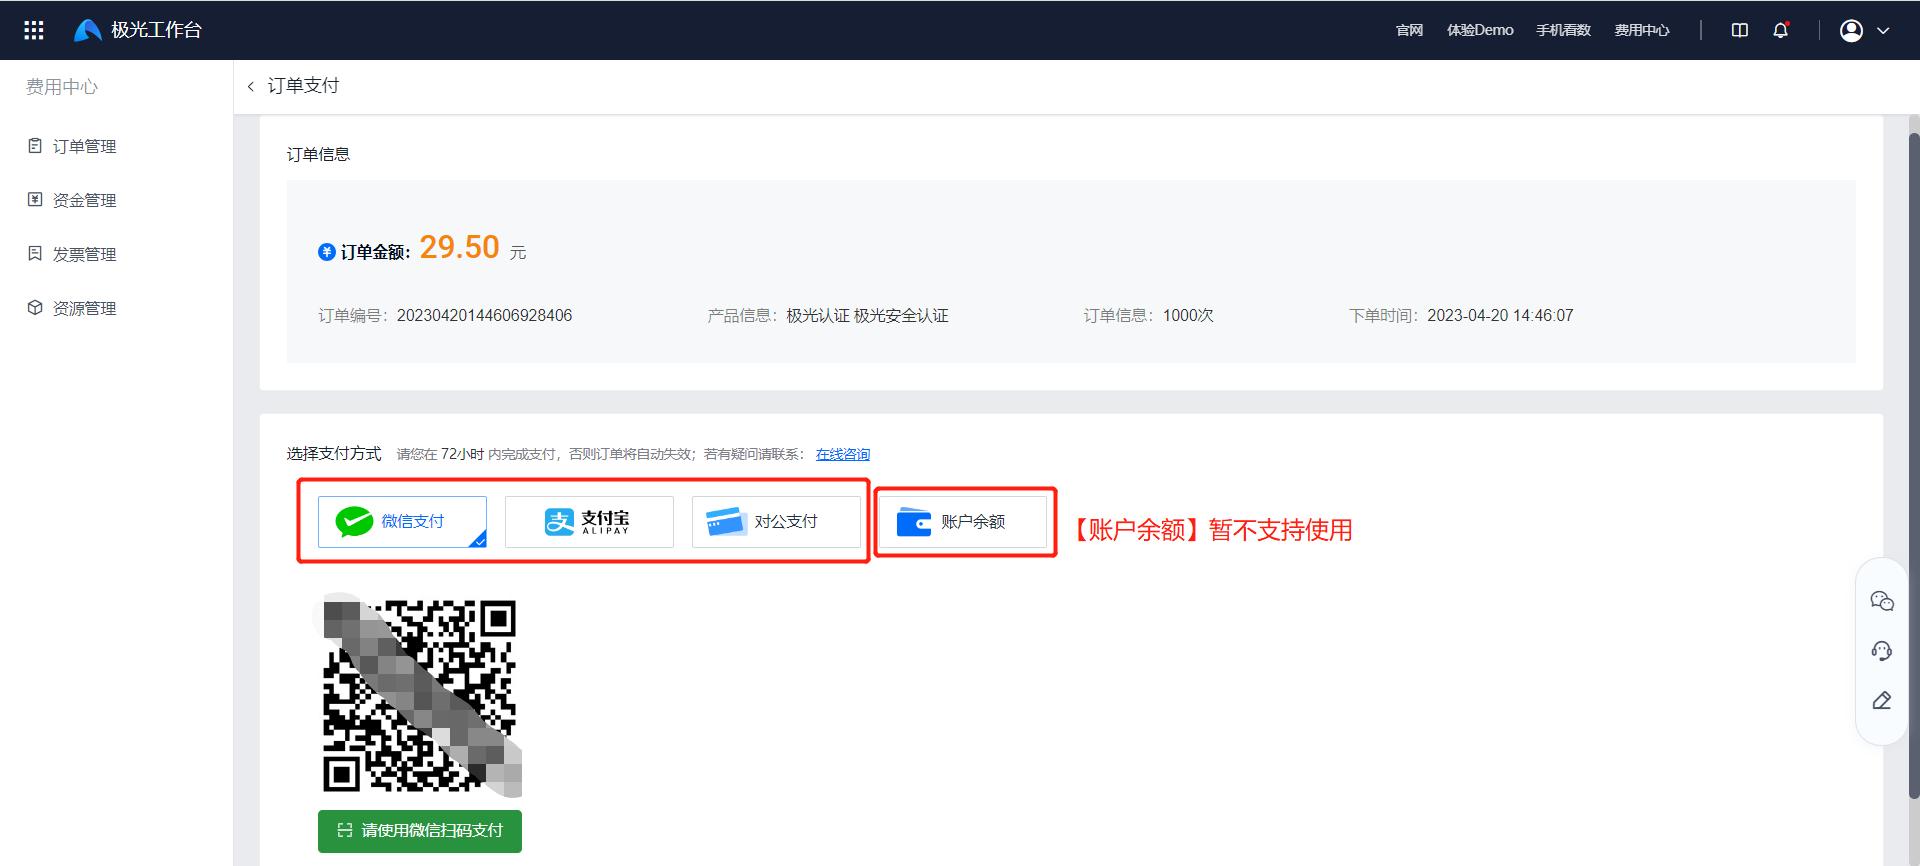
When selecting corporate payment, carefully check the amount, fill in the correct remittance remark, and upload the remittance receipt voucher after payment, so that the payment can be matched with the order.
Order Management
After recharge succeeds, you can view the payment status of the order on the [Order Management] page. "Paid" means payment succeeded.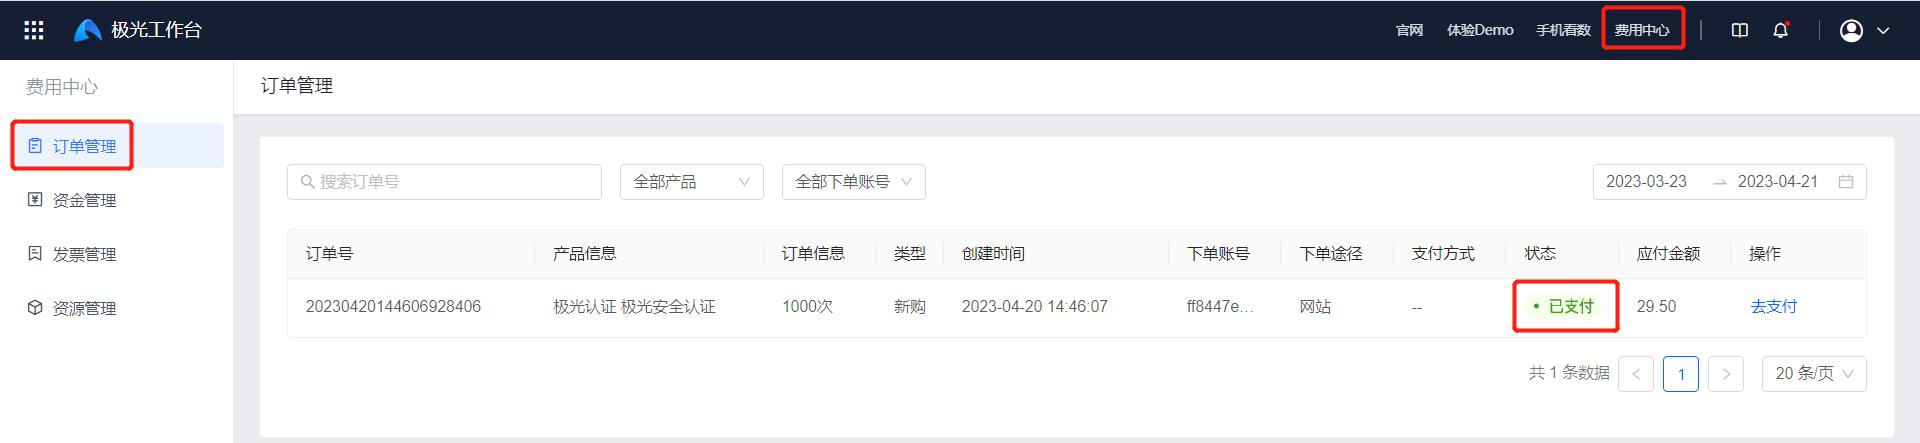
Fund Management
On the [Fund Management] page, you can view transaction details for each transaction. Transaction remarks show product information corresponding to the transaction.
Invoice Management
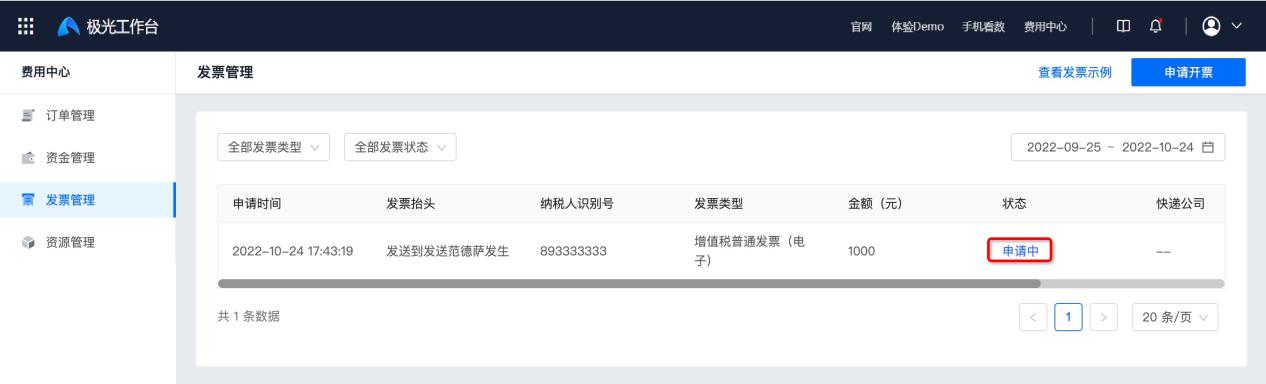
If you need an invoice, go to [Invoice Management] and click "Apply for Invoice".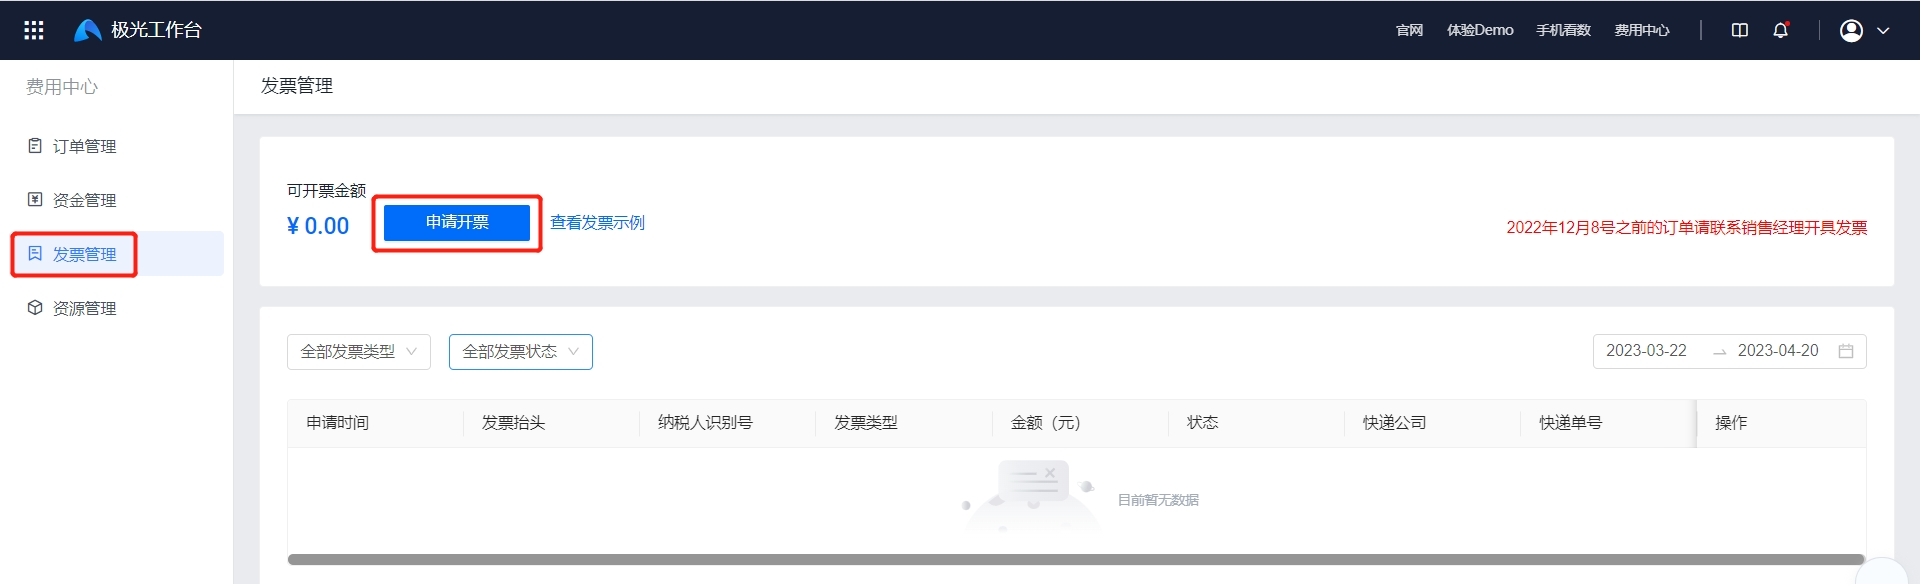
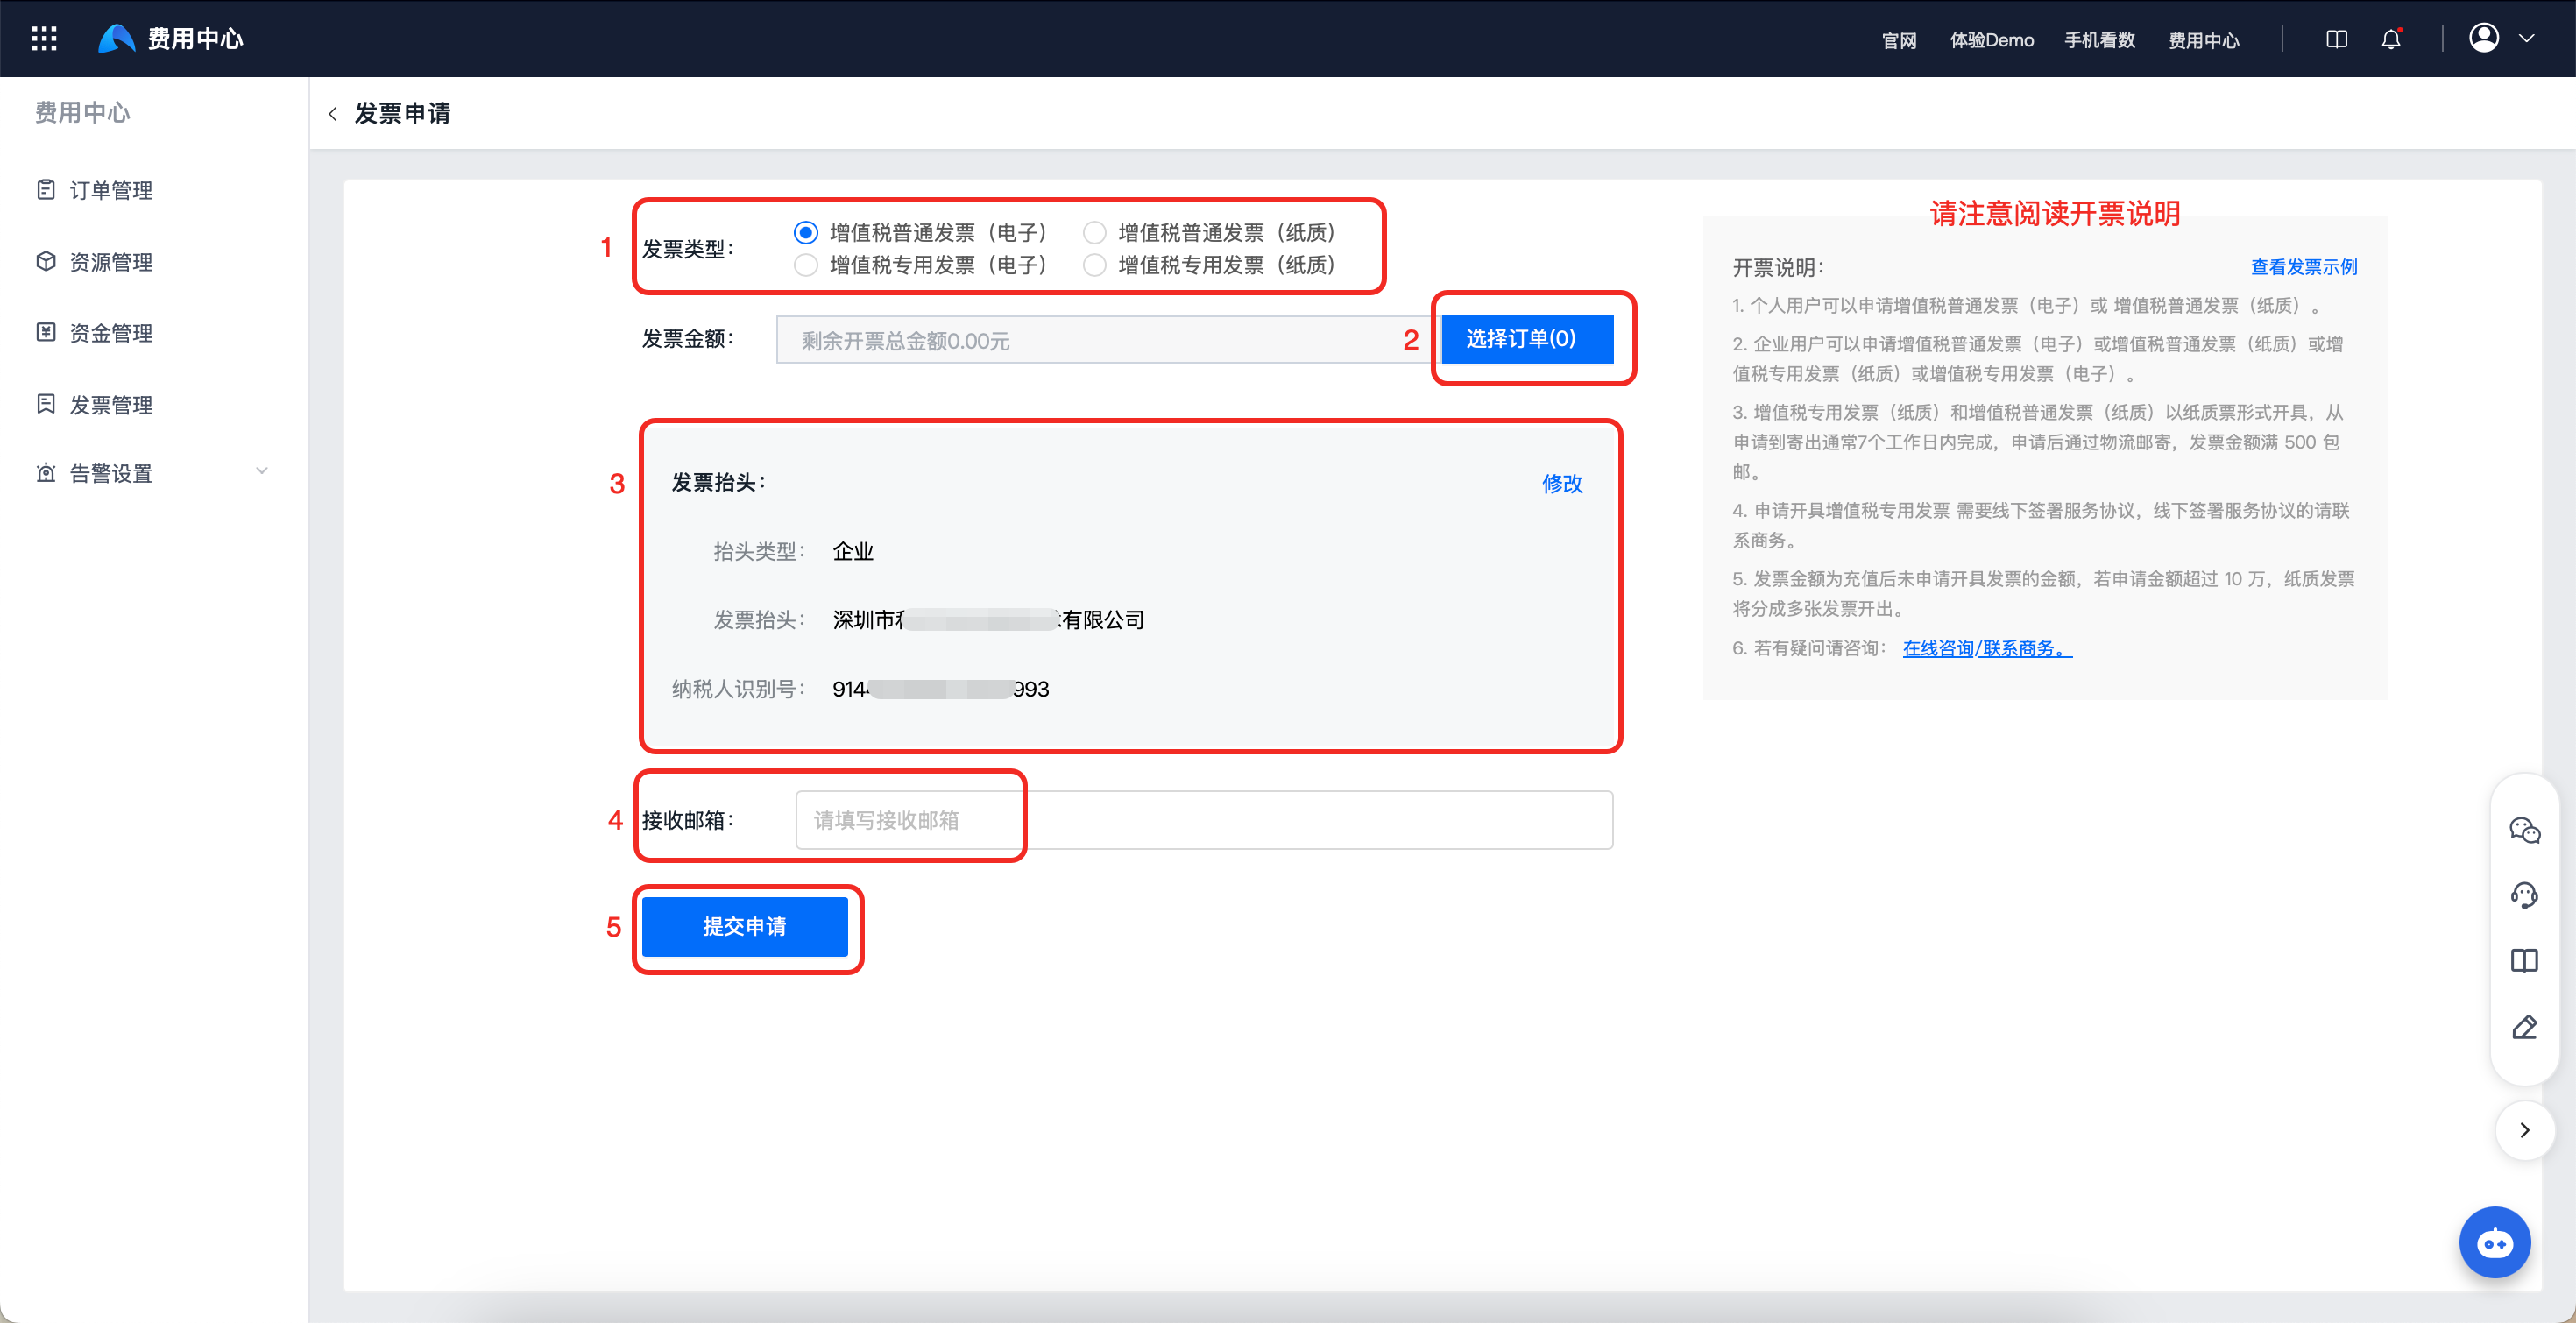
- At position 1, select the invoice type. Electronic and paper general/special VAT invoices are supported.
- Click position 2 to select the corresponding order for invoicing, and the amount is filled in automatically.
- At position 3, the title used during authentication is selected by default. Click "Modify" to modify the invoice title. Enterprise and individual title types are supported. Click "Restore to authenticated title" to restore the title used during authentication.
- If electronic invoice is selected, fill in the email address at position 4. If paper invoice is selected, fill in recipient, contact number, and delivery address.
- Invoice information cannot be modified after the invoice application is submitted. After confirming that invoice information is correct, click "Submit Application" at position 5. If you find invoice information is incorrect after submission, contact business support.
After completing the application, you can view the application status on the [Invoice Management] page. After approval by the Jiguang backend, the invoice will be issued according to the selected invoice type.