Verification Settings
This document guides users through the settings required for verification services in the console.
Integration Settings
Android Settings
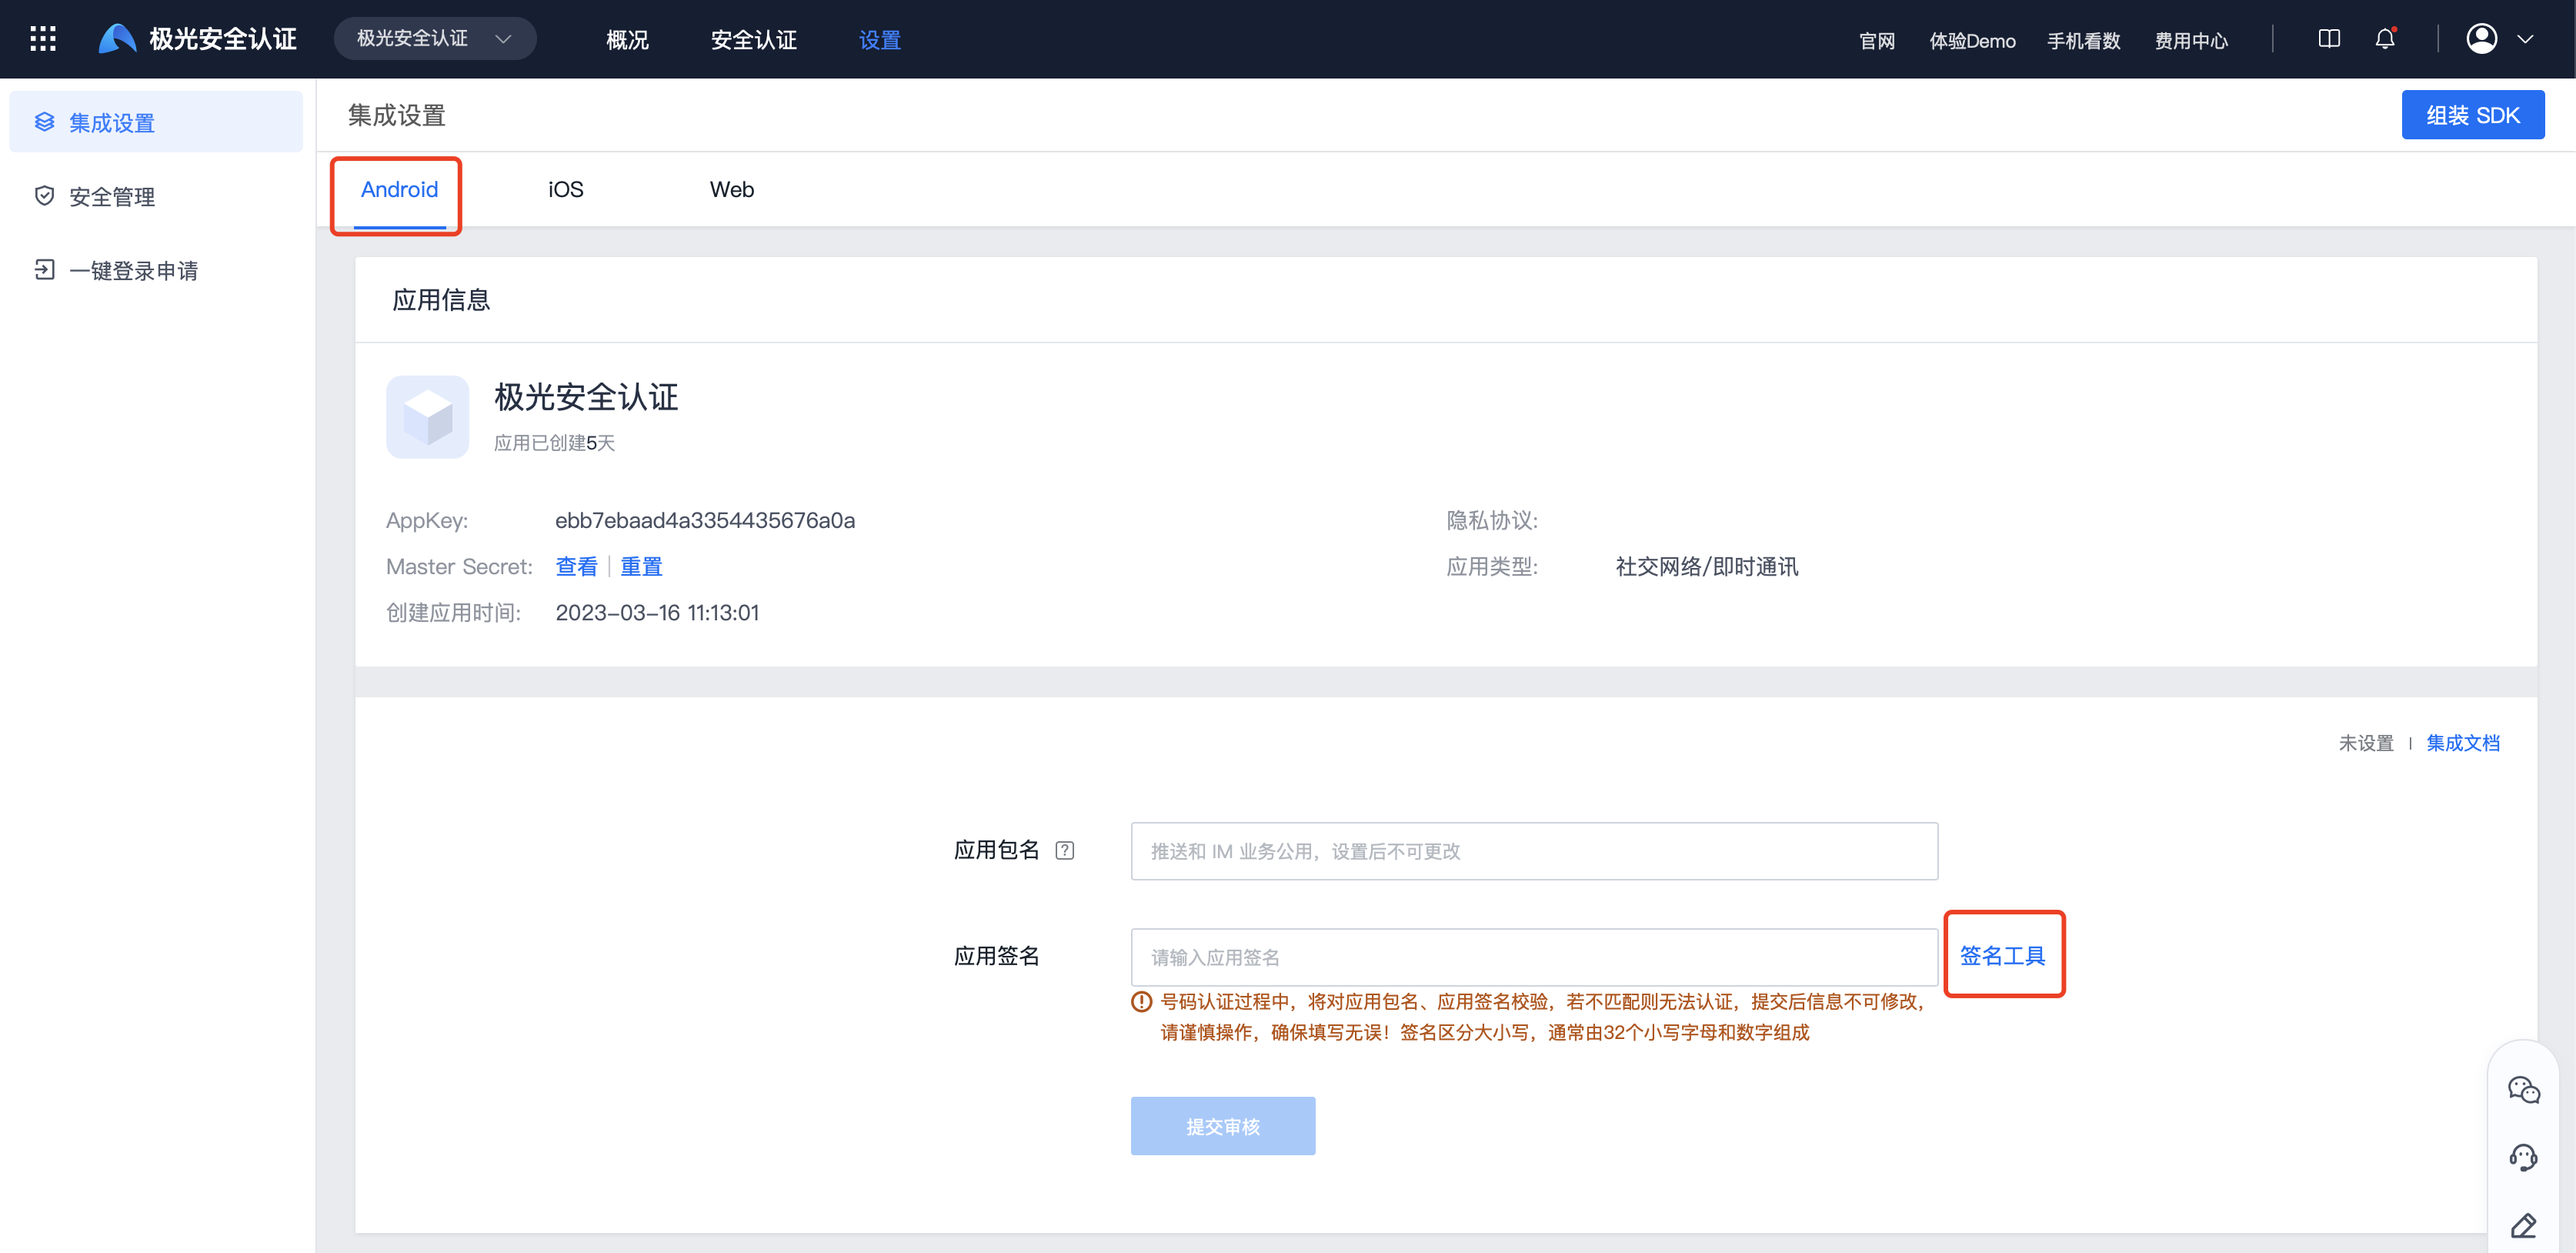
Go to Verification Settings -> Integration Settings -> Android, and enter the application package name and application signature.
- The application package name refers to the Package Name of the Android application. It is shared by push, verification, sharing, IM, and other services. Once specified, it cannot be changed.
- You can install the signature acquisition tool on a mobile device to quickly obtain the application signature information.
- During number verification, the application package name and application signature are checked. If they do not match, verification cannot be completed. The submitted information cannot be modified, so please fill it in carefully and make sure it is correct. The signature is case-sensitive and usually consists of 32 lowercase letters and digits.
HarmonyOS Settings
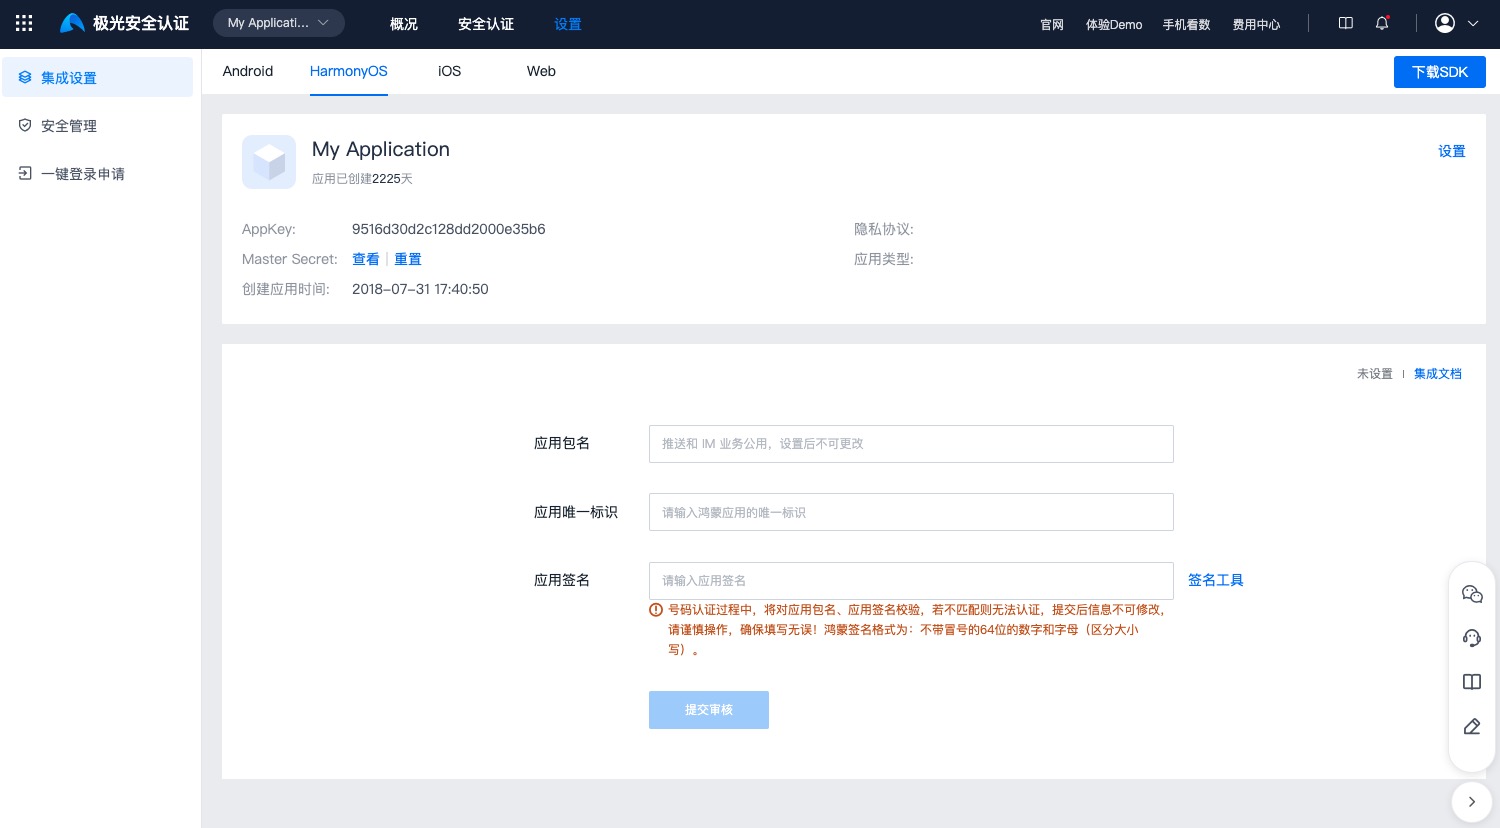
Go to Verification Settings -> Integration Settings -> Android, enter the application package name, application unique identifier, and application signature, then submit them for review.
- The application package name refers to the package name of the HarmonyOS application. It is shared by push, verification, sharing, IM, and other services. Once specified, it cannot be changed.
- For how to obtain the signature, see the Integration Guide.
- During number verification, the application package name and application signature are checked. If they do not match, verification cannot be completed. The submitted information cannot be modified, so please fill it in carefully and make sure it is correct. The HarmonyOS signature format is 64 digits and letters without colons, and it is case-sensitive.
iOS Settings
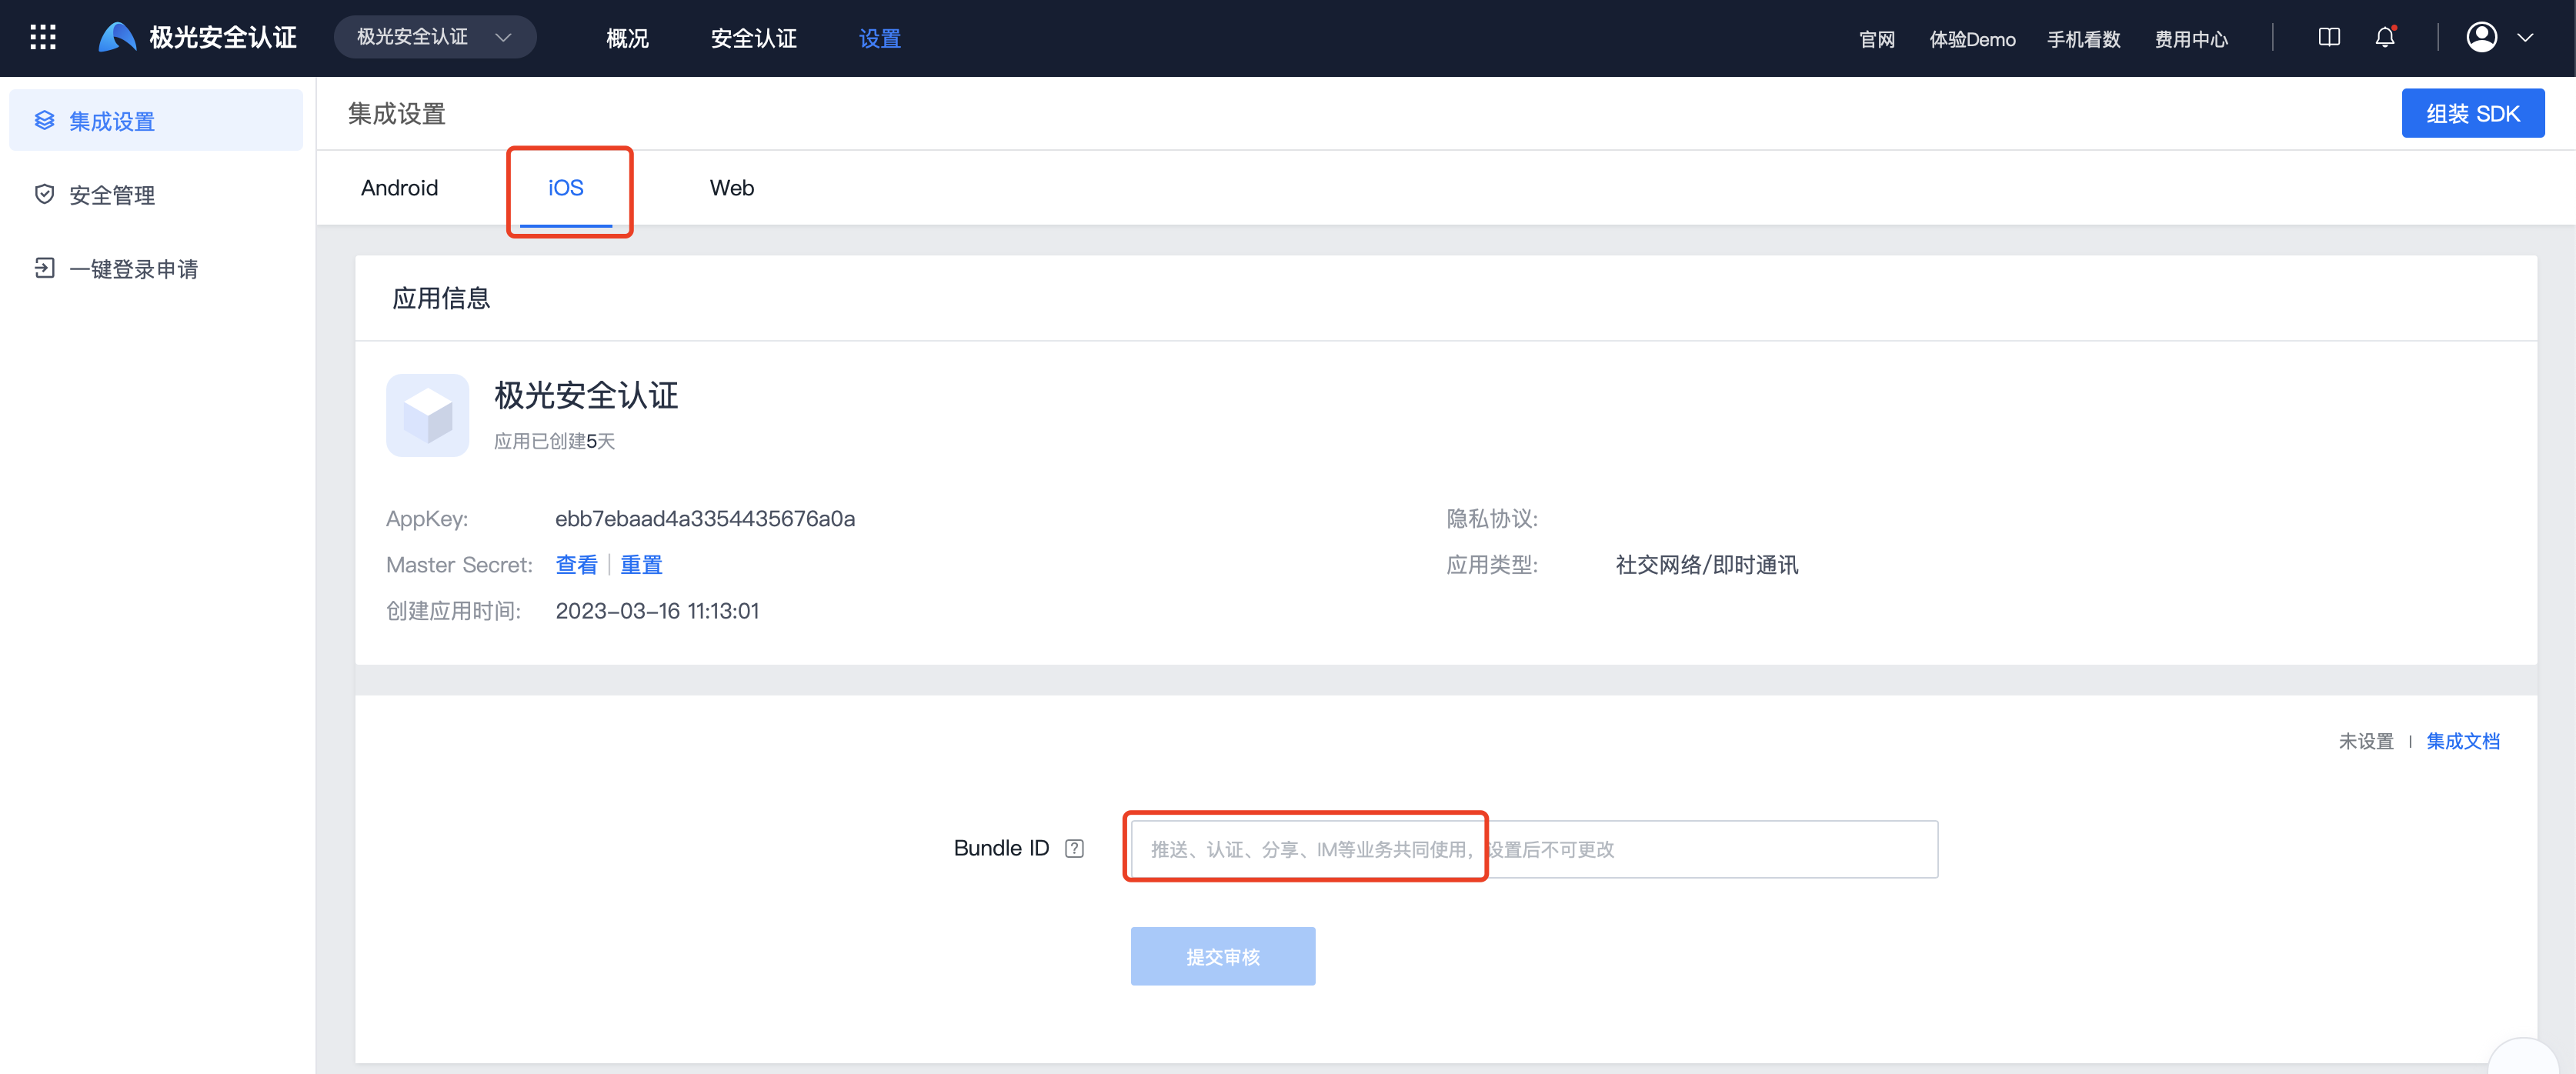
Go to Verification Settings -> Integration Settings -> iOS, enter the Bundle ID, and click Next to complete verification service configuration.
The Bundle ID is shared by push, verification, sharing, IM, and other services. Once configured, it cannot be changed.
Web Settings
On the Verification Settings -> Integration Settings -> Web page, enter the online date, offline date, integration page URL, and request origin, then click Submit for Review. After the review is approved, Web settings are complete.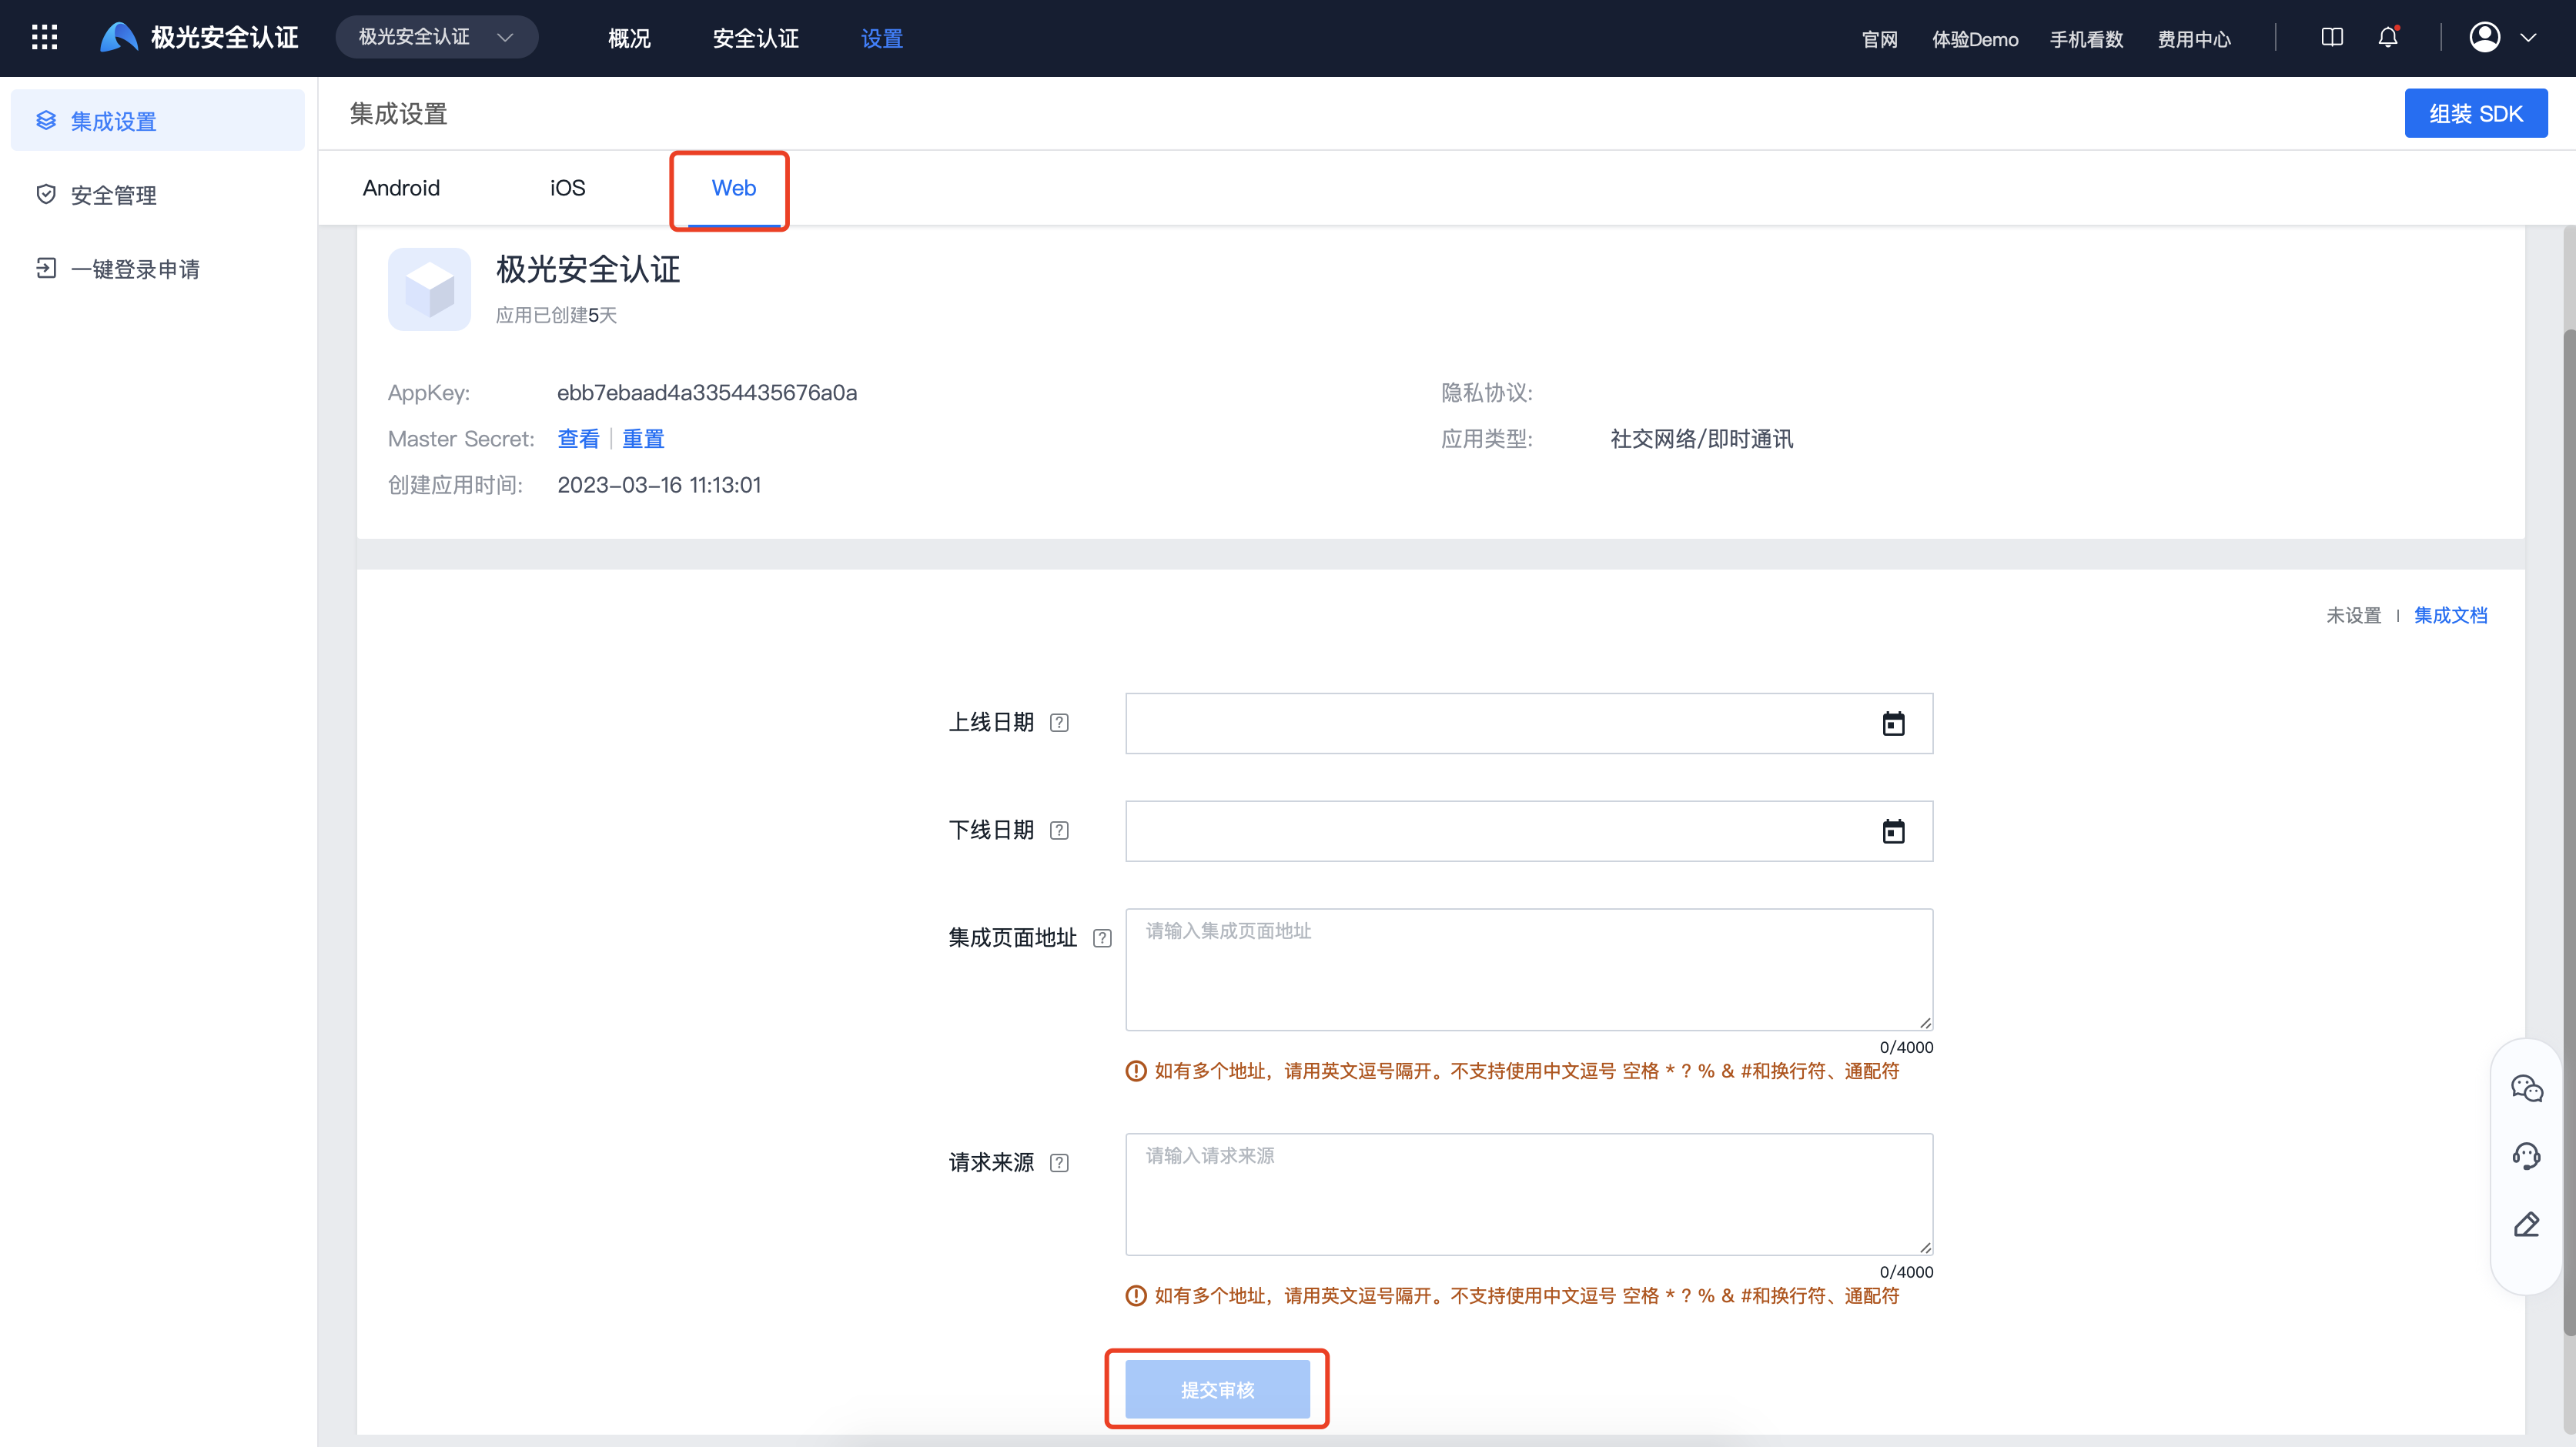
After filing is completed, China Mobile and China Unicom take effect within 30 minutes, while China Telecom takes 1 to 2 business days.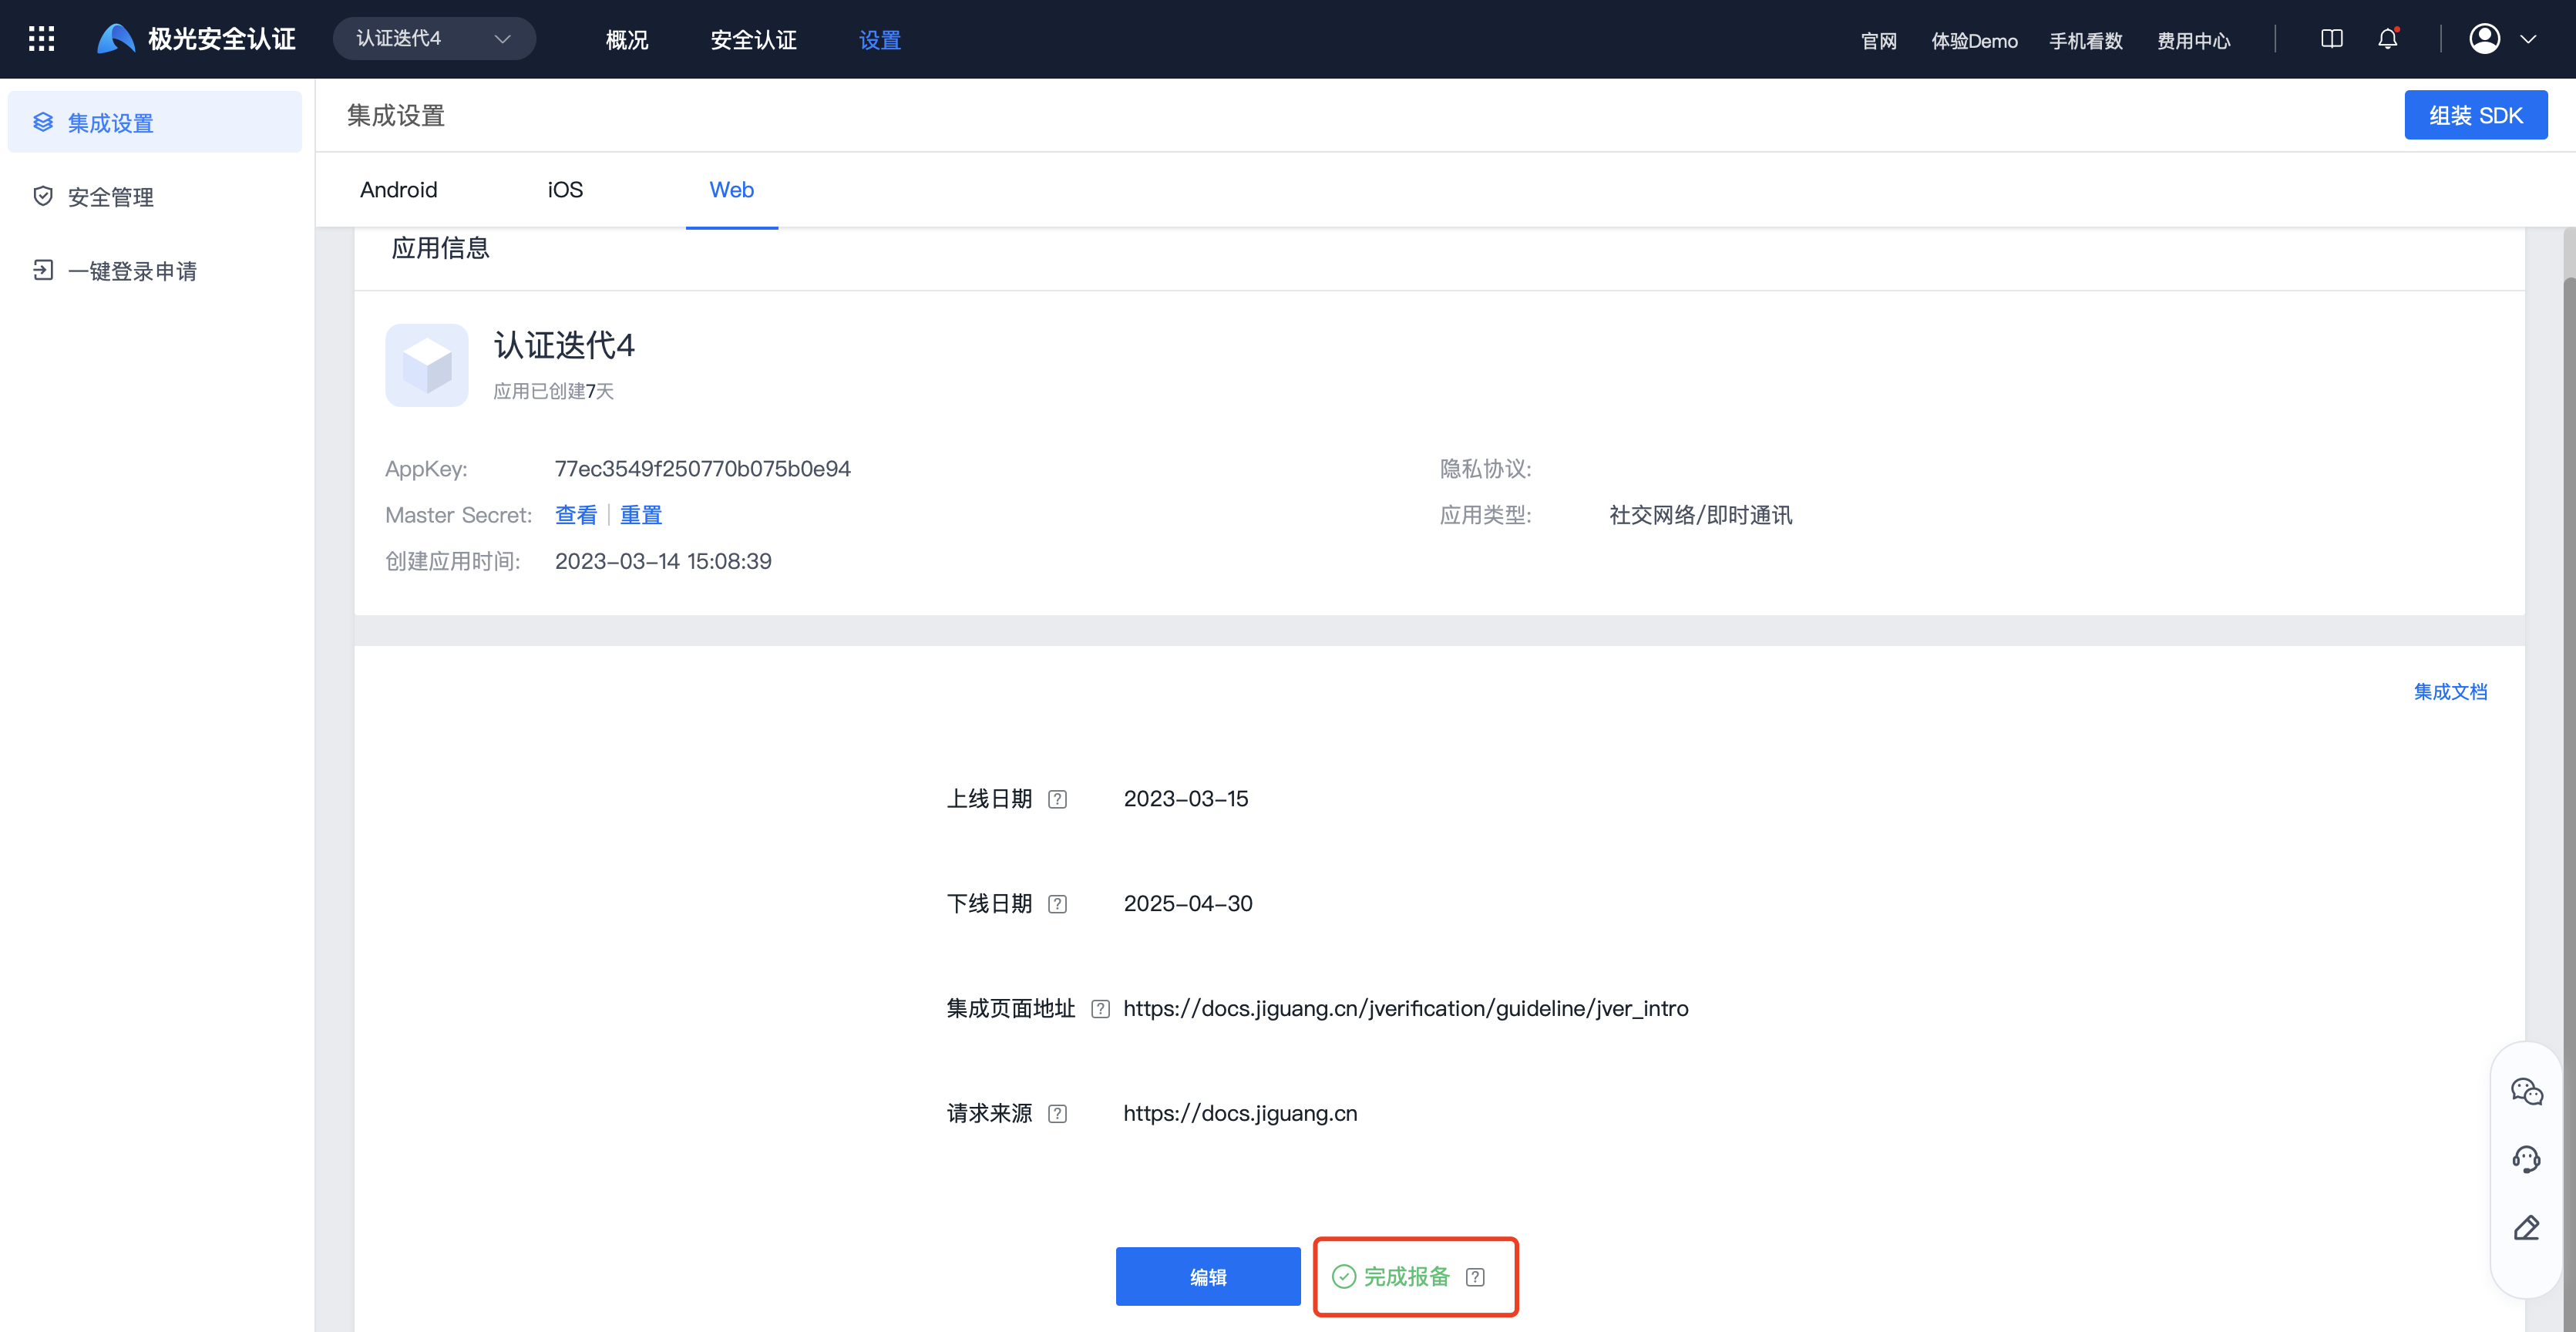
One-Click Login
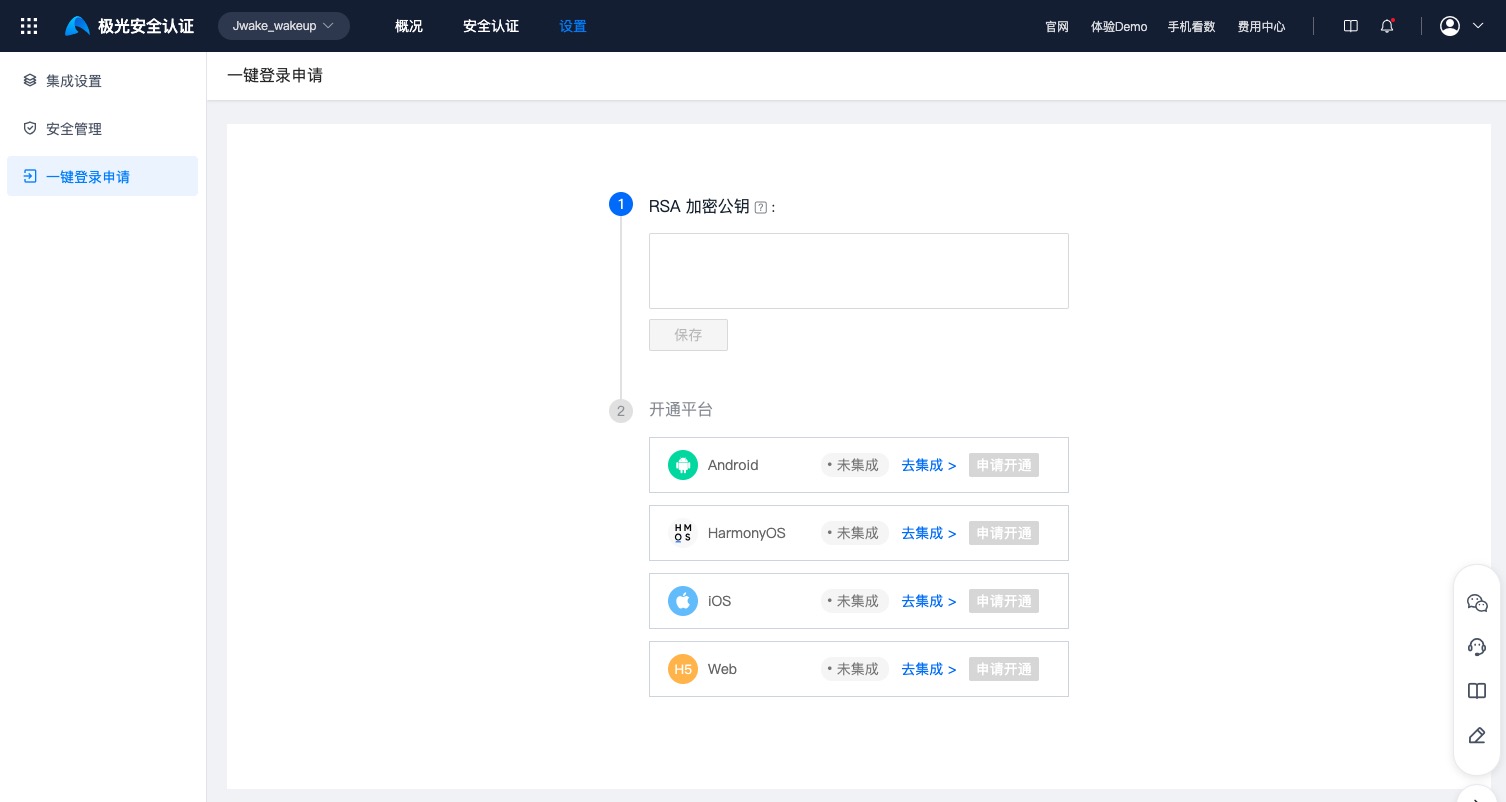
If developers need to use one-click login, after completing integration settings, save the RSA encryption public key on the One-Click Login page and click Apply to Enable under the platform that needs to be enabled.
The phone number returned by one-click login is encrypted with the RSA public key. Decrypt it locally with the corresponding private key. Keep the key pair secure and do not enter production private keys into third-party online tools. The RSA public key length is 1024 bits, and the key format is PKCS#8.
You can use OpenSSL to generate and verify RSA keys locally:
          # Generate a 1024-bit PKCS#8 RSA private key
openssl genpkey -algorithm RSA -pkeyopt rsa_keygen_bits:1024 -out private_key.pem

# Export the public key from the private key
openssl rsa -in private_key.pem -pubout -out public_key.pem

# Verify that the private key is readable
openssl pkey -in private_key.pem -text -noout

# Verify that the public key is readable
openssl pkey -pubin -in public_key.pem -text -noout
Security Management
To prevent malicious API calls, Jiguang supports security management. You can specify a request IP whitelist and set consumption limits for the application and for the same number.
API Call Frequency
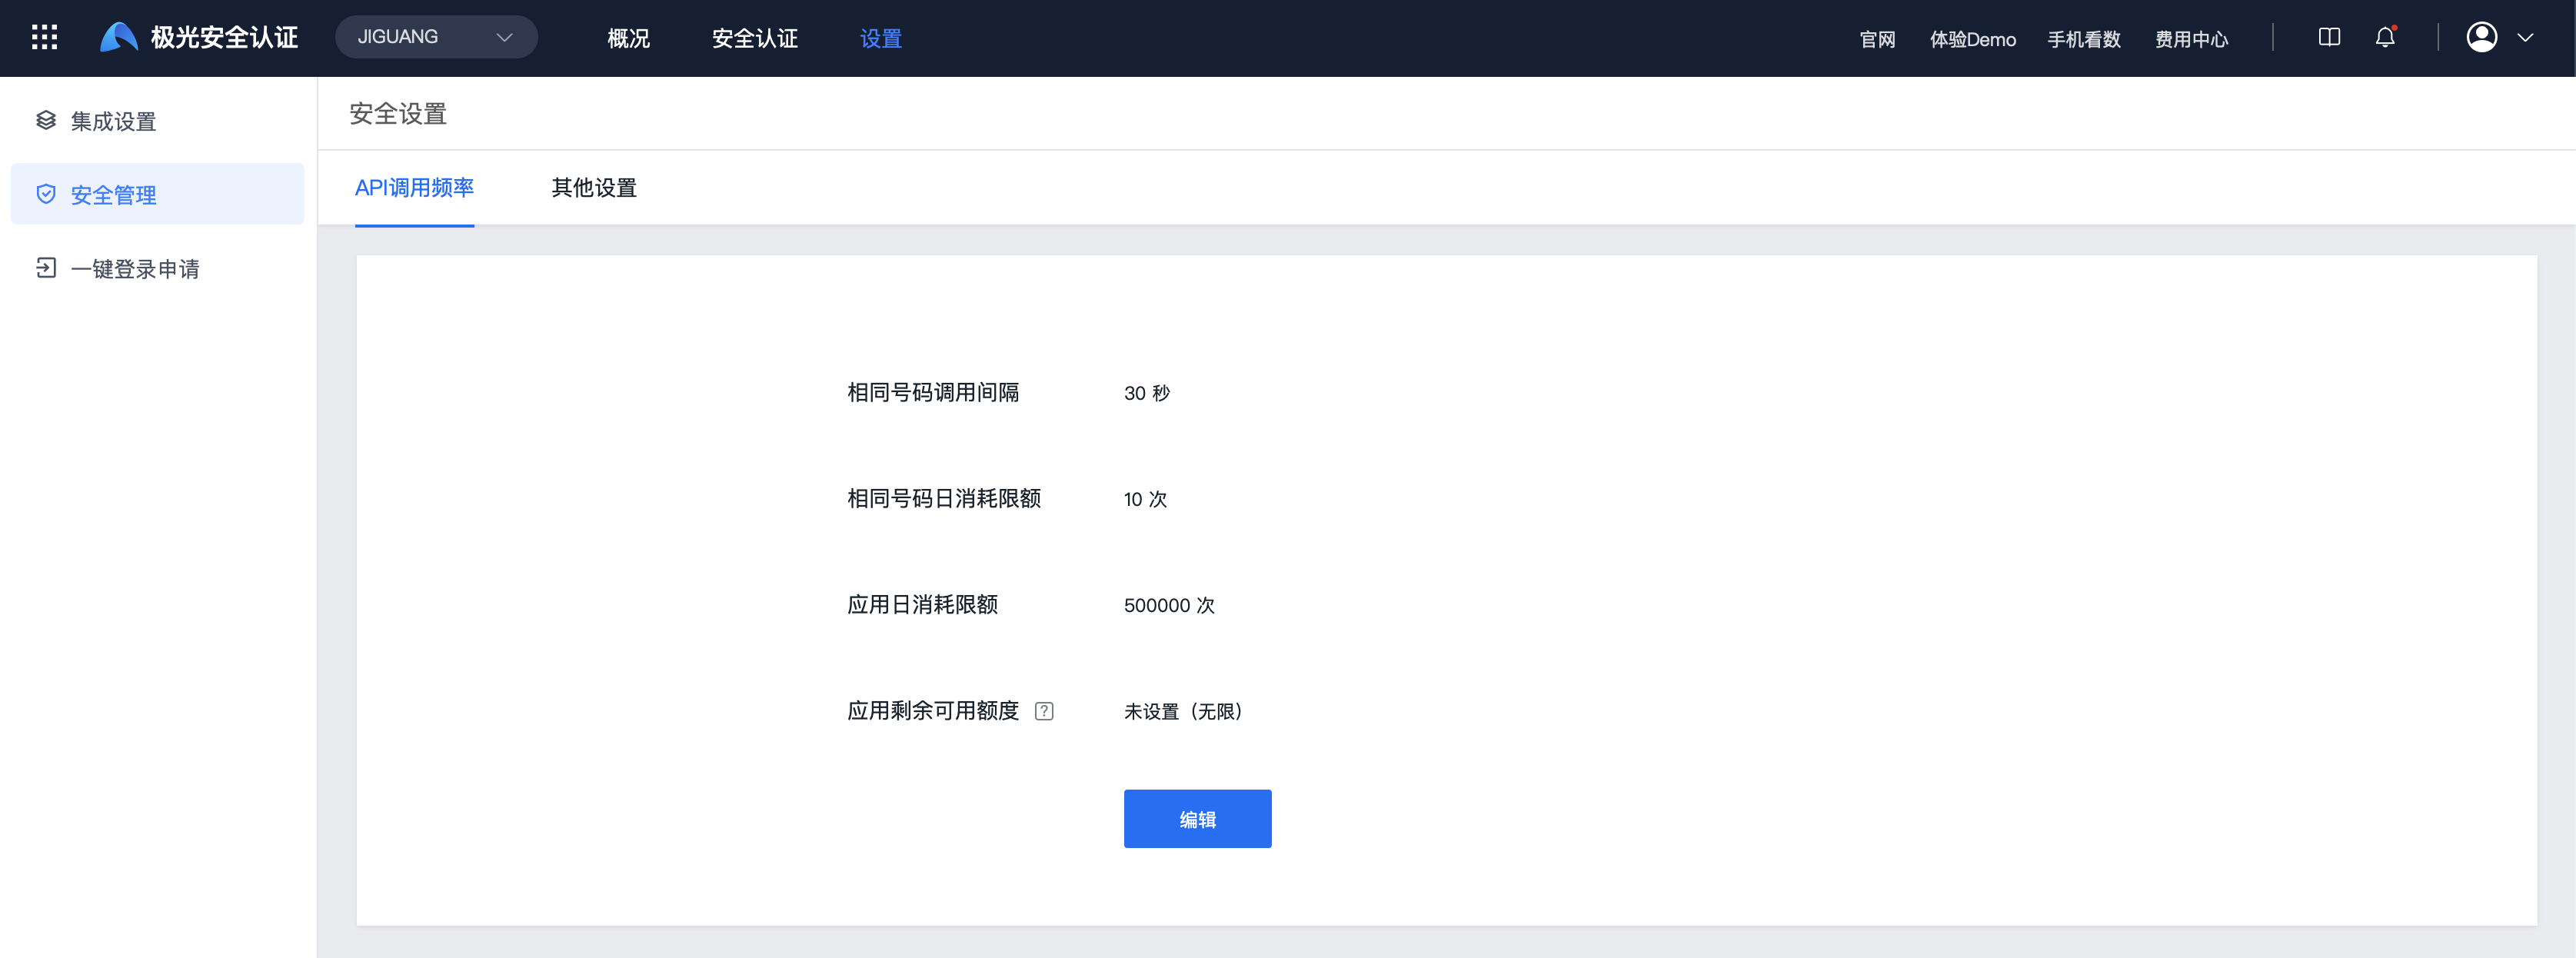
Click Edit to set the call interval for the same number, daily consumption limit for the same number, daily consumption limit for the application, and remaining available quota for the application.
The remaining available quota for the application is the remaining available quota of this appkey. It is independent of the total remaining quota of the verification account and must be set below 1 billion.
Other Settings
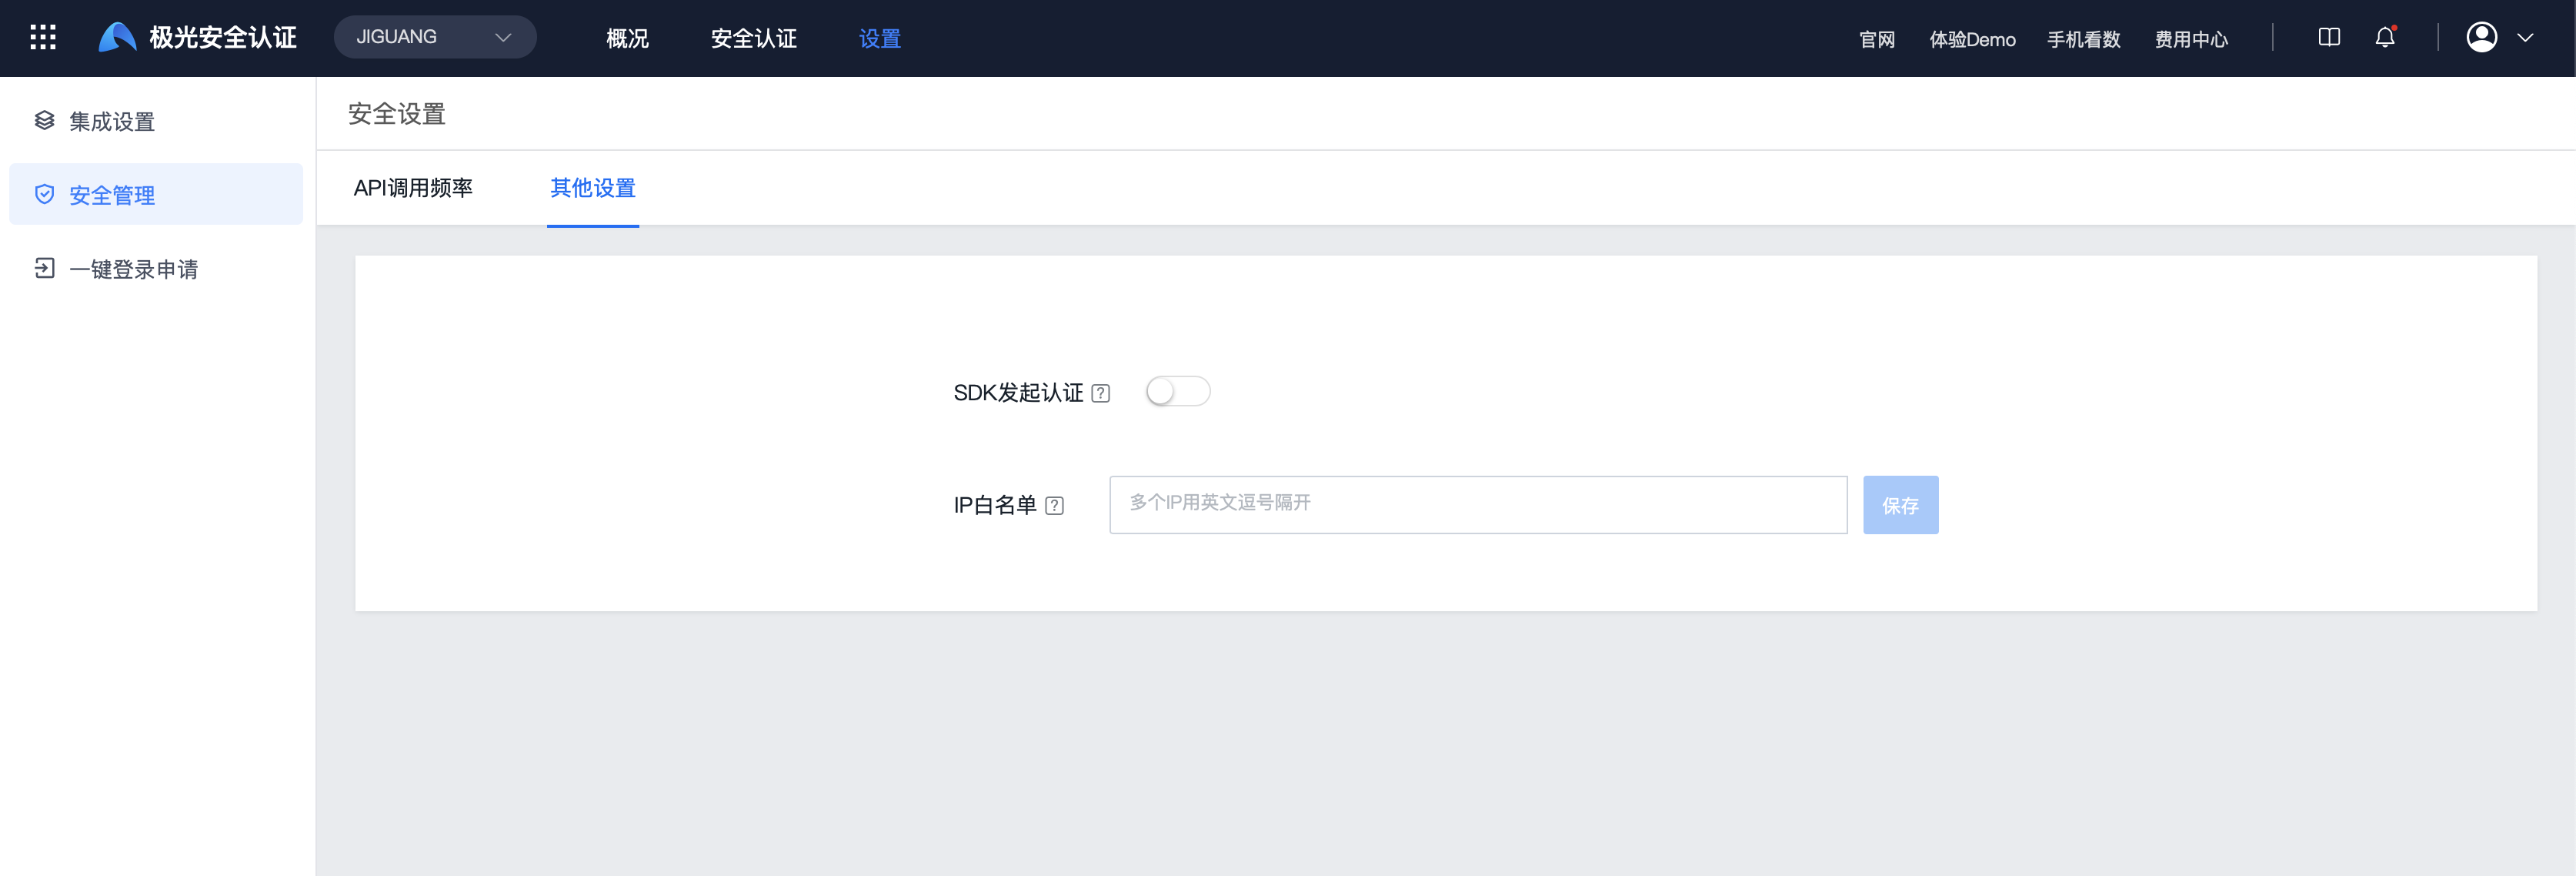
- SDK-initiated verification: The client calls the SDK Verify API to submit verification. This is disabled by default.
- IP whitelist: Leaving this field empty means there is no IP restriction for API calls. Once filled in, this appkey accepts verification requests only from the specified IPs.