
Data Verification Operation Guide
Definition
After integrating the SDK, if you need to test whether the data source is reporting data normally, you can use the data verification feature. The client scans a QR code to open the configured URL scheme and enter data verification mode. You can then view the data reporting status of the CUID in the console. For other descriptions, see Data Verification Definition.
Data generated in data verification mode is test data and is completely isolated from production data. It does not affect the accuracy of production environment statistics.
Prerequisites
Android
- Integrate the Jiguang SDK in the app to be verified and add the URL scheme. For details, see the Android SDK Integration Guide.
- Follow the verification steps below.
iOS
- Integrate the Jiguang SDK in the app to be verified and add the URL scheme. For details, see the iOS SDK Integration Guide.
- iOS also needs the following code configured before it can enter Data Verification mode. For details, see the API documentation:
This API is called when using a browser to scan the QR code.
          // See the demo for specific usage.
- (BOOL)application:(UIApplication *)app openURL:(NSURL *)url options:(NSDictionary<UIApplicationOpenURLOptionsKey, id> *)options {[JOPERATEService openDebugMode:url];
return YES;
}
- Follow the verification steps below.
WeChat Mini Program
- Integrate the Jiguang SDK in the app to be verified. For details, see the WeChat Mini Program Integration Guide.
- WeChat Mini Program also needs the following code configured before it can enter Data Verification mode. For details, see the API documentation:
This API is called when using a browser to scan the QR code.
          // Scan code to enter data verification mode
wx.scanCode({
success (res) {
let debug = joperate.openDebugMode(res.result)
}
})
- Follow the verification steps below.
Web
- Integrate the Jiguang SDK in the app to be verified. For details, see the Web SDK Integration Guide.
- Web also needs the following code configured before it can enter Data Verification mode. For details, see the API documentation:
This API is called when using a browser to scan the QR code.
window.JOperateInterface.openDebugMode()
- Follow the verification steps below.
Verification Steps
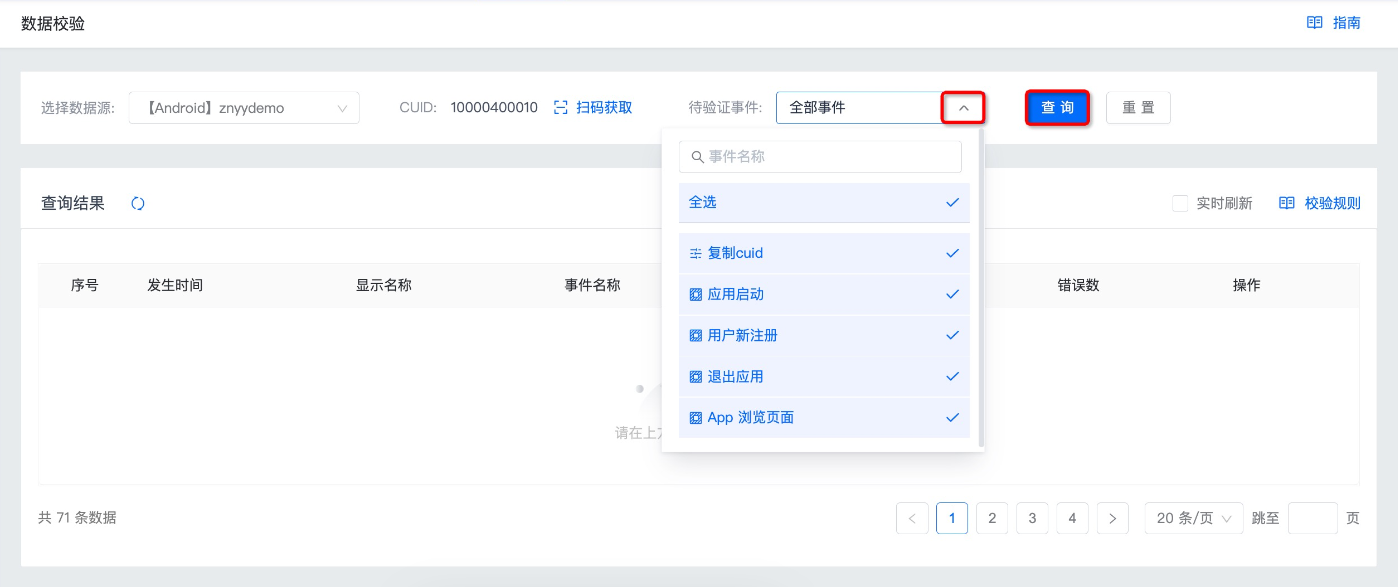
Go to Data Center -> Data and Channels -> Data Verification, and select the data source you need to verify.
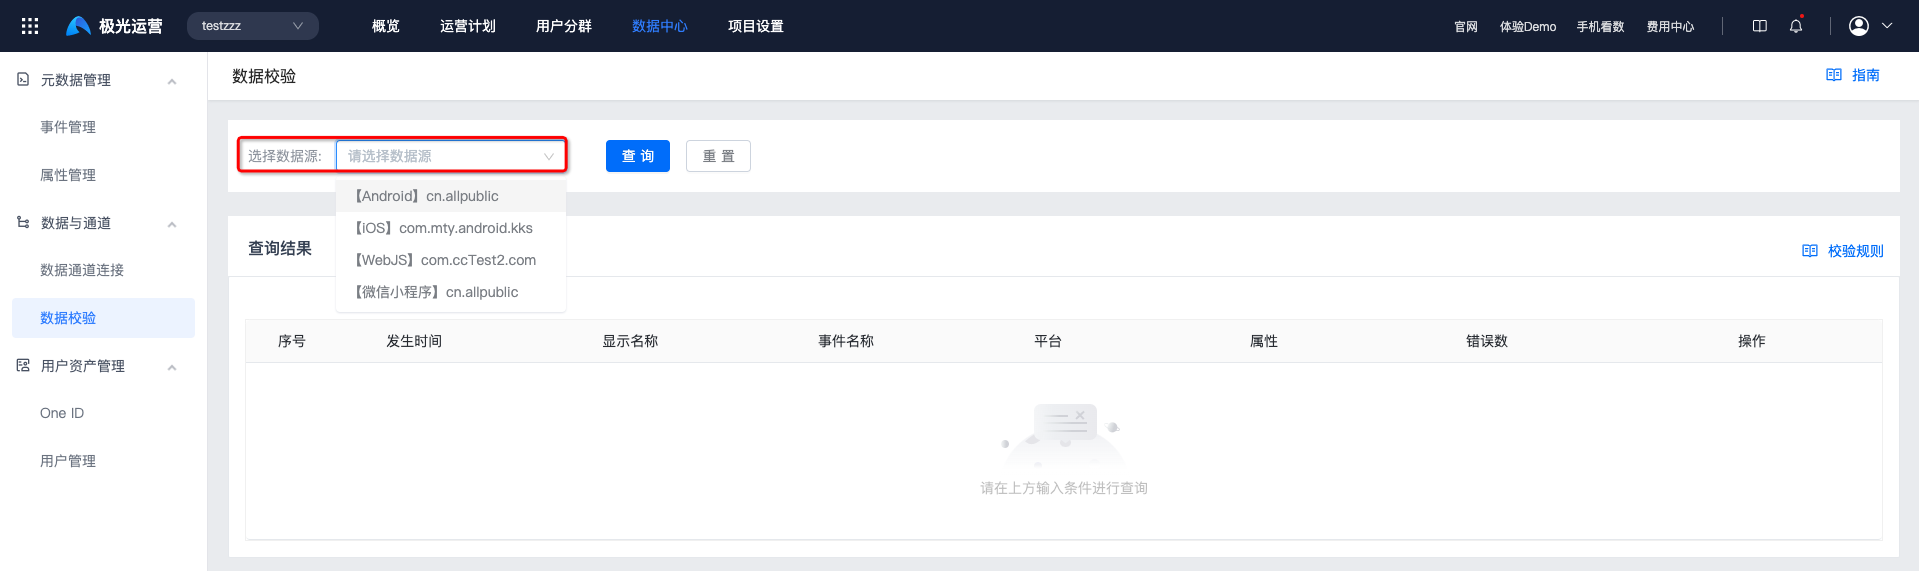
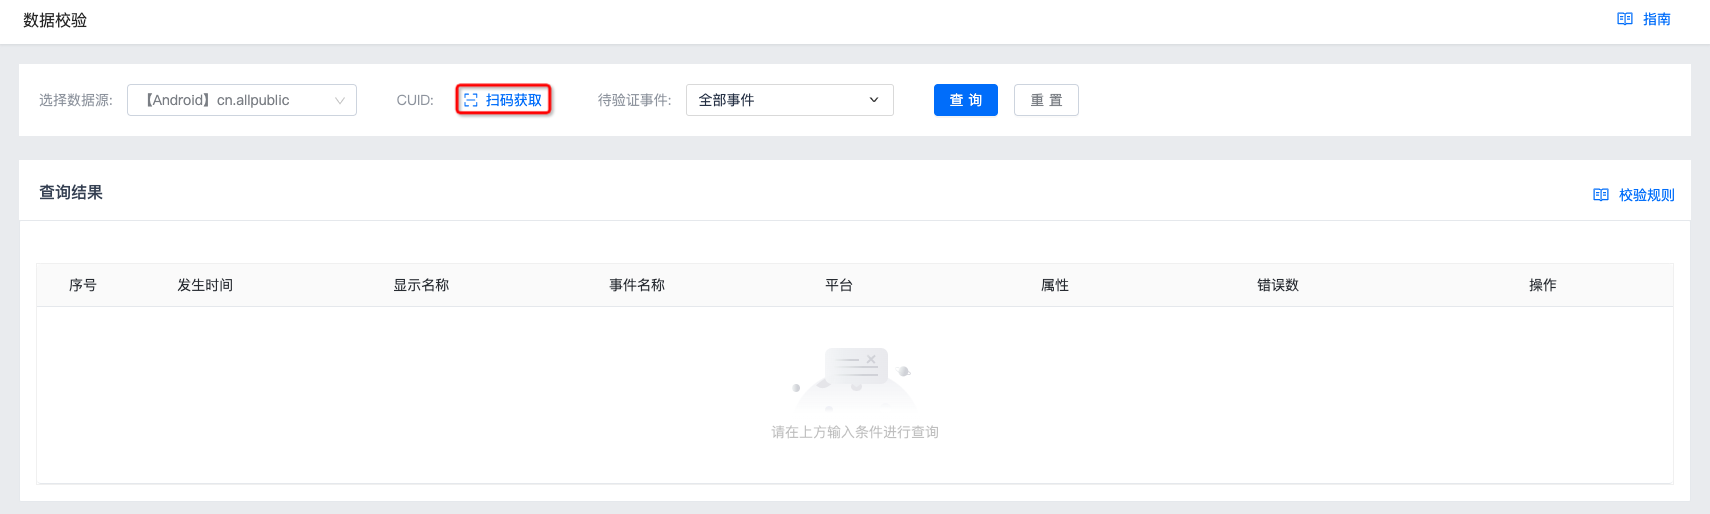
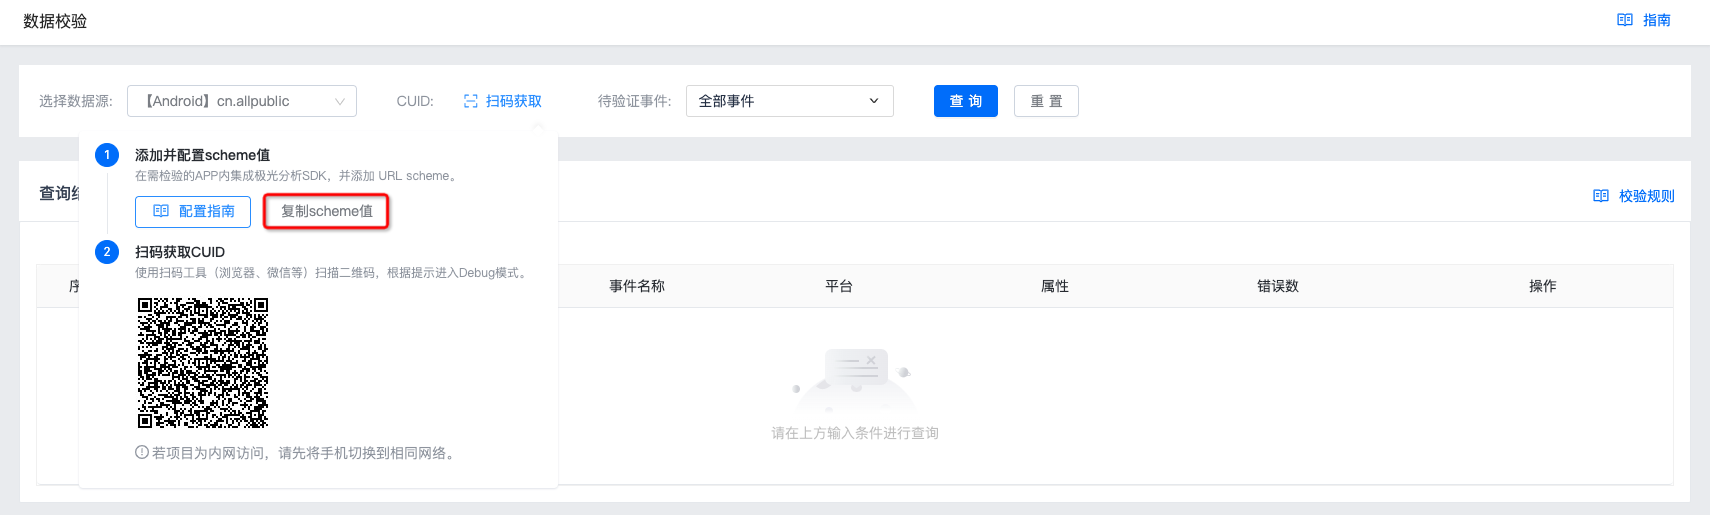
Click Scan to Obtain on the right side of CUID.
- If Android, iOS, or mini program is selected, use a scanning tool, such as a browser or WeChat, to scan the QR code and enter data verification mode according to the prompt.
If no scheme value was configured during Android or iOS integration, click Copy Scheme Value and configure the scheme value according to the Configuration Guide.
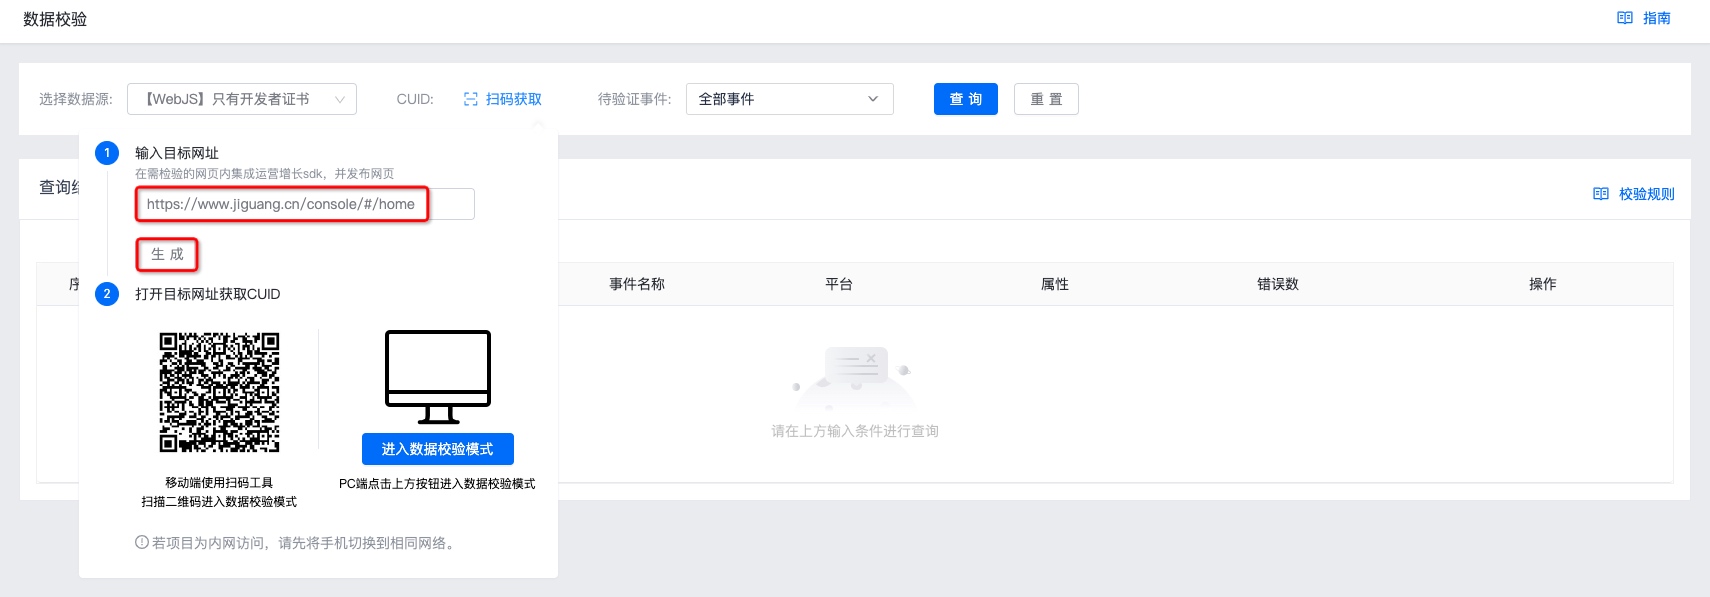
- If Web is selected, enter the published web page that has integrated the Jiguang Analytics SDK and click Generate.
- On mobile, use a scanning tool to scan the QR code and enter data verification mode.
- On PC, click the button to enter data verification mode.
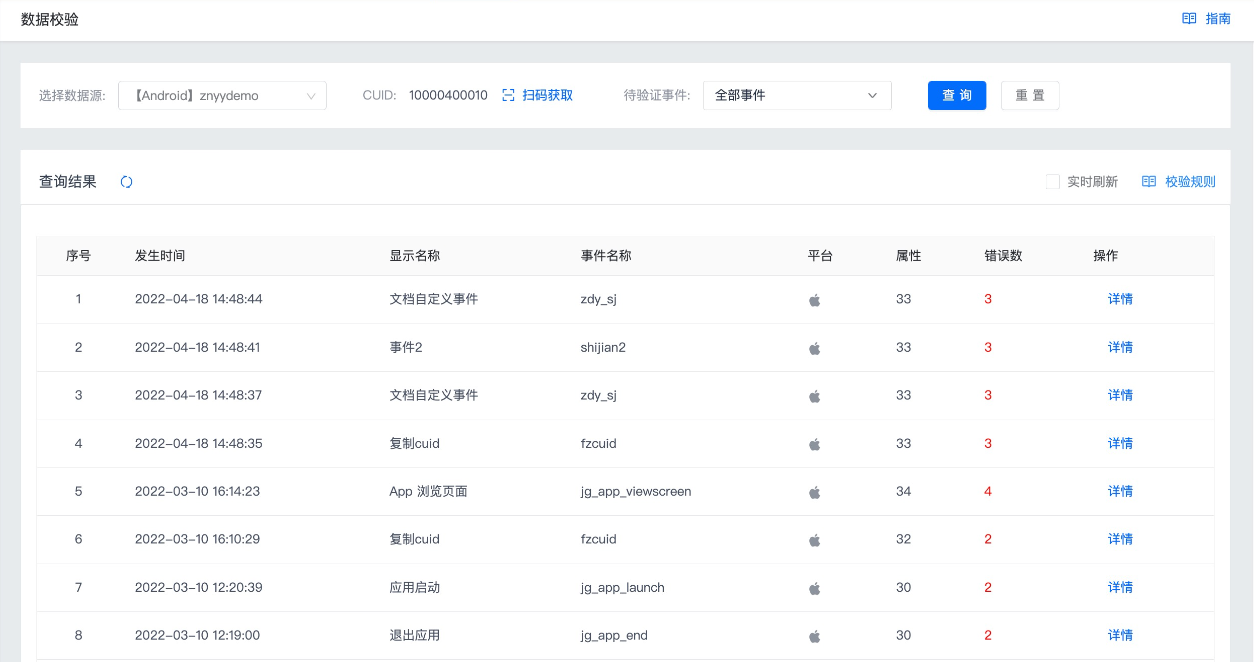
After entering data verification mode, the specific CUID is displayed. To filter by event, select the corresponding event and click Query.
The data verification page displays event reporting status for this CUID.
View Data Verification
Real-Time Refresh
To view real-time data, select Real-Time Refresh.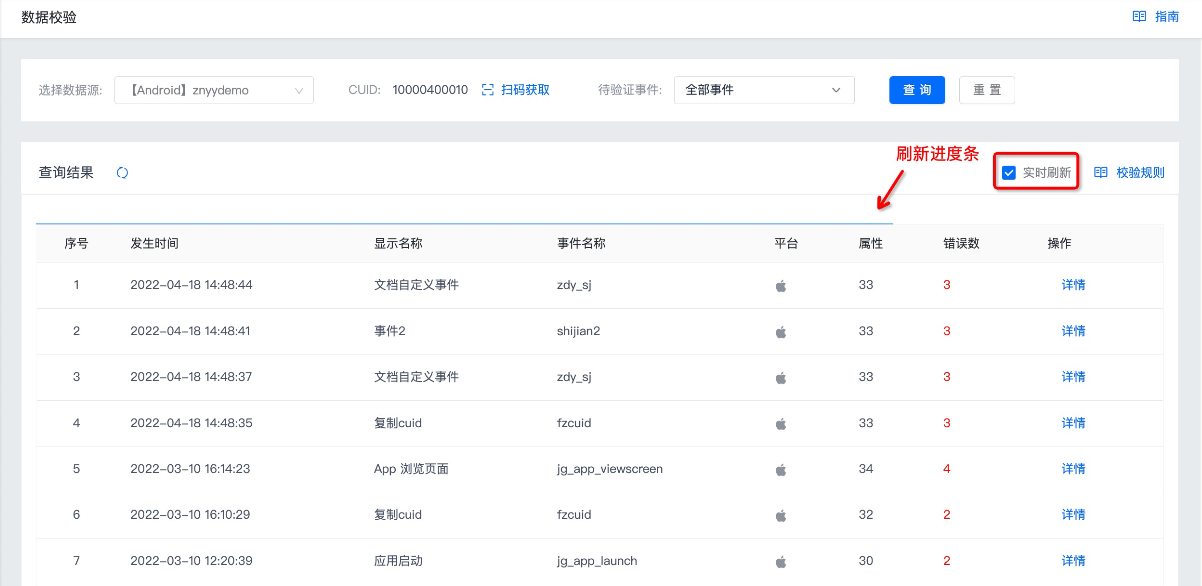
Verification Details
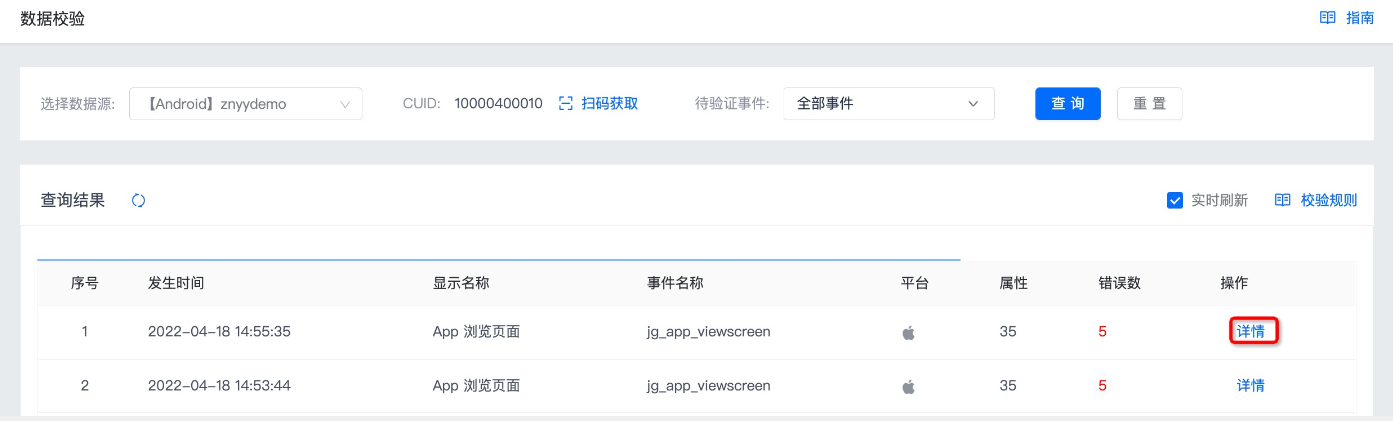
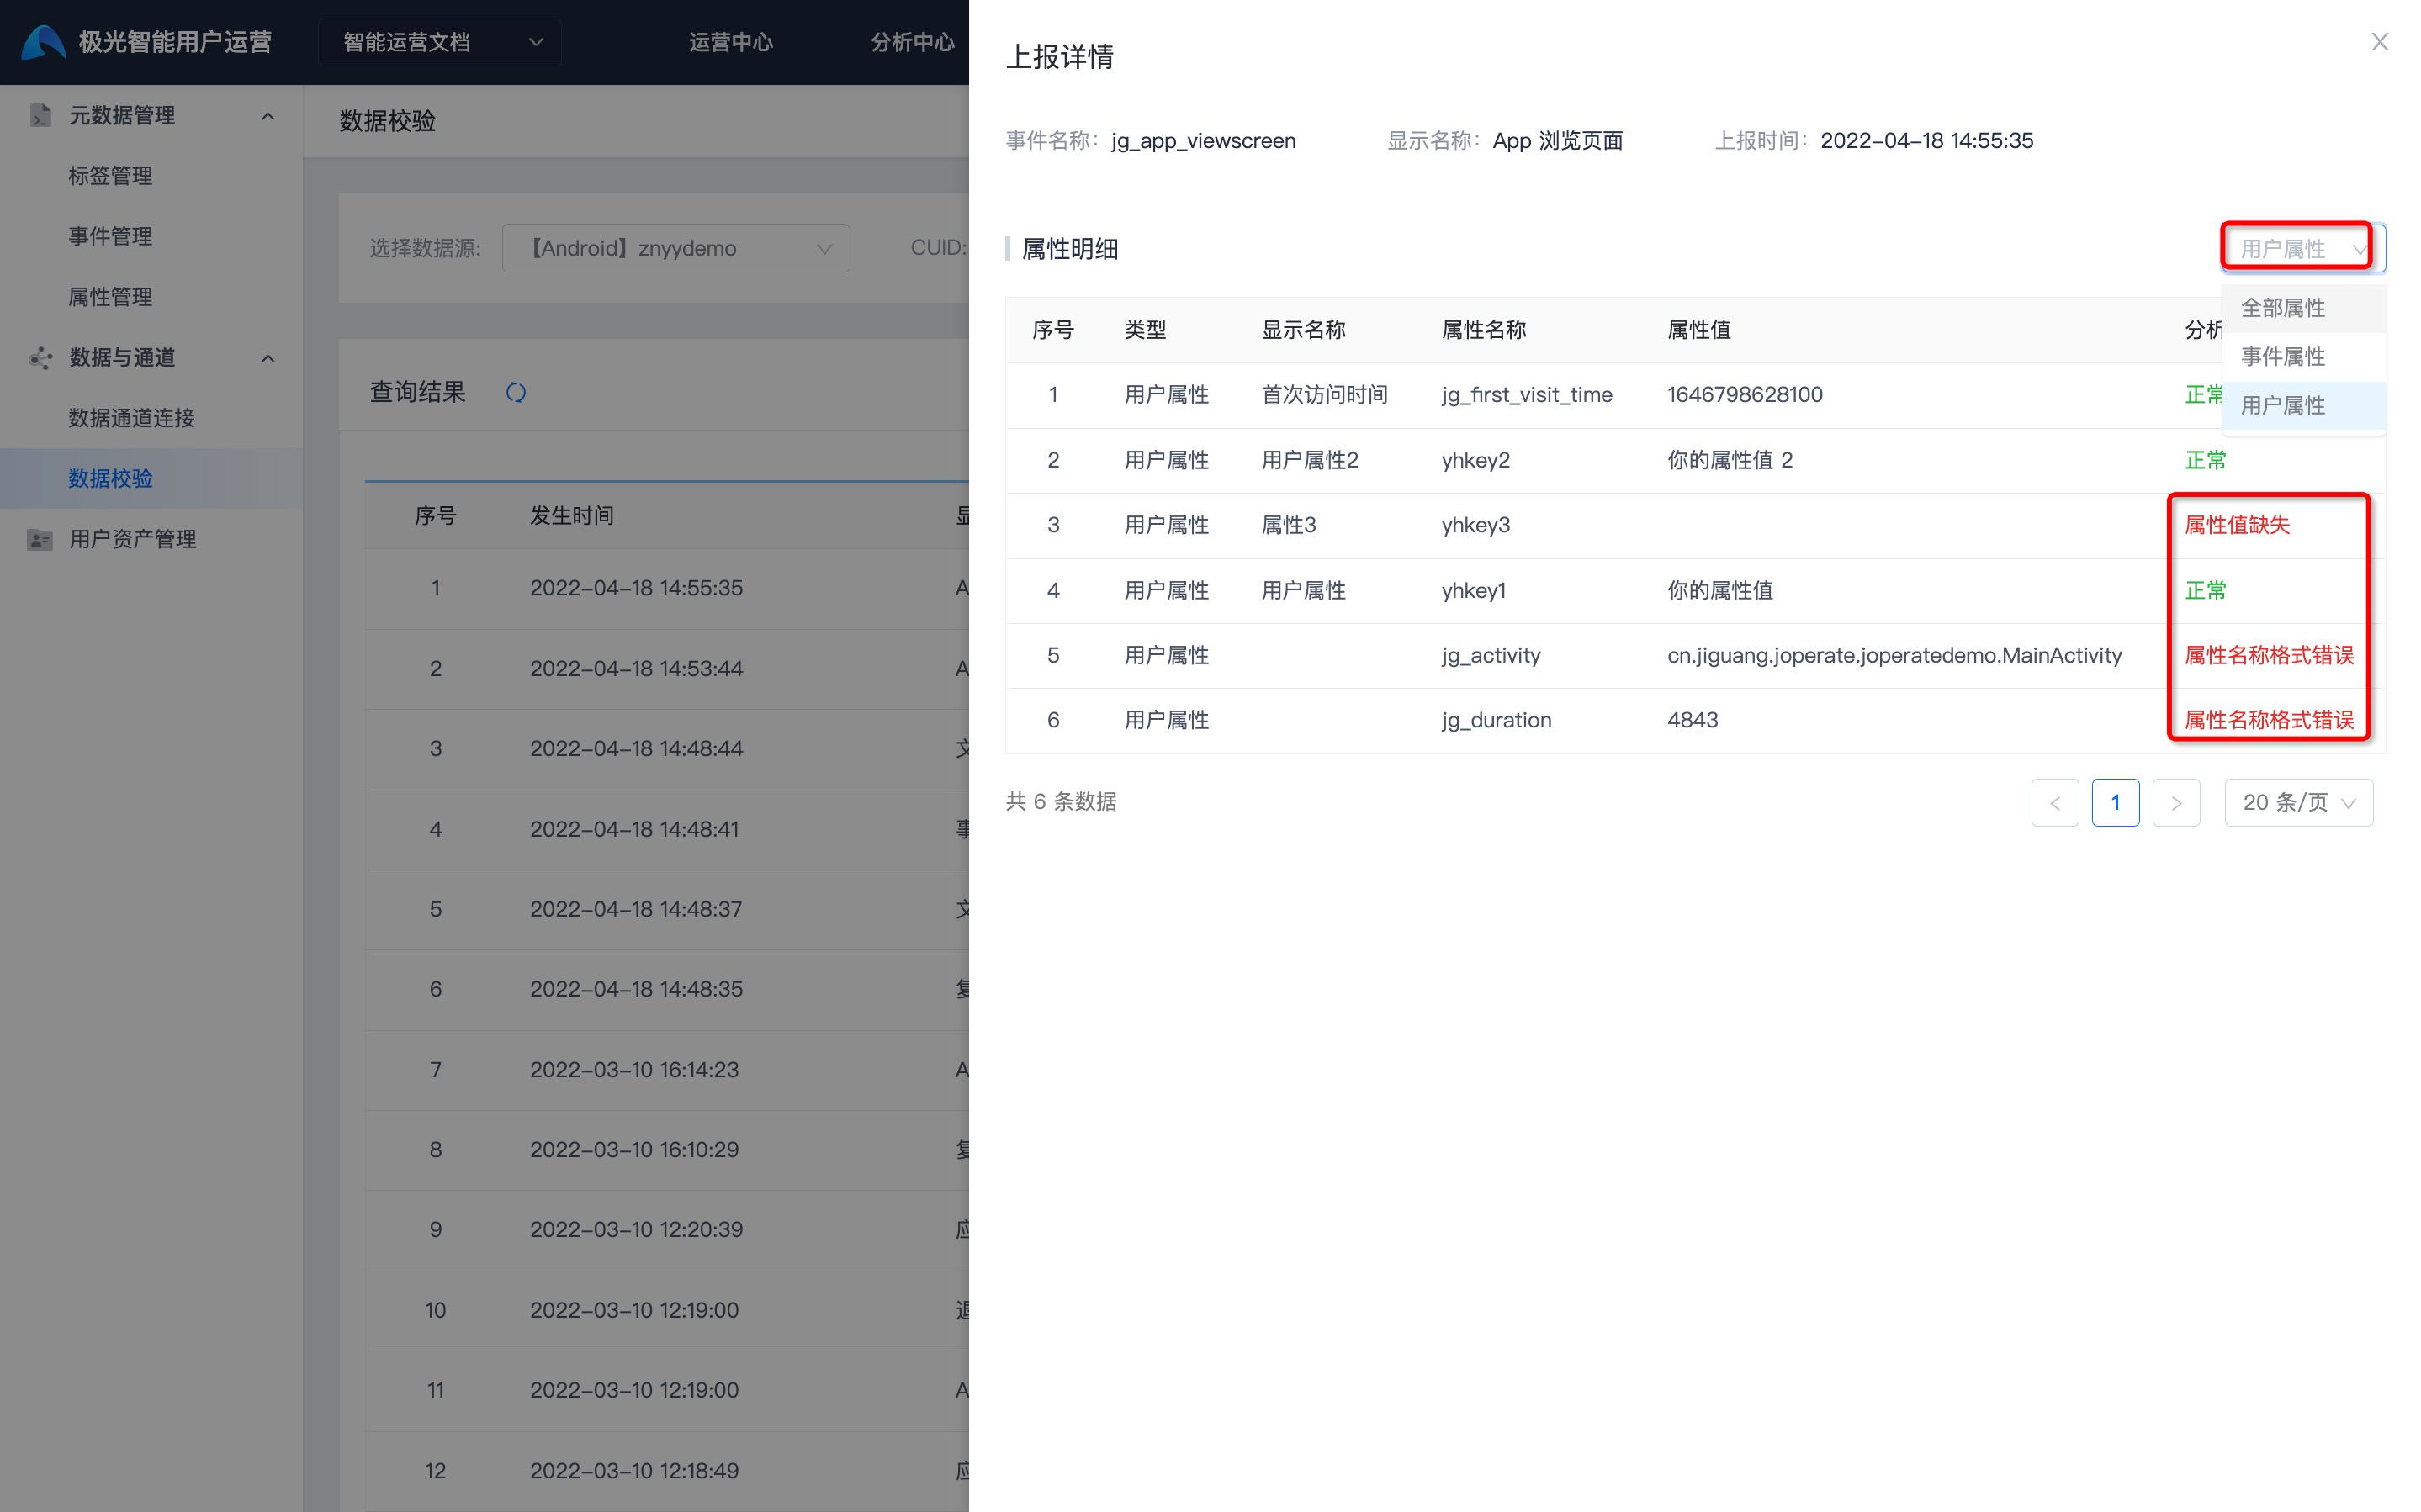
The query result displays event occurrence time, display name, event name, platform, attributes, and number of errors. Click Details to view detailed reporting status. For verification rules and error descriptions, see the Data Verification Definition document.
Click All Attributes on the right side of attribute details to switch to event attributes or user attributes. If attribute reporting is normal, the analysis section displays Normal. If attribute reporting has an error, the corresponding error reason is displayed.
Exit Data Verification Mode
When the app process exits from the background, the SDK automatically disables data verification mode.

